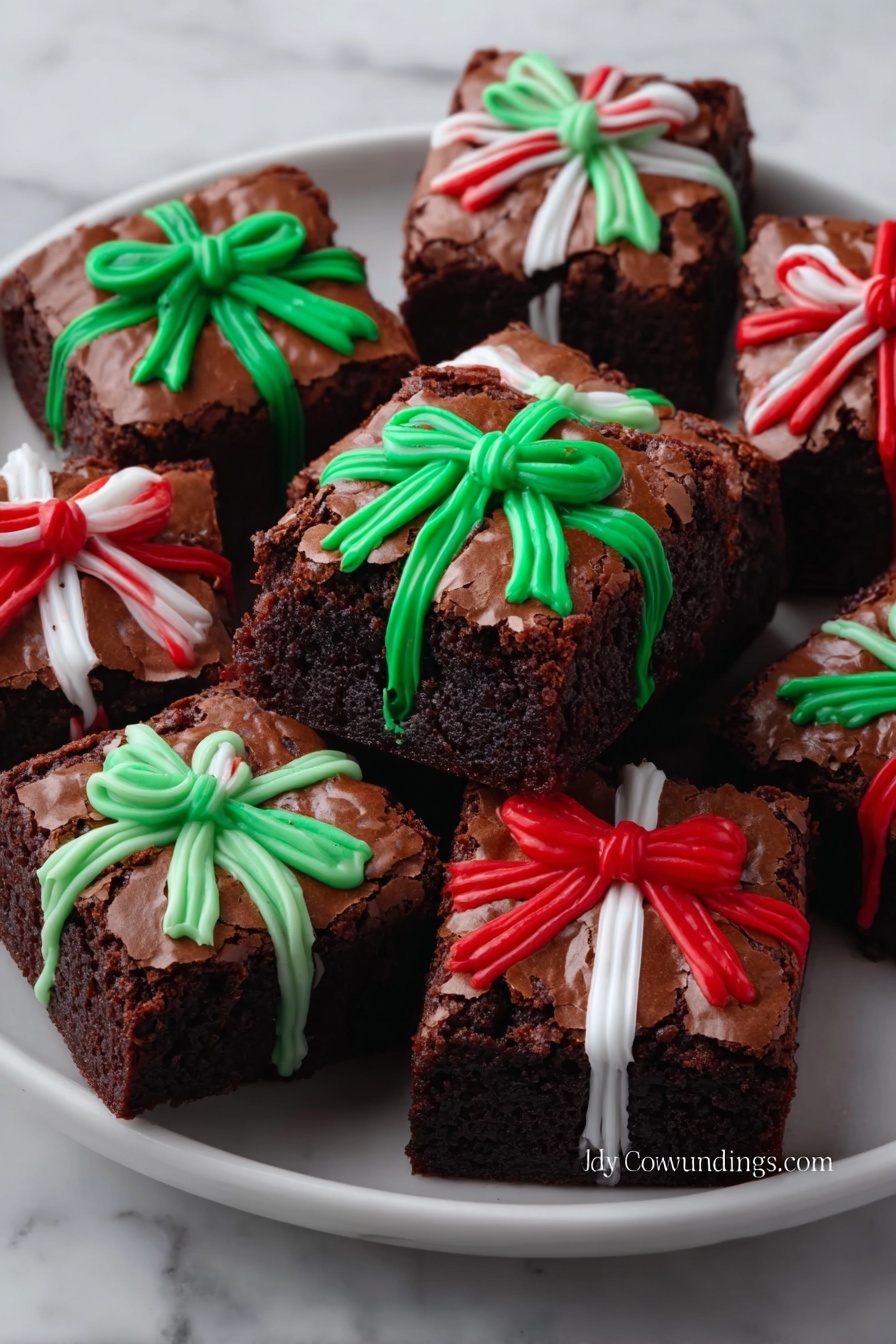
If you’re looking for a show-stopping treat this holiday season, you’ll absolutely adore this Festive Chocolate Brownie Gift Bars Recipe. It’s easy to make, deliciously fudgy, and so festive that everyone will think you spent hours in the kitchen. When I first tried this, I was amazed at how these brownies transformed into adorable little presents with just a bit of candy melt magic. Stick around—I’m going to walk you through everything you need to know to nail these every single time!
Why You’ll Love This Recipe
- Impressively Festive: These brownies don’t just taste amazing—they look like gift-wrapped presents that brighten up any holiday spread.
- Fudgy & Delicious: The perfect chewy texture is my favorite part, thanks to careful mixing and baking times you’ll learn here.
- Easy to Customize: You can swap out chocolates or adjust decorations to suit your style—more on that below!
- Great for Gifting: These bars package up beautifully, making them a thoughtful homemade gift anyone will appreciate.

Ingredients You’ll Need
Each ingredient plays a huge role in making these festive chocolate brownie gift bars truly special. I like to keep the base simple but rich, and the candy melts let you get creative with the decorations. Here are the essentials and tips for picking the best ones.
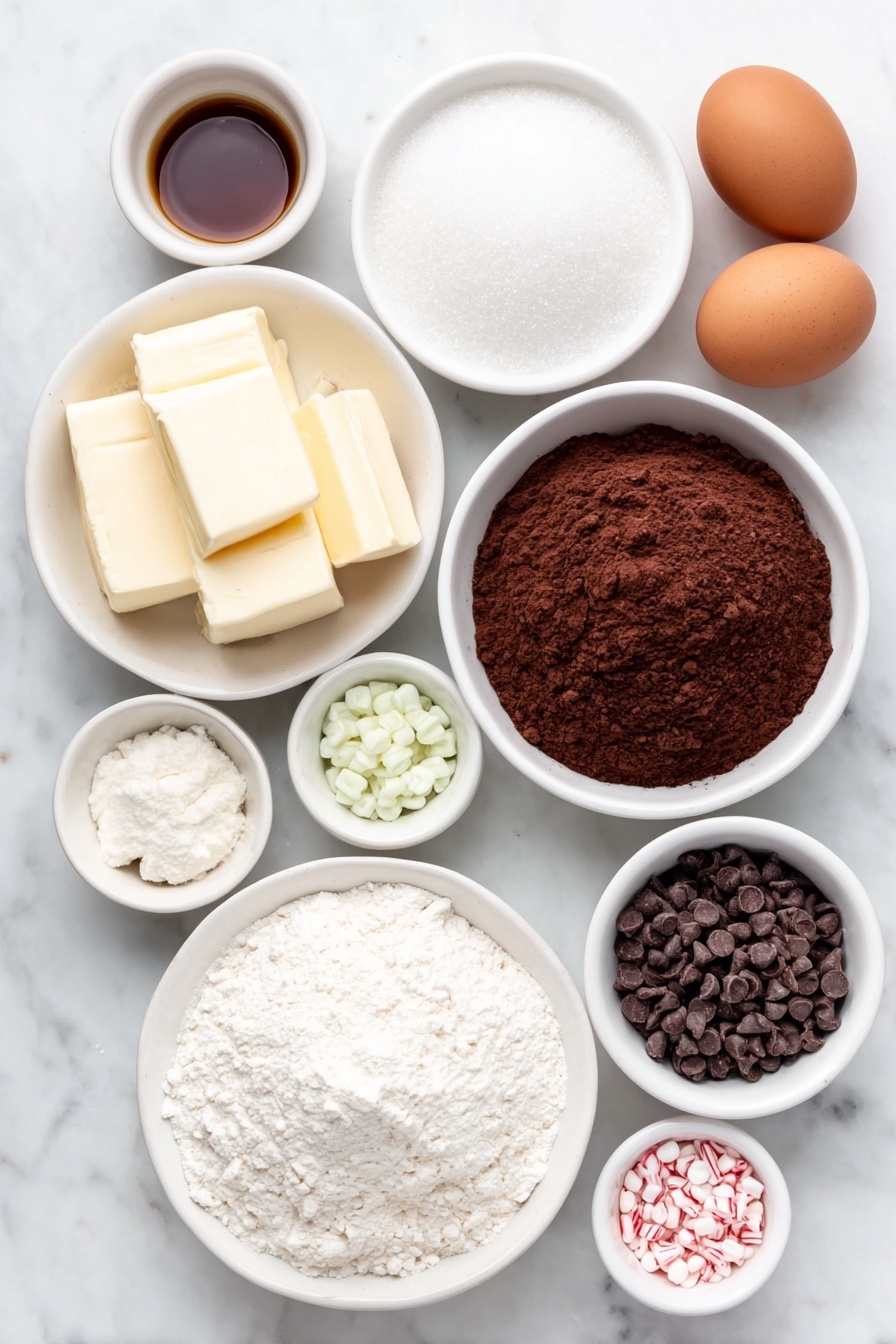
- Unsalted Butter: Using unsalted butter lets you control the saltiness better and gives the brownies a silky texture.
- Granulated Sugar: This adds sweetness but also helps create that shiny, crackly top I always look for in fudgy brownies.
- Large Eggs: Eggs act as the glue here and give the brownies their fudgy density—don’t skip or substitute!
- Vanilla Extract: A splash of vanilla adds warmth and depth to the chocolate flavor.
- All-Purpose Flour: Just enough flour keeps the brownies chewy instead of cakey, which I love.
- Unsweetened Cocoa Powder: I prefer a good-quality cocoa powder to get that rich chocolate punch.
- Baking Powder & Salt: These balance the flavor and give just a hint of lift.
- Semi-Sweet Chocolate Chips (Optional): For that extra gooey bite, I always fold these in right before baking.
- Red, Green, and White Candy Melts: Essential for transforming your brownies into festive gifts! These are easy to melt and pipe.
- Mini Candy Bows or Holiday Sprinkles (Optional): These fun toppings add that final festive touch that makes these bars irresistible.
Variations
I love how flexible this Festive Chocolate Brownie Gift Bars Recipe is. Over the years, I’ve tweaked it to fit different occasions or dietary needs, and you can do the same without losing any of that rich, fudgy goodness.
- Nutty Upgrade: My family goes crazy for adding chopped walnuts or pecans right into the batter—gives it a nice crunch against that fudgy background.
- Gluten-Free Version: I swapped regular flour for a gluten-free blend once and it still turned out beautifully—just be sure to use a blend meant for baking.
- Dairy-Free Option: Try coconut oil instead of butter and dairy-free chocolate chips for a nice twist that still feels indulgent.
- Spice It Up: For an adult flavor, mix in a pinch of cinnamon or chili powder to the dry ingredients—surprisingly festive and warm!
How to Make Festive Chocolate Brownie Gift Bars Recipe
Step 1: Prep Your Pan and Melt Butter
Start by preheating your oven to 350°F (175°C). Line a 9×13-inch baking pan with parchment paper, leaving some overhang on the edges—this makes it a breeze to lift the brownies out later without breaking them. Melt the butter gently over low heat in a saucepan, making sure it doesn’t brown. I like to whisk in the sugar while the butter is still warm, which helps create that beautiful shiny surface on the baked brownies. Let this cool slightly before moving on to the next step so your eggs don’t scramble.
Step 2: Combine Wet Ingredients
Once the butter-sugar mixture has cooled to lukewarm, whisk in your eggs one at a time, mixing well after each addition. Then add the vanilla extract. You’ll notice the batter thickens and becomes glossy—that’s exactly what you want here. If it looks too runny, just keep whisking gently; consistency matters for perfect fudginess.
Step 3: Fold in Dry Ingredients
In a separate bowl, sift together the flour, unsweetened cocoa powder, baking powder, and salt to ensure there are no lumps. Slowly fold this dry mixture into your wet batter using a rubber spatula. Be gentle—overmixing can make brownies cakey. If you’re opting for the chocolate chips, fold them in now for those extra melty pockets of chocolate that I love.
Step 4: Bake to Perfection
Pour the batter evenly into your prepared pan, smoothing the top with the spatula. Bake for 30–35 minutes. Here’s what I’ve learned: check them at the 30-minute mark with a toothpick—it should come out with a few moist crumbs, but not wet batter. Brownies will keep cooking a bit after you take them out, so resist the urge to overbake. Let them cool completely in the pan before decorating—this makes cutting and decorating so much easier.
Step 5: Cut and Decorate Your Brownie Gifts
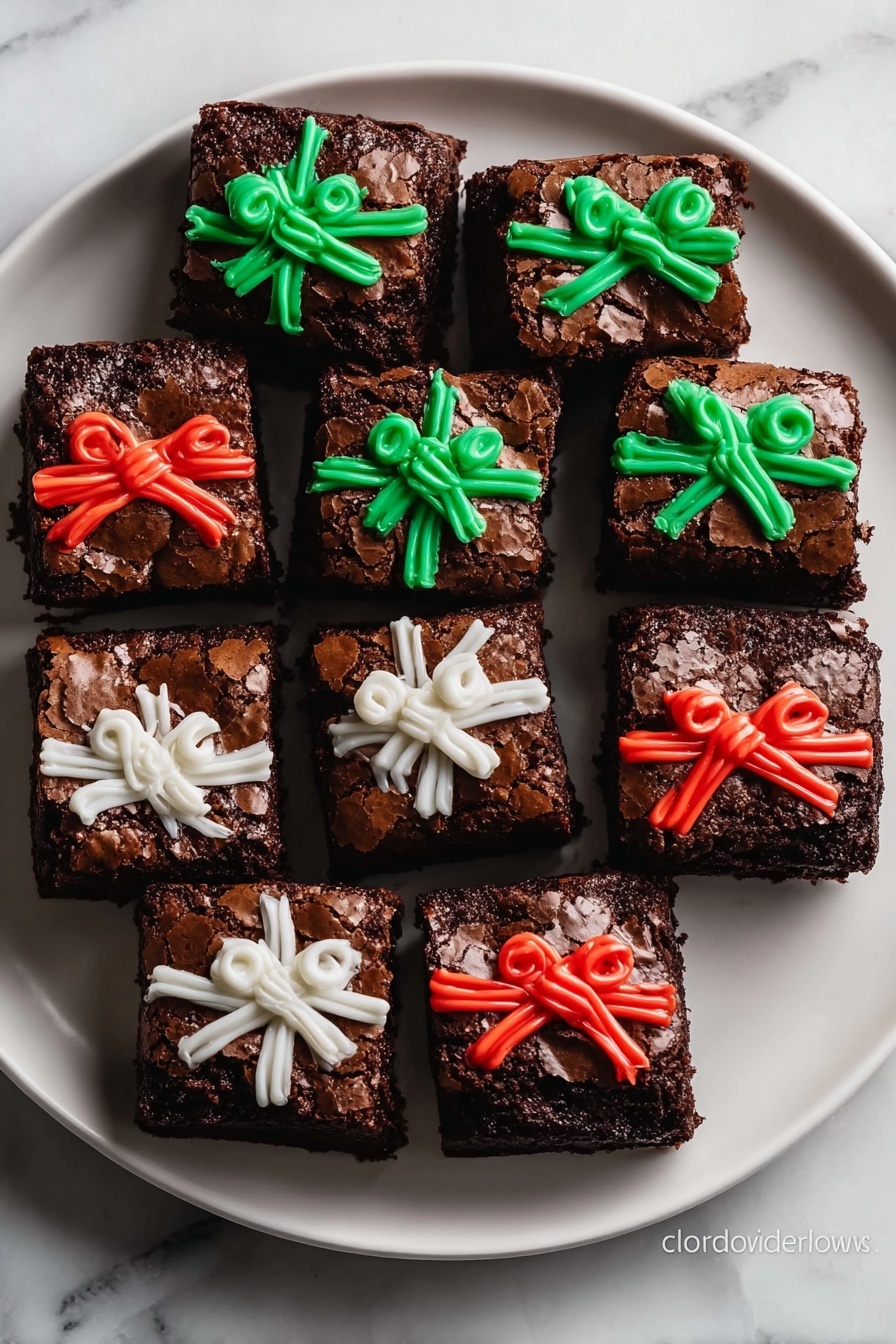
Using the parchment paper, lift the brownies out of the pan and place them on a cutting board. Cut into even squares—you’re making your little “present” bars! Melt the red, green, and white candy melts in separate bowls using 15-second bursts in the microwave, stirring between each, until silky smooth. Then drizzle or pipe the melted candy on each brownie crisscross style to look like ribbons. Add mini bows, candy sprinkles, or whatever festive topping you love to finish the look.
Step 6: Let the Decorations Set
Allow the candy melt decorations to harden at room temperature, or pop the brownies in the fridge for about 10–15 minutes to speed it up. Once set, arrange your beautiful Gift Bars on a platter, or package them in gift boxes lined with parchment paper—they’re perfect for sharing or gifting with friends and family.
Pro Tips for Making Festive Chocolate Brownie Gift Bars Recipe
- Sugar Melting Technique: Whisk the sugar into butter while warm but not hot—it helps dissolve the sugar for that crackly top without graininess.
- Measuring Flour: Spoon and level your flour instead of scooping directly from the bag to avoid dry, crumbly brownies.
- Cutting Clean Squares: Warm your knife under hot water and wipe it dry before slicing to get smooth edges without messy crumbs.
- Candy Melt Control: When melting candy melts, use short bursts and stir frequently to avoid overheating and clumping.
How to Serve Festive Chocolate Brownie Gift Bars Recipe
Garnishes
I usually keep it simple with mini candy bows and sparkly holiday sprinkles—those little touches make the brownies pop visually and delight kids and adults alike. Sometimes I even sprinkle a tiny pinch of edible glitter for an extra festive sparkle. These garnishes don’t just look good; they add a bit of crunchy texture that balances the softness nicely.
Side Dishes
These sweet bars pair wonderfully with a scoop of vanilla ice cream or a dollop of whipped cream if you want to get indulgent. For drinks, a warm cup of peppermint hot chocolate or a fresh brew of coffee helps cut through the richness beautifully.
Creative Ways to Present
One of my favorite ways to present these is in a rustic wooden box lined with festive tissue paper—perfect for gifting. You can wrap them individually in clear cellophane and tie them with a ribbon for a charming look that friends adore. For parties, arrange them on a holiday-themed platter with little handwritten tags naming each flavor or variation.
Make Ahead and Storage
Storing Leftovers
Once decorated and cooled, I store leftover brownies in an airtight container at room temperature. They stay perfectly moist for up to four days, though in my house they rarely last that long! If you want to keep them fresher longer, store them in a cool place but avoid the fridge to keep them from drying out.
Freezing
I’ve had great luck freezing these brownies before decorating. Wrap them tightly in plastic wrap, then foil, and freeze for up to three months. When you’re ready, thaw them overnight in the fridge and add your candy melt decorations fresh—they look and taste just as delightful as when first made.
Reheating
If you want that just-baked warm feeling, microwave a brownie square for about 10 seconds. It revives the softness and melts the chocolate chips inside nicely. Just avoid overheating, or you’ll risk drying them out.
FAQs
-
Can I use store-bought brownie mix instead of making the batter from scratch?
Absolutely! While I prefer making these from scratch for that homemade touch and tailored texture, a good-quality brownie mix works fine too. Just decorate the cooled brownies the same way with candy melts, and you’ll still get that festive gift-bar look that everyone loves.
-
What if I don’t have candy melts—can I use other decorations?
If you don’t have candy melts, melted white chocolate or colored icing can substitute nicely. You could also use store-bought fudge stripes or simple dusting of powdered sugar with festive sprinkles to get a holiday vibe.
-
How do I make these brownies extra fudgy?
For extra fudginess, be careful not to overbake, fold in additional chocolate chips, and consider using more butter relative to flour. Also, stirring gently and avoiding overmixing helps maintain a dense texture rather than cakey.
-
Can I make these ahead of time for holiday gift-giving?
Yes! These brownies are perfect for making ahead. Bake and freeze the undecorated brownies, then thaw and decorate them close to the gifting day for the freshest look and taste.
Final Thoughts
Honestly, this Festive Chocolate Brownie Gift Bars Recipe is one of my absolute favorites for the holidays. It’s the perfect balance of rich, fudgy chocolate and cheerful, colorful decoration that makes you smile before you even take a bite. When I share these with friends and family, they always ask for the recipe—and I love knowing I’m sending them off with something truly special. I hope you’ll give these a try and enjoy making memories as much as I do!
Print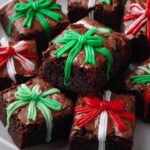
Festive Chocolate Brownie Gift Bars Recipe
- Prep Time: 20 minutes
- Cook Time: 35 minutes
- Total Time: 55 minutes
- Yield: 12 servings
- Category: Dessert
- Method: Baking
- Cuisine: American
- Diet: Vegetarian
Description
Delightfully festive Christmas Present Brownies are rich, fudgy, and topped with colorful candy melt ‘ribbons’ to resemble wrapped gifts. These chewy chocolate brownies are perfect for holiday parties or gift-giving, combining classic brownie flavors with charming decorations for a seasonal treat everyone will love.
Ingredients
Brownie Ingredients
- 1 cup (2 sticks) unsalted butter
- 2 cups granulated sugar
- 4 large eggs
- 1 teaspoon vanilla extract
- 1 cup all-purpose flour
- 1 cup unsweetened cocoa powder
- ½ teaspoon baking powder
- ¼ teaspoon salt
- 1 cup semi-sweet chocolate chips (optional for extra fudginess)
Decorations
- Red, green, and white candy melts
- Mini candy bows or holiday sprinkles (optional, but festive!)
Instructions
- Prepare the brownie batter: Preheat your oven to 350°F (175°C). Line a 9×13-inch baking pan with parchment paper, leaving an overhang on the sides for easy removal. Melt the butter in a medium saucepan over low heat. Remove from heat and whisk in the sugar until smooth and shiny. Let it cool slightly before adding eggs and vanilla, whisking continuously until the mixture is thick and glossy.
- Add the dry ingredients: In a separate bowl, sift together flour, cocoa powder, baking powder, and salt. Gradually fold the dry ingredients into the wet mixture with a rubber spatula. Stir until combined and smooth, being careful not to overmix to maintain chewiness. Fold in chocolate chips if using.
- Bake the brownies: Pour the batter evenly into the prepared pan and smooth the top. Bake for 30–35 minutes or until a toothpick inserted comes out with a few moist crumbs. Avoid overbaking as brownies continue to cook after removal. Let cool completely in the pan.
- Cut and decorate like gifts: Using the parchment overhang, lift the brownies out and place on a cutting board. Cut into even squares. Melt each color of candy melts in separate bowls in the microwave in 15-second bursts, stirring until smooth. Drizzle or pipe candy melts over brownies in crisscross lines to resemble ribbons. Add mini bows or sprinkles to finish.
- Let the decorations set: Allow the candy melts to harden at room temperature or refrigerate for 10–15 minutes. Once set, arrange brownies on a platter or in a gift box lined with parchment paper for a beautiful presentation.
Notes
- Use parchment paper with an overhang for easy brownie removal.
- Do not overmix the batter to keep brownies chewy and fudgy.
- Check brownies early to avoid overbaking—slightly underdone is best.
- Chocolate chips are optional but add extra gooey texture.
- Decorate with candy melts and festive sprinkles or bows for a holiday theme.
- Store brownies in an airtight container at room temperature for up to 3 days or refrigerate for longer freshness.
Nutrition
- Serving Size: 1 brownie (approximately 2×2 inch square)
- Calories: 350 kcal
- Sugar: 30 g
- Sodium: 150 mg
- Fat: 18 g
- Saturated Fat: 11 g
- Unsaturated Fat: 6 g
- Trans Fat: 0 g
- Carbohydrates: 45 g
- Fiber: 4 g
- Protein: 5 g
- Cholesterol: 75 mg

