
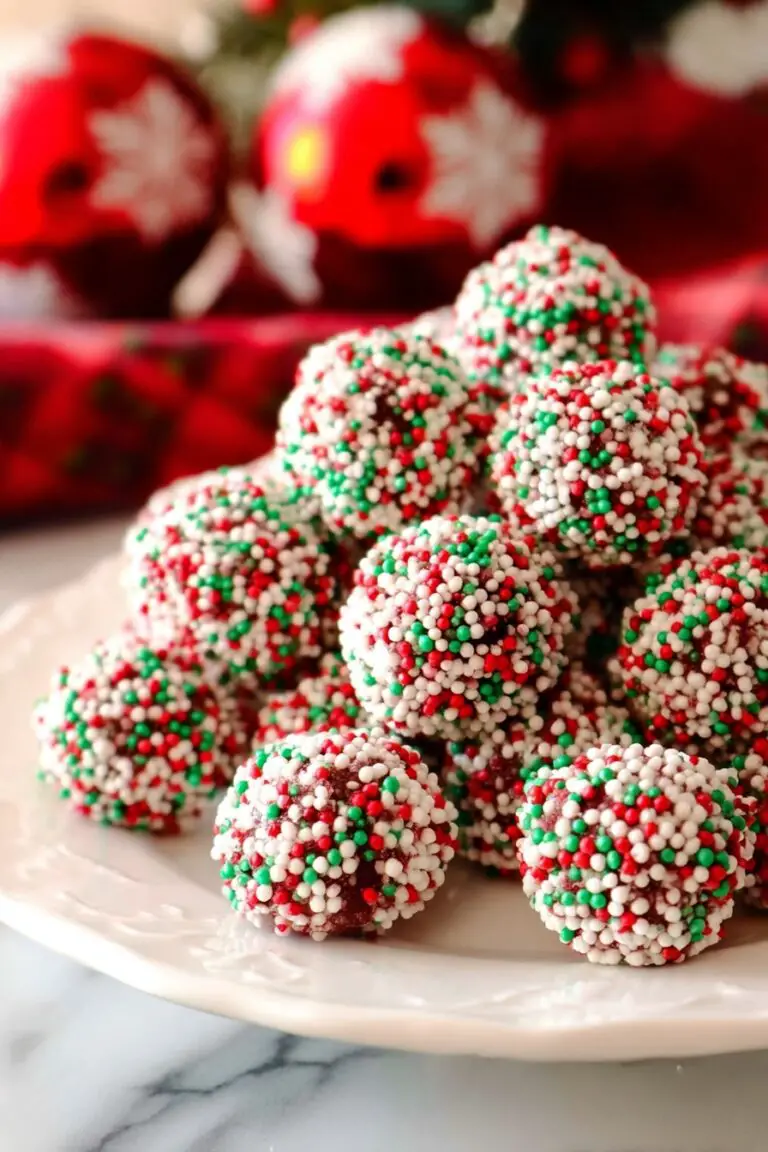
If you’re looking for a festive treat that’s simple, quick, and absolutely delightful, then you’re in for a real treat with this No-Bake Christmas Peppermint Mints Recipe. I love this recipe because it’s fuss-free, requires no baking, and results in those melt-in-your-mouth mints that are perfect for sharing (or sneaking a few when no one’s looking!). Whether you’re new to candy-making or a seasoned pro, you’ll find that this recipe is as fun to make as it is to eat. Ready? Let’s dive in!
Why You’ll Love This Recipe
- No Oven Needed: Perfect for those who want a quick holiday treat without heating up the kitchen.
- Customizable Colors: Create festive red, green, and white mints to brighten up your holiday spread.
- Easy to Make: Simple ingredients and straightforward steps make candy-making approachable for beginners.
- Perfect for Gifting: Makes roughly 100 individual mints — great for sharing with friends, family, or coworkers.

Ingredients You’ll Need
This recipe calls for a handful of common ingredients that come together beautifully to create those creamy, refreshing peppermint mints. Each plays a role in balancing texture and taste, and the powdered sugar is key to getting that perfect firmness.
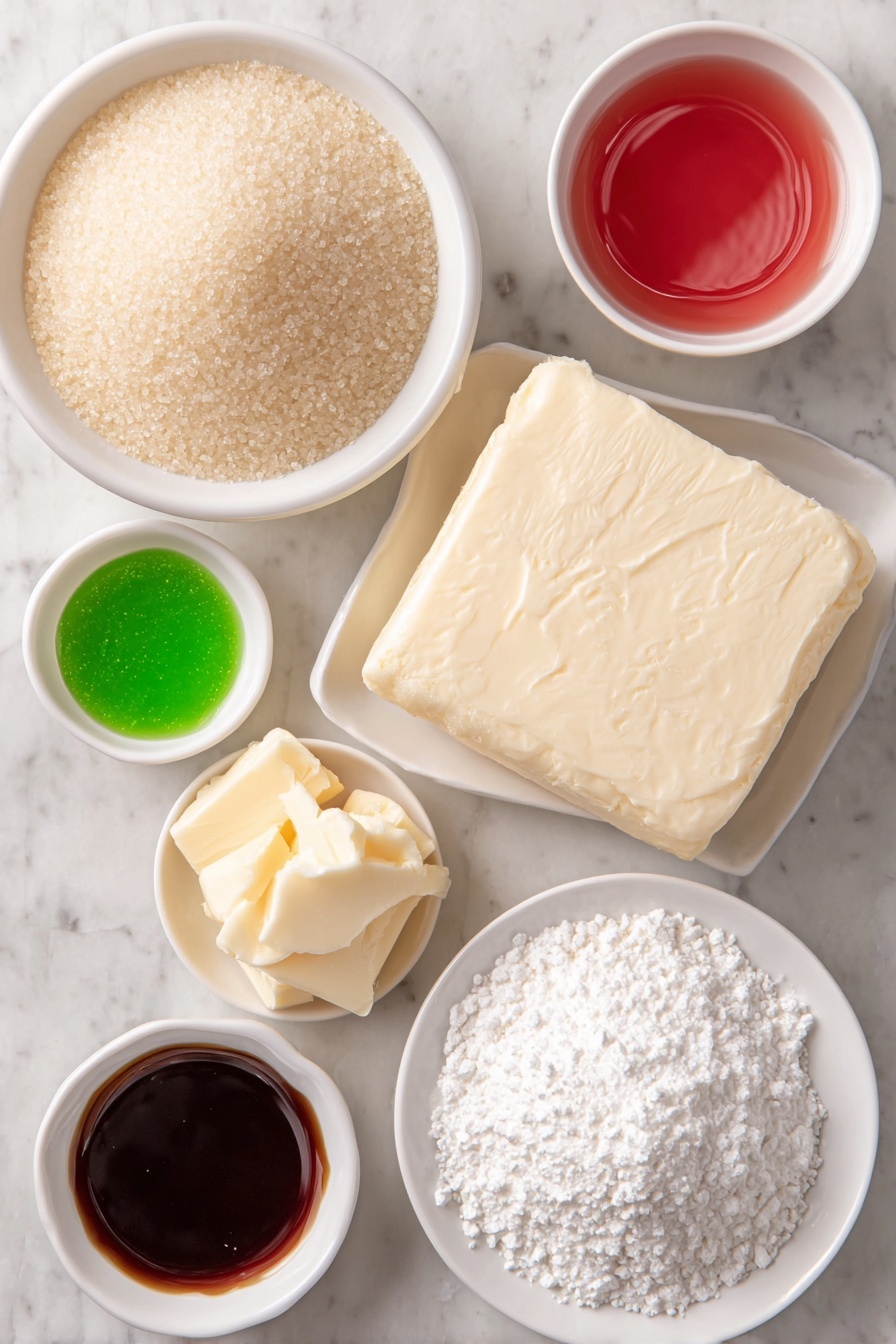
- Granulated sugar: Used for coating so the mints get a nice sugary crunch outside.
- Cream cheese: I always soften mine to room temperature — it blends smoothly and keeps the mints creamy without being greasy.
- Unsalted butter: Soften it well for easy mixing and to avoid lumps in your dough.
- Clear corn syrup: Adds just the right chewiness without altering the flavor.
- Peppermint extract: This is your star ingredient — pick a good-quality extract for that true cool peppermint punch.
- Powdered sugar: Divided into portions; you’ll use most to create the dough’s texture and some for dusting to keep things from sticking.
- Green and red liquid food coloring: Adds the festive holiday colors to your mints; you can skip this or adjust to your favorite shades.
Variations
I like to switch things up a bit depending on my mood and occasion. Feel free to customize this No-Bake Christmas Peppermint Mints Recipe to make it your own — the beauty of mints is how easily they adapt!
- Chocolate Peppermint Mints: I once added a tablespoon of cocoa powder for a peppermint-chocolate twist that my family went crazy for.
- Vegan Version: Swap cream cheese and butter for dairy-free alternatives, like vegan cream cheese and margarine; it works surprisingly well!
- Different Flavors: Try substituting peppermint extract with spearmint or even a drop of almond extract for a unique holiday bite.
- Extra Crunch: Rolling mints in crushed candy canes instead of granulated sugar can add that festive crunch and sparkle.
How to Make No-Bake Christmas Peppermint Mints Recipe
Step 1: Prep Your Workspace and Sugar Coating
Start by lining a large baking sheet with parchment paper — this is where your finished mints will rest. Pour the granulated sugar into a small bowl nearby because you’ll be coating the mint balls in it later. Having all this ready saves you time and keeps things flowing smoothly.
Step 2: Mix Your Base Ingredients Until Smooth
In a large bowl, blend the softened cream cheese, butter, corn syrup, and peppermint extract using a handheld mixer starting on low speed. After about a minute, this mixture turns silky smooth. When I first tried this, I was concerned about lumps, but softening those dairy ingredients made all the difference. It’s key to get a smooth blend here for the best texture.
Step 3: Gradually Add Powdered Sugar
Keep your mixer on low and add 4¼ cups of powdered sugar slowly, about half a cup at a time. The dough will thicken up quickly, and your mixer may start to protest—when it does, switch to a spatula or wooden spoon and finish mixing by hand. This step is crucial to get the right dough consistency; it should be thick but still pliable.
Step 4: Divide and Color Your Dough
Turn the thick dough onto a fresh piece of parchment dusted with powdered sugar. Divide it evenly into three portions. Make a shallow dent into two of them and add your red food coloring to one, green to the other, leaving the third plain white. Knead each colored dough gently, adding extra powdered sugar gradually to combat stickiness. This part is fun but a little messy—trust me, your hands will know when it’s right!
Step 5: Roll and Cut Into Bite-Sized Pieces
Roll each colored dough into 18-inch long ropes, about an inch thick—think of rolling cookie dough logs. Then, slice those ropes into half-inch segments. I like doing this on a clean surface with a sharp knife for neat, uniform pieces that make the final mint look professional.
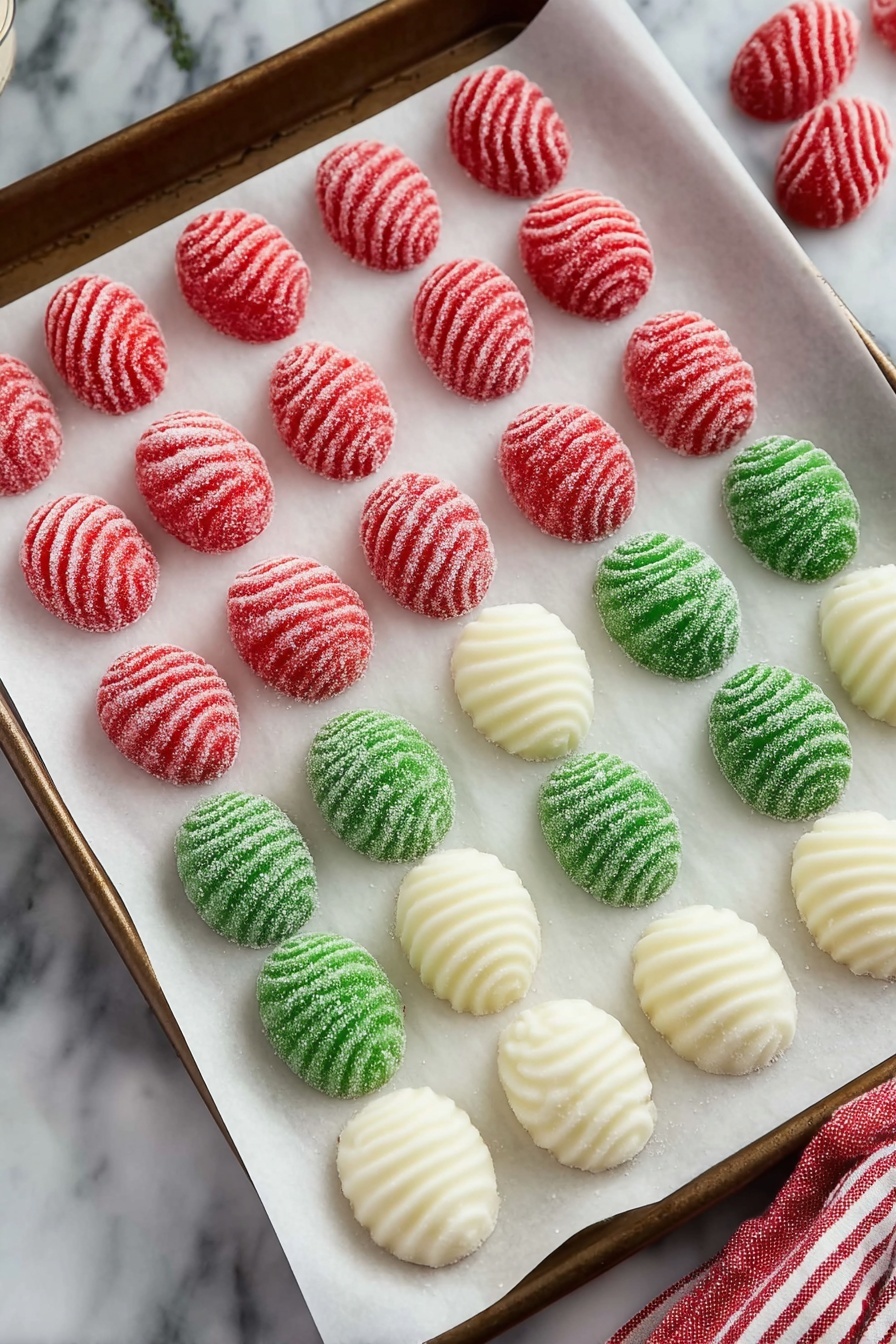
Step 6: Shape, Coat, and Flatten Your Mints
Roll each segment between your palms to form smooth balls. Toss a few at a time into the granulated sugar in your small bowl, gently coating each ball. Then place them on your parchment-lined sheet. Use a fork to gently press down on each ball to flatten into little discs — the fork leaves charming striped marks that feel so festive!
Step 7: Rest and Firm Up
Finally, let your mints sit at room temperature for up to 24 hours. This resting time is a game changer — it lets the candies firm up, giving them the perfect texture. When I skipped this step once, the mints were too soft and sticky, so don’t skip it!
Pro Tips for Making No-Bake Christmas Peppermint Mints Recipe
- Softening Ingredients: Always bring cream cheese and butter to room temperature—it makes mixing way easier and your dough smoother.
- Powdered Sugar Gradual Addition: Add powdered sugar little by little while kneading to adjust for humidity and temperature; your dough will thank you.
- Use Good Quality Extract: I learned that the peppermint flavor shines brightest with a fresh, strong peppermint extract—don’t skimp here!
- Rest Time is Crucial: Letting the mints rest overnight is key to get that perfect bite—not too soft, not too hard.
How to Serve No-Bake Christmas Peppermint Mints Recipe
Garnishes
I like to sprinkle a little extra granulated sugar or crushed candy canes on top of the mints after flattening for an extra sparkle and festive touch. It not only looks inviting but also adds a tiny crunch that contrasts beautifully with the creamy center.
Side Dishes
These mints pair wonderfully with a cup of hot cocoa or fresh coffee—perfect for holiday gatherings when you want a little sweet pick-me-up alongside your warm drinks. I also love setting them next to Christmas cookies on dessert platters for variety.
Creative Ways to Present
For a really special touch, arrange your mints in small glass jars tied with ribbon and include a festive tag. I’ve gifted these jars to neighbors and friends, and they always get rave reviews. You can also place them in mini cupcake liners or cellophane bags for party favors.
Make Ahead and Storage
Storing Leftovers
I store leftover mints in an airtight container at room temperature. They’ll keep well for about a week, but honestly, they rarely last that long in my house! Make sure you keep them away from heat and moisture to prevent stickiness.
Freezing
If you want to make a big batch ahead of time, these mints freeze beautifully. I wrap them tightly in parchment paper first, then place them in an airtight freezer-safe container. When you’re ready to enjoy, just let them thaw at room temperature for a couple hours—easy and just as fresh!
Reheating
Since this is a no-bake recipe, reheating isn’t necessary. Just bring frozen mints to room temperature before serving for the best texture and flavor. Avoid heating them as it can cause the texture to become undesirably soft.
FAQs
-
Can I make these mints without cream cheese?
While cream cheese is important for the creamy texture of these mints, you can experiment with a vegan cream cheese alternative if needed. However, skipping cream cheese without a substitute might result in a very different texture and flavor.
-
How do I prevent the dough from being too sticky?
Adding powdered sugar gradually while kneading helps control stickiness. Don’t rush it, and if your kitchen is warm, expect to use more powdered sugar to keep the dough manageable.
-
Can I use gel food coloring instead of liquid?
Yes! Gel food coloring is actually preferable for less stickiness since it’s more concentrated and doesn’t add extra liquid. Use a toothpick to add small amounts and knead carefully.
-
How long do these mints keep?
Stored in an airtight container at room temperature, these mints keep well for up to a week. For longer storage, freezing is the best option.
-
Can I add flavors other than peppermint?
Definitely! You can swap the peppermint extract for other extracts like spearmint, almond, or even vanilla to customize your mints to your taste.
Final Thoughts
This No-Bake Christmas Peppermint Mints Recipe has become a holiday staple for me because it’s fast, fun, and flavorsome with minimal stress. I love pulling these out at Christmas parties, gifting them to neighbors, and even sneaking some late-night by the fire. If you want a candy recipe that’ll wow your friends and add that perfect touch of peppermint cheer to your holiday season, give this one a try—you won’t regret it!
Print
No-Bake Christmas Peppermint Mints Recipe
- Prep Time: 15 Minutes
- Cook Time: 0 Minutes
- Total Time: 15 Minutes
- Yield: 100 peppermint candies
- Category: Candy
- Method: No-Cook
- Cuisine: American
- Diet: Vegetarian
Description
Delightful no-bake Christmas mints made with creamy peppermint-flavored dough in festive red, green, and white colors, coated with granulated sugar for a perfect holiday treat. These easy-to-make candies require no oven and are perfect for gifting or enjoying at holiday gatherings.
Ingredients
Main Ingredients
- ⅓ cup granulated sugar, plus extra for coating
- 4 ounces cream cheese, softened to room temperature
- 2 tablespoons unsalted butter, softened to room temperature
- 2 tablespoons clear corn syrup
- 1 teaspoon peppermint extract
- 4¼ to 5 cups powdered sugar, separated
Food Coloring
- 6 drops green liquid food coloring
- 6 drops red liquid food coloring
Instructions
- Prepare Baking Sheet and Sugar: Line a large rimmed baking sheet with parchment paper. Pour granulated sugar into a small bowl for coating the mints later.
- Mix Cream Cheese and Other Ingredients: In a large bowl, combine softened cream cheese, butter, corn syrup, and peppermint extract. Using a handheld mixer on low speed, blend everything for about a minute until smooth and creamy.
- Add Powdered Sugar Gradually: While mixing on low, add 4¼ cups of powdered sugar gradually, about ½ cup at a time. As the mixture thickens and the mixer struggles, switch to a spatula or wooden spoon to finish mixing until a thick dough forms.
- Prepare Surface and Divide Dough: Place a fresh parchment paper on the counter and dust with ¼ cup powdered sugar. Turn the dough out onto it and divide into three equal portions.
- Add Food Coloring: Make a small indent in two portions; add red food coloring to one and green to the other. Leave the third portion plain white. Knead each colored dough gently, adding up to ¼ cup extra powdered sugar as needed to reduce stickiness. Add a tablespoon or two extra sugar to the white dough if sticky.
- Shape Dough Into Ropes: Roll each colored dough into a long rope about 18 inches long and 1 inch thick.
- Slice and Shape Balls: Slice each rope into ½-inch segments from end to end. Roll each segment between palms to form smooth, round balls and set them aside.
- Coat Mints with Sugar: Drop a few balls at a time into the bowl of granulated sugar and toss gently to coat. Place sugar-coated mints on the prepared baking sheet.
- Flatten and Decorate: Using a fork, gently press down each candy ball to flatten into a small disc; the fork tines will create striped marks on top.
- Rest Mints: Leave mints at room temperature on the tray for up to 24 hours to firm up and develop the perfect texture before serving or gifting.
Notes
- These no-bake mints are perfect for making ahead during the busy holiday season.
- The amount of extra powdered sugar needed during kneading varies with kitchen temperature – warmer kitchens require more sugar, cooler kitchens less.
- The 24-hour rest period helps the candies firm up and develop their signature texture.
Nutrition
- Serving Size: 1 candy (approximate)
- Calories: 25
- Sugar: 4.5g
- Sodium: 10mg
- Fat: 1.2g
- Saturated Fat: 0.7g
- Unsaturated Fat: 0.4g
- Trans Fat: 0g
- Carbohydrates: 3g
- Fiber: 0g
- Protein: 0.3g
- Cholesterol: 5mg


