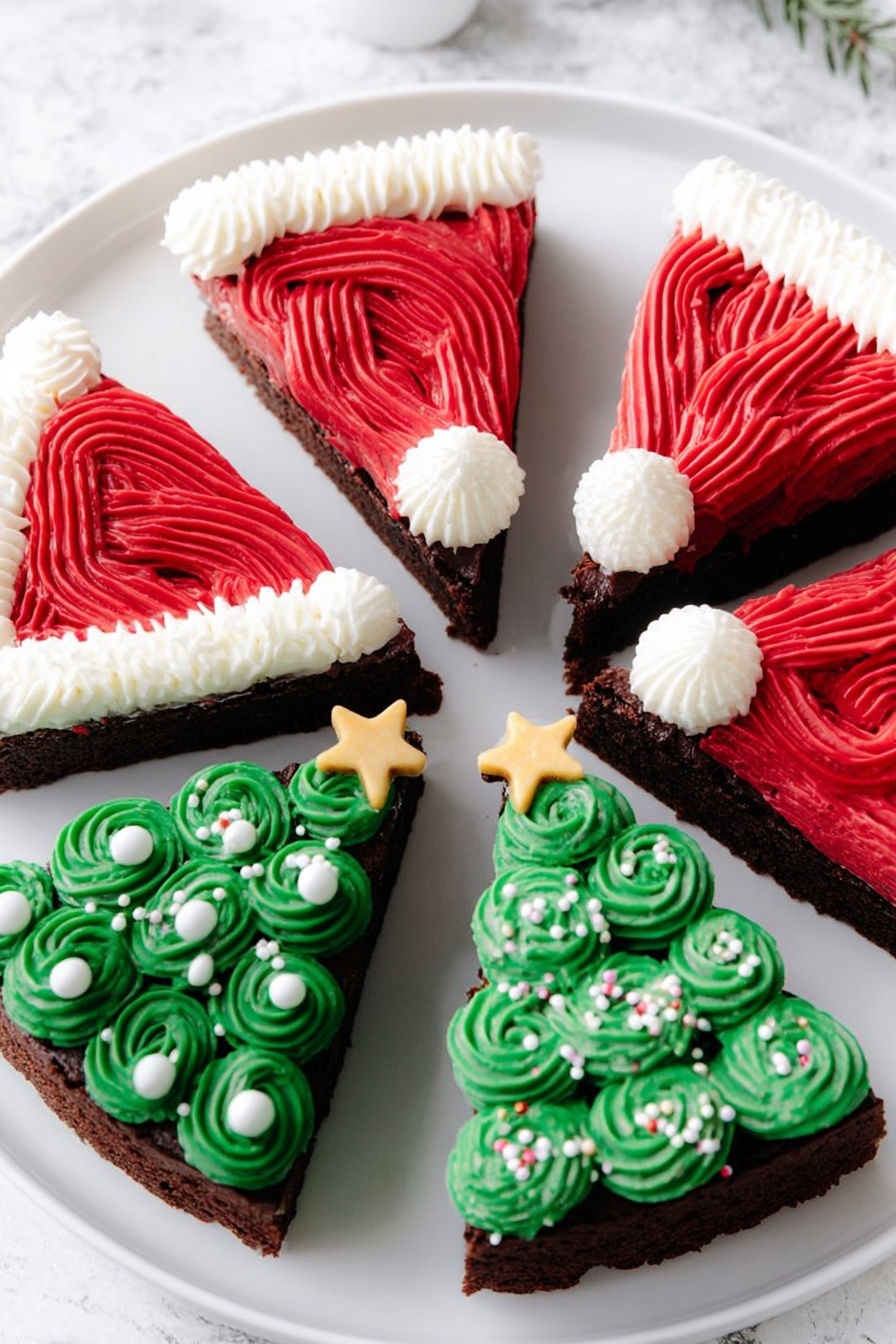
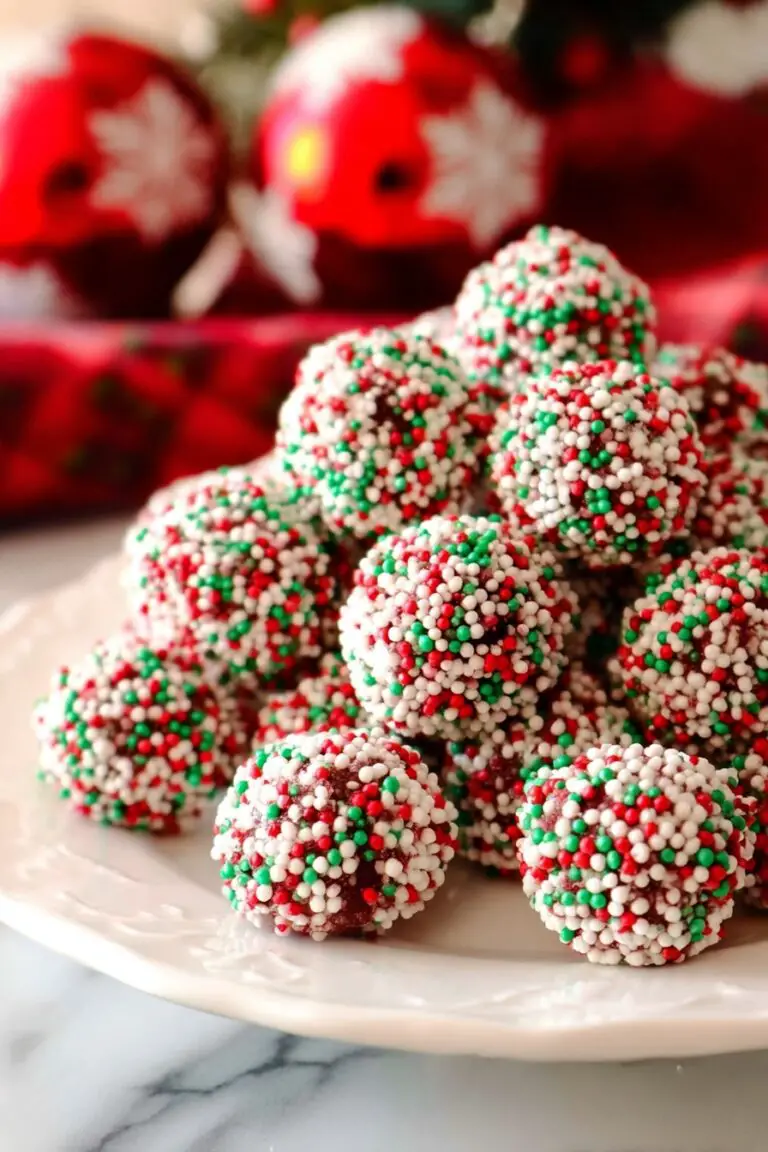
If you’re looking to wow your friends and family this holiday season with a sweet treat that’s as festive as it is delicious, let me introduce you to my Christmas Tree Brownies with Festive Frosting Recipe. This fan-freaking-tastic dessert combines rich, fudgy brownies shaped like Christmas trees and topped with vibrant red, green, and white frosting that instantly scream holiday cheer. Trust me, once you try these, your holiday dessert table will never be the same again!
Why You’ll Love This Recipe
- Super Festive Design: Shaping brownies into Christmas trees makes them instantly festive and fun to decorate.
- Fun and Easy to Make: Uses simple pantry staples and boxed or homemade brownies so you can whip these up quickly.
- Deliciously Fudgy Texture: Double batch brownies create thick, rich slices that hold their shape perfectly.
- Customizable Frosting Colors: You can adjust the shades of red and green to your liking—perfect for making these your own!

Ingredients You’ll Need
The beauty of this Christmas Tree Brownies with Festive Frosting Recipe is its simplicity. With just a few ingredients, you’ll get decadently chocolatey brownies topped with colorful frosting that’ll have everyone asking for the recipe. Plus, you can use either boxed brownie mix for a shortcut or homemade for that extra homemade touch.
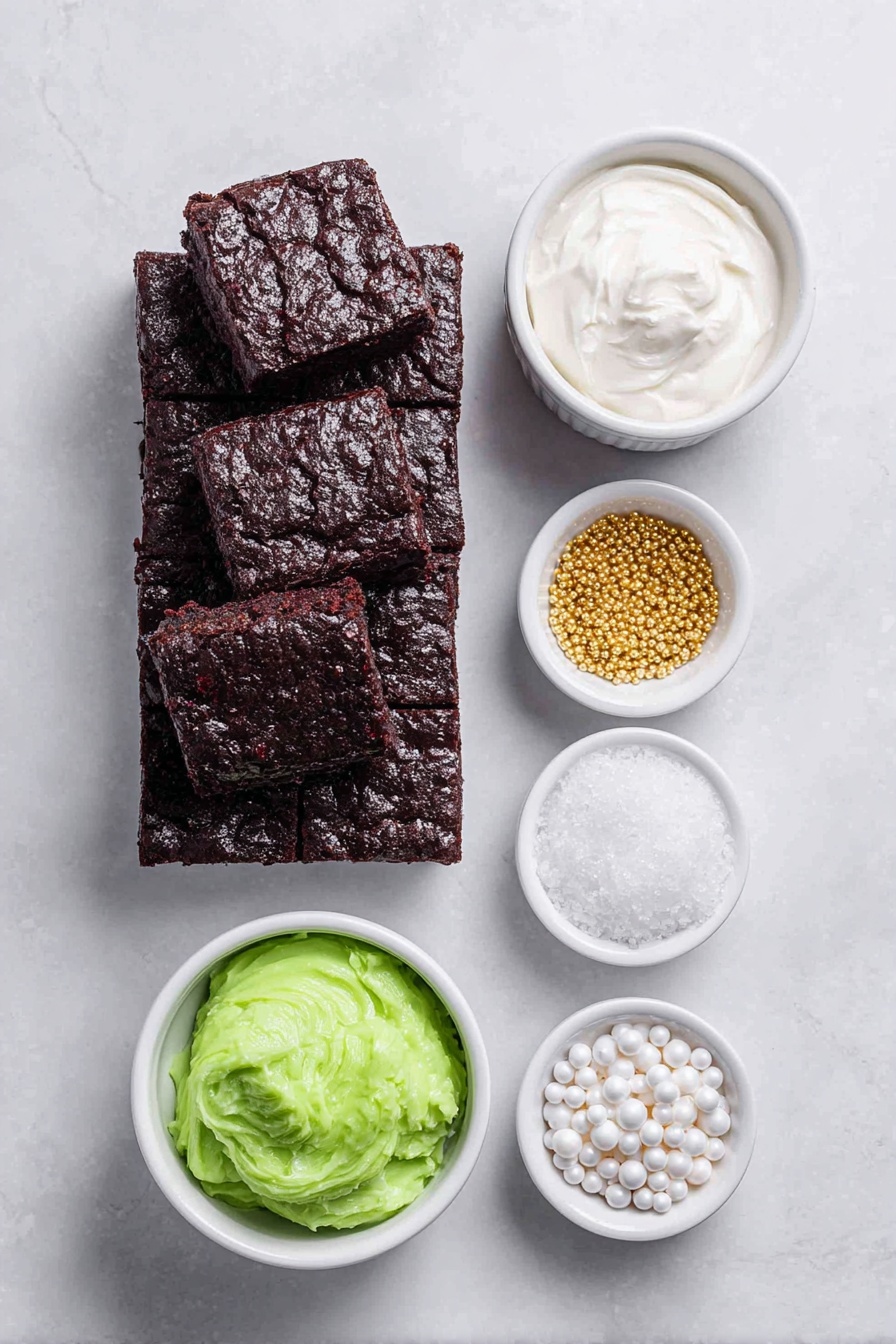
- Brownie mix or homemade brownie batter: I like using two boxes or a double batch for thick, sturdy brownies that hold their festive shape better.
- White frosting: This works great as the base and can be tinted any color you want using food coloring.
- Gel food coloring (red and green): These give vibrant colors without watery frosting; I prefer gel over liquid for the best color payoff.
- Edible gold stars: These little sparkly touches turn the brownie trees from cute to dazzling.
- White pearl sprinkles: I love how these add a bit of texture and act as “snow” on the tree branches.
- Icing bags and frosting tips (I recommend large star – 1M): For easy and neat decorating that looks professionally done.
Variations
I absolutely love that you can make this Christmas Tree Brownies with Festive Frosting Recipe your own—there’s plenty of room to get creative or adapt for diets. Personally, I’ve swapped out a few things depending on the occasion or cravings, and each variation has been a hit!
- Gluten-Free Version: Using a gluten-free brownie mix or homemade gluten-free batter works wonderfully, and the frosting decorating stays the same.
- Vegan Option: I’ve tried a vegan brownie recipe and dairy-free frosting, and honestly, nobody could tell the difference!
- Nutty Delight: Adding chopped nuts to the brownie batter gives a crunchy surprise that I adore—just sprinkle some walnuts or pecans.
- Flavor Twists: Play with peppermint extract in the frosting or even swirl in some caramel sauce inside the brownies for an adult-friendly touch.
How to Make Christmas Tree Brownies with Festive Frosting Recipe
Step 1: Get Baking with Your Brownies
Start by preheating your oven according to the brownie mix instructions—or to your homemade recipe’s guidelines if you’re going that route. I like to spray a 9-inch springform pan with some cooking spray to make sure your brownies pop right out after baking. Next, mix your double batch of brownies (two boxes or homemade equivalent), pour it evenly into the pan, and bake. Since it’s a double batch, I noticed it takes a bit longer than usual—check with a toothpick to make sure it comes out clean before pulling them out.
Step 2: Shape Those Festive Brownies
Once your brownies are fully cooled, carefully remove them from the springform pan and set on a cutting board. Now comes the fun part: cutting the brownies into 8 triangles that resemble Christmas trees! I found it easiest to cut the brownie into rectangular strips, then cut diagonally to get those perfect triangle shapes. This step is the key to getting that charming tree look.
Step 3: Color Your Frosting and Get Decorating
Here’s a little trick I picked up: split your white frosting into three small bowls. Tint one with red gel food coloring, one with green, and leave one plain white. This way, you have three frosting colors ready to decorate your brownie trees and maybe whip up a few Santa hat brownies on the side if you’re feeling extra festive. Pop each color into piping bags fitted with a large star tip for easy, pretty decorating.
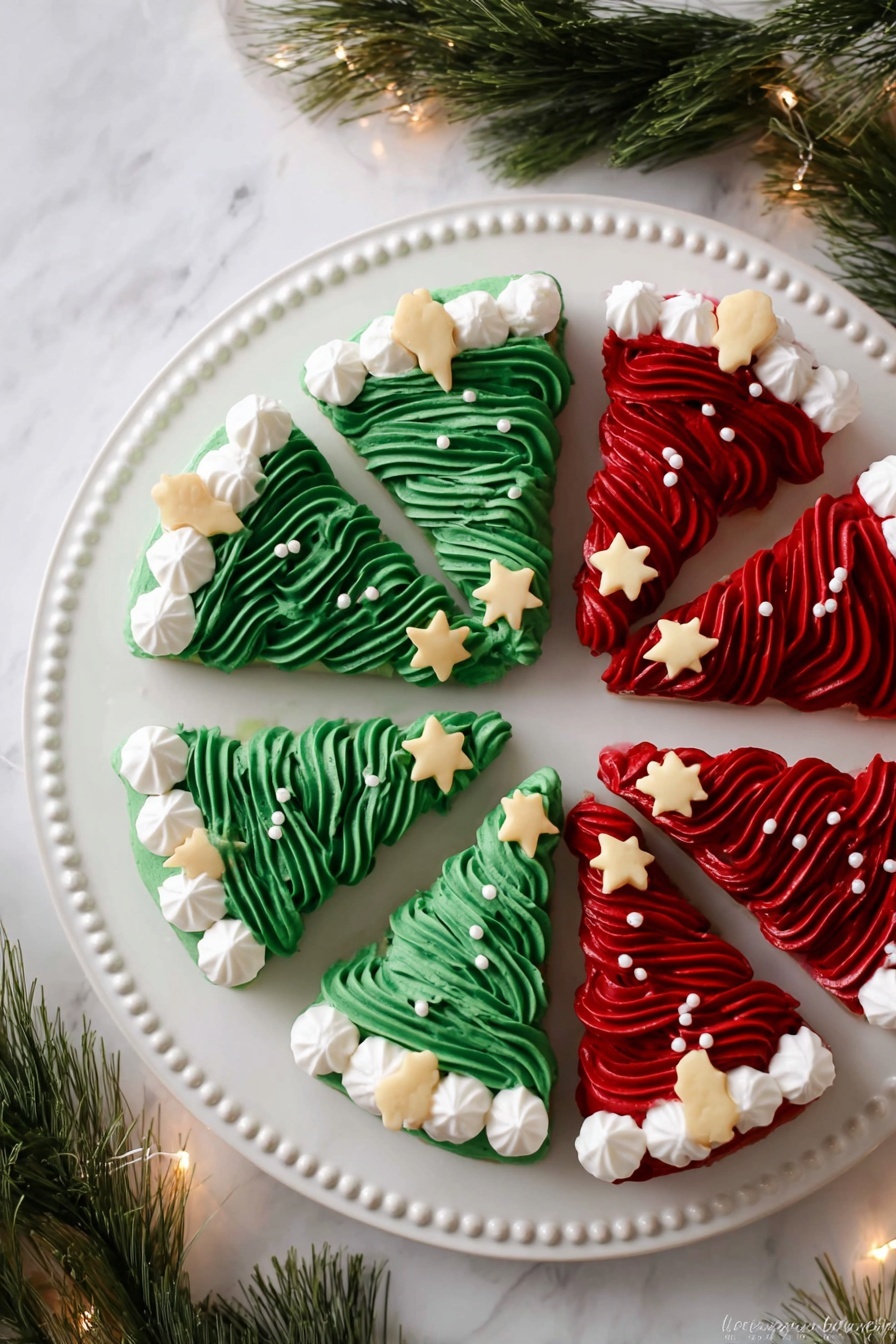
Step 4: Frost, Sprinkle, and Shine
Use the green frosting to create the “branches” of your Christmas tree brownies, swirling or zig-zagging to mimic the texture of pine needles. Then, sprinkle on the white pearl sprinkles as “snow” and finish with a few edible gold stars as tree toppers. The red frosting works beautifully for accenting with festive bows or for those Santa hats I told you about. Once decorated, give yourself a little high five—you’ve just created holiday magic!
Pro Tips for Making Christmas Tree Brownies with Festive Frosting Recipe
- Use a Springform Pan: This makes removing the dense, double batch brownies much easier without breaking their shape.
- Don’t Overbake: Check your brownies a few minutes before the recommended time, especially since baking times can vary with thickness.
- Gel Food Coloring is Key: Using gel colors keeps your frosting thick and vibrant without watering it down.
- Cool Completely Before Cutting: Cutting warm brownies leads to crumbly edges, so patience here pays off for neat tree shapes.
How to Serve Christmas Tree Brownies with Festive Frosting Recipe
Garnishes
For garnishes, I love sticking with the edible gold stars and white pearl sprinkles—they add that festive sparkle and snowy feel that just elevates the brownies. Sometimes I throw in tiny crushed candy canes for a peppermint crunch, or mini chocolate chips for a bit of extra indulgence.
Side Dishes
I like serving these brownies alongside a warm holiday drink—like spiced hot chocolate or mulled cider—to really get the cozy vibes. A simple scoop of vanilla ice cream on the side also pairs beautifully, balancing the fudgy sweetness.
Creative Ways to Present
One year, I arranged my Christmas Tree brownies on a platter in the shape of a giant Christmas tree and used fresh rosemary sprigs as garland around the tray. It looked stunning and made an unforgettable centerpiece. You could also stack a few brownies to create a 3D tree effect or even wrap individual brownies in clear cellophane bags tied with festive ribbons for gifting.
Make Ahead and Storage
Storing Leftovers
I keep leftover Christmas Tree Brownies in an airtight container at room temperature for up to 3 days. If your kitchen is warm or you decorated with more delicate sprinkles, storing them in the fridge is safer but bring them to room temp before serving to get that perfect fudgy bite.
Freezing
If you want to make these ahead, you can freeze undecorated brownies wrapped tightly in plastic wrap and foil for up to 3 months. When you’re ready to serve, thaw them completely, then frost and decorate for that fresh-out-of-the-oven appeal.
Reheating
To warm the brownies, I pop them in the microwave for about 10 seconds or the oven at 300°F for 5 minutes—just enough to soften without melting the frosting. This warm moment makes the brownies taste freshly baked again!
FAQs
-
Can I use homemade brownies for this Christmas Tree Brownies with Festive Frosting Recipe?
Absolutely! Homemade brownies work wonderfully, and the thicker and fudgier, the better. Just make sure they’ve fully cooled before cutting to keep the shapes clean and intact for decorating.
-
What frosting tips do you recommend for decorating these brownies?
I highly recommend large star tips like a 1M—it gives those pretty ridges and makes spreading or piping the frosting much easier, especially for the tree branch effect.
-
How long do these Christmas Tree Brownies stay fresh?
Stored in an airtight container at room temperature, they stay fresh for around 3 days. You can extend freshness by refrigerating them, though I always bring them back to room temp before serving.
-
Can I make these brownies ahead of time?
Yes! You can bake and freeze undecorated brownies for months ahead. Just thaw, then add frosting and decorations when ready to impress your guests.
Final Thoughts
I truly cherish this Christmas Tree Brownies with Festive Frosting Recipe because it brings so much joy to my holiday gatherings—and from what I’ve seen, yours will too! The combination of fudgy brownies and colorful, festive frosting makes for a treat that’s both nostalgic and exciting. If you want a dessert that looks incredible but doesn’t take all day to make, this is the one to try. I can’t wait for you to make it and share the smiles around your table!
Print
Christmas Tree Brownies with Festive Frosting Recipe
- Prep Time: 15 minutes
- Cook Time: 35-45 minutes (depending on batch size)
- Total Time: 50-60 minutes
- Yield: 8 large brownie triangles
- Category: Dessert
- Method: Baking
- Cuisine: American
Description
These Frosted Christmas Brownies are a festive and delicious holiday treat featuring rich, thick brownies decorated with colorful red and green frostings, edible gold stars, and white pearl sprinkles. Perfect for holiday parties or gifts, these brownies combine classic chocolatey goodness with cheerful seasonal decorations for a delightful twist on a favorite dessert.
Ingredients
Brownies
- 2 Boxes of Brownie Mix, or a double batch of homemade brownies
- Spray oil for greasing the pan
Frosting & Decorations
- White Frosting, 1-3 jars (amount depends on desired coverage and thickness)
- Edible Gel Food Coloring (red and green, or alternative no artificial dye food coloring)
- Edible Gold Stars
- White Pearl Sprinkles
- Icing Bags
- Frosting Tips (large star tip, such as 1M)
Instructions
- Preheat Oven and Prepare Pan: Preheat your oven according to the brownie box instructions and spray a 9-inch springform pan lightly with cooking spray to prevent sticking.
- Mix and Bake Brownies: Prepare the brownie batter by mixing both boxes according to the instructions or bake a double batch of homemade brownies. Pour the batter into the prepared springform pan and bake as directed on the package or until a toothpick inserted in the center comes out clean. Note that baking time may be longer due to the double batch.
- Cool and Cut Brownies: Once baked, allow the brownies to cool completely. Then carefully remove them from the springform pan and transfer to a cutting board. Cut the brownies into 8 triangular slices.
- Prepare Colored Frostings: In separate small bowls, divide the white frosting. Mix red gel food coloring into one bowl and green gel food coloring into another, adjusting the shade to your preference. Leave one bowl with plain white frosting for decorating.
- Fill Icing Bags: Place each colored frosting into individual icing bags fitted with a large star tip (such as tip 1M) for easy decorating.
- Decorate Brownies: Frost the brownie triangles creatively—use green frosting and white pearl sprinkles to create Christmas tree brownies, adding edible gold stars as ornaments. For Santa Claus hat brownies, use red and white frostings. Decorate according to your festive imagination.
- Serve and Enjoy: Arrange the decorated brownies on a platter, serve, and enjoy these festive treats with family and friends.
Notes
- You can use just one box or batch of brownies, but two boxes yield extra thick brownies.
- Baking a double batch may extend baking time beyond package instructions, so check doneness with a toothpick test.
- Frosting quantity depends on how thick and vividly colored you want your frostings to be.
- Use gel food coloring for the best vibrant color without thinning the frosting.
Nutrition
- Serving Size: 1 brownie triangle (approximately 1/8 of batch)
- Calories: 280
- Sugar: 22g
- Sodium: 180mg
- Fat: 12g
- Saturated Fat: 4g
- Unsaturated Fat: 6g
- Trans Fat: 0g
- Carbohydrates: 38g
- Fiber: 2g
- Protein: 3g
- Cholesterol: 20mg

