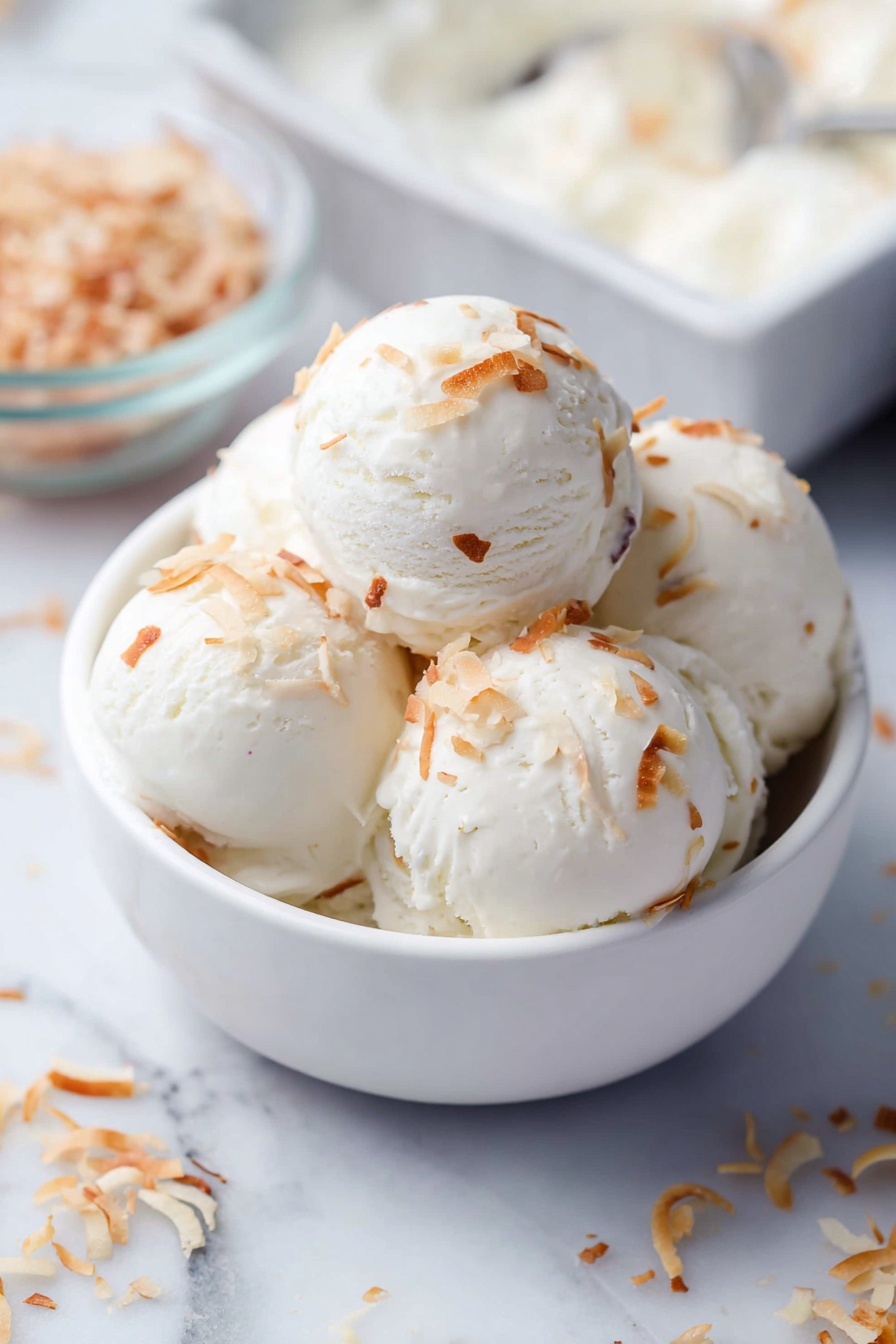
If you’re craving something creamy, cool, and full of tropical goodness, you’re in the right place. I’m excited to share my Homemade Coconut Ice Cream Recipe that’s surprisingly easy to make and absolutely delightful. Whether you’re making this for a summer treat or just want to impress your friends with a dairy-rich, luscious dessert, this recipe will become your new go-to for coconut ice cream.
Why You’ll Love This Recipe
- No Ice Cream Machine Needed: You can whip this up with just a mixer and freezer, so it’s super easy at home.
- Rich Coconut Flavor: Thanks to full-fat coconut milk and toasted coconut flakes, it bursts with authentic coconut goodness.
- Perfectly Creamy Texture: Whipping the cream to stiff peaks keeps the ice cream light yet decadent.
- Customizable: You can tweak sweetness, coconut intensity, or try it vegan-friendly with a few swaps.

Ingredients You’ll Need
Each ingredient in this Homemade Coconut Ice Cream Recipe plays a key role in creating that perfect balance of creaminess and tropical flavor. I always recommend using full-fat coconut milk for richness, and cold ingredients help everything blend faster and freeze smoother.

- Heavy Cream / Whipping Cream: Make sure it’s cold and fresh, so it whips into nice stiff peaks for that airy texture.
- Powdered Sugar: Dissolves quickly for smooth sweetness with no graininess.
- Vanilla Extract: This adds warmth and depth to the flavor, balancing the coconut beautifully.
- Coconut Milk (Full Fat): The star ingredient! Full-fat coconut milk brings a rich and creamy base.
- Sweetened Condensed Milk: It sweetens naturally and helps keep the texture soft and scoopable.
- Coconut Extract (optional): If you want an extra boost of coconut flavor, a little goes a long way.
- Dry Shredded Coconut / Coconut Flakes: Toasted for nuttiness and a delightful crunch.
Variations
I love how versatile this Homemade Coconut Ice Cream Recipe is — sometimes, I add a few twists to keep things interesting or adapt it for dietary needs. Feel free to play around with the flavors to make this your own.
- Vegan Version: Substitute sweetened condensed milk with coconut condensed milk alternatives and use coconut cream instead of heavy cream — turns out just as delicious!
- Add Tropical Mix-ins: Try folding in chunks of pineapple or mango for a fresh tropical burst I swear my family went crazy for.
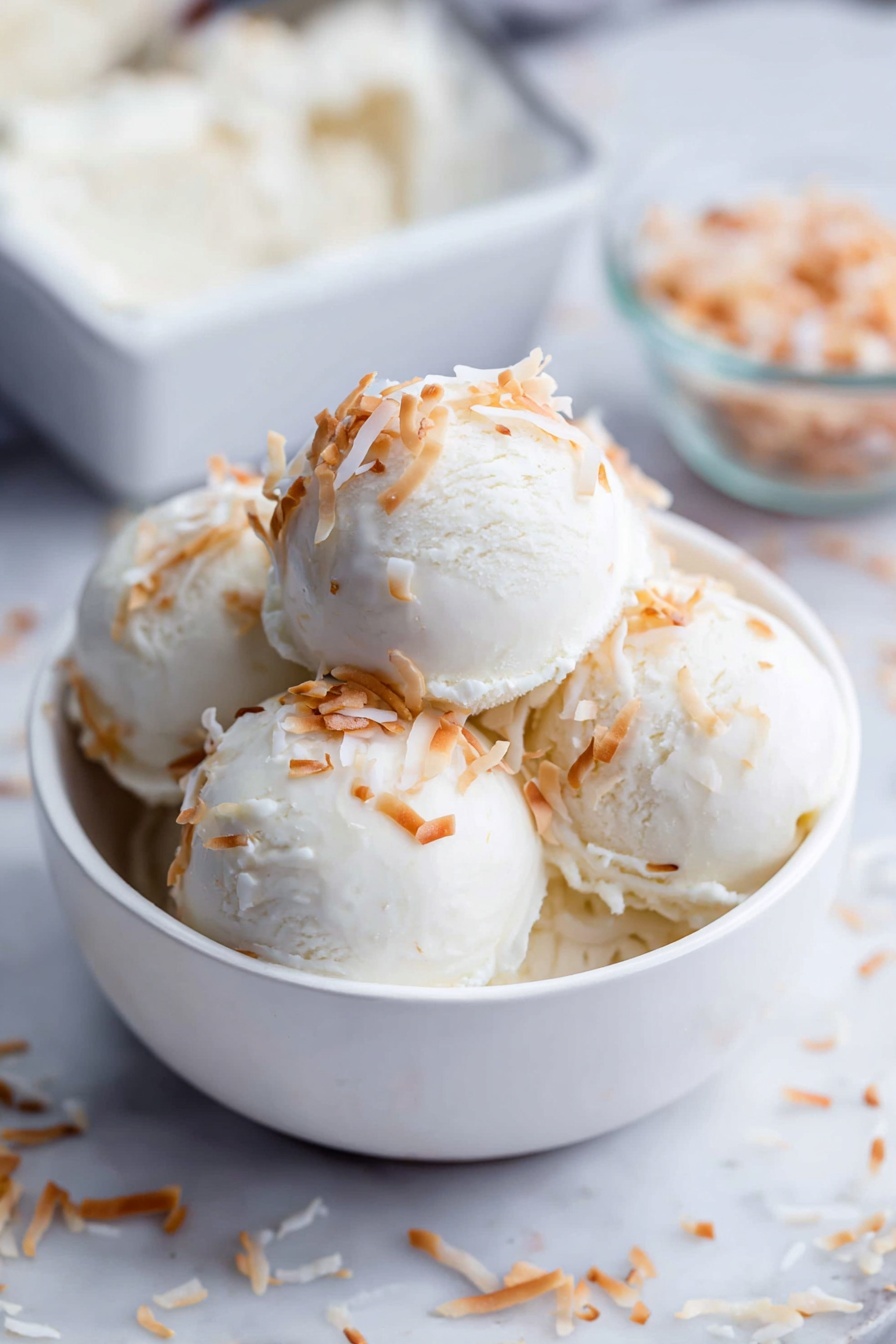
- Extra Coconut Flakes: Toast a bit more coconut flakes and sprinkle on top just before serving — adds that perfect toasted crunch.
- Coconut Rum Twist: Adding a splash of coconut rum not only enhances flavor but also keeps this ice cream a bit softer when frozen.
How to Make Homemade Coconut Ice Cream Recipe
Step 1: Whip the Cold Cream to Stiff Peaks
Start by pouring your cold heavy cream into a large mixing bowl. Add the powdered sugar and vanilla extract, then grab your hand blender or stand mixer and whip until the cream almost doubles in volume and forms stiff peaks — you want it to hold its shape firmly when you lift the beater. This step is key for creating the fluffy texture that makes your ice cream feel homemade and indulgent.
Step 2: Mix the Coconut Milk Base
In another bowl, stir together the full-fat coconut milk, sweetened condensed milk, and coconut extract (if you’re using it). Mix this really well until everything is fully combined. This mixture is the creamy base that brings the coconut flavor front and center, so make sure it’s smooth.
Step 3: Fold Cream and Coconut Mixture Together
Here’s the trick I discovered: Take a couple of scoops of your whipped cream and fold it gently into the coconut milk mix. This aerates the base, making your ice cream nice and light. Then, pour the coconut milk base into the whipped cream bowl in two batches, folding carefully with a spatula each time. Don’t rush this part — folding slowly keeps the air in your whipped cream, which is what makes the ice cream creamy rather than icy.
Step 4: Add Toasted Coconut Flakes
Once your mixture is merged evenly, fold in the toasted shredded coconut or coconut flakes for texture and nuttiness. Toasting is super simple — just watch them closely in a dry pan over medium heat and shake the pan occasionally until golden and smelling amazing.
Step 5: Freeze and Chill Overnight
Pour everything into a shallow rectangular container, then gently press a piece of cling wrap or parchment paper on the surface to prevent ice crystals. Cover tightly with a lid or foil, then freeze it for at least 8 hours, though overnight is best. Keeping the liquid ingredients cold before mixing helps it freeze quicker and smoother.
Step 6: Serving Time
When you’re ready to serve, remove the cling wrap from the surface and let the ice cream sit at room temperature for about 5 minutes. This resting time softens it slightly and makes scooping a breeze without it melting too fast — I always look forward to these moments!
Pro Tips for Making Homemade Coconut Ice Cream Recipe
- Keep Everything Cold: Using chilled cream, coconut milk, and condensed milk ensures your ice cream freezes faster and gets that silky texture.
- Gentle Folding is Key: I learned the hard way that overmixing knocks out the air and can make the ice cream dense—fold gently to keep it light.
- Toast Coconut Right Before Use: Toasting coconut flakes just before mixing gives you the freshest flavor and crunch.
- Use Shallow Containers: Freezing in a shallow dish helps the ice cream firm up evenly and makes it easier to scoop later.
How to Serve Homemade Coconut Ice Cream Recipe
Garnishes
I like topping my coconut ice cream with freshly shredded coconut, toasted almonds, or a drizzle of honey for a little extra sweetness. Sometimes I’ll sprinkle a bit of lime zest on top, which cuts through the richness beautifully and adds a zesty kick.
Side Dishes
This ice cream pairs perfectly with tropical fruit salads, warm mango sticky rice, or even alongside a slice of rich chocolate cake. Trust me, it’s a crowd-pleaser whether you’re serving it after dinner or at a summer barbecue.
Creative Ways to Present
For a special occasion, I’ve scooped this ice cream into coconut shells or served it with edible flowers and fresh mint leaves for a beautiful tropical vibe. You can also layer it with crushed cookies and toasted coconut in clear glass jars to make coconut ice cream parfaits that look as good as they taste.
Make Ahead and Storage
Storing Leftovers
I usually store leftover coconut ice cream in an airtight container with a tight-sealing lid to avoid ice crystals. It keeps well in the freezer for up to two weeks without losing that creamy texture, so you can enjoy it later without worry.
Freezing
Freezing works best when you keep the ice cream in a shallow container, covered snugly with a food-safe wrap or lid. This minimizes freezer burn and helps the ice cream freeze evenly, which I discovered by accident after a few batches.
Reheating
The best way to serve leftovers is to let them sit out for 5 to 10 minutes at room temperature before scooping again — no reheating needed! This softens the ice cream just the right amount to scoop easily without melting it completely.
FAQs
-
Can I make this Homemade Coconut Ice Cream Recipe without an ice cream machine?
Absolutely! This recipe is designed to be easy and requires no ice cream machine at all—you just whip, fold, and freeze. It’s perfect for home cooks who want great results with simple equipment.
-
What can I use instead of sweetened condensed milk?
If you want a dairy-free or vegan option, try using store-bought coconut condensed milk or make your own by simmering coconut milk with sugar until thickened. This keeps the sweetness and creaminess intact without traditional dairy.
-
How do I get that perfect creamy texture without ice crystals?
Using full-fat coconut milk, cold heavy cream, and a gentle folding technique helps retain air and prevent ice crystals from forming. Also, covering the ice cream surface tightly with cling wrap before freezing minimizes ice formation.
-
Can I add other flavors or mix-ins?
Definitely! From tropical fruit chunks to a swirl of chocolate or toasted nuts, feel free to customize. Adding mix-ins after folding but before freezing works best to keep everything evenly distributed.
Final Thoughts
This Homemade Coconut Ice Cream Recipe has become one of my favorites because it’s simple to make, incredibly creamy, and full of that dreamy coconut flavor I crave. I love serving it at family gatherings—everyone always asks for seconds. You’ll find it’s a recipe you’ll reach for again and again, especially when you want a sweet escape to the tropics without leaving your kitchen. Trust me, give it a shot—you’ll be so glad you did!
Print
Homemade Coconut Ice Cream Recipe
- Prep Time: 15 minutes
- Cook Time: 0 minutes
- Total Time: 12 hours 15 minutes
- Yield: 10 Servings
- Category: Dessert
- Method: No-Cook
- Cuisine: International
- Diet: Vegetarian
Description
This homemade coconut ice cream is a creamy, rich, and naturally tropical dessert made without an ice cream maker. Using cold heavy cream, full-fat coconut milk, and sweetened condensed milk, it offers a smooth texture infused with the delicate flavors of vanilla and coconut. Toasted shredded coconut adds a delightful crunch, making it perfect for coconut lovers seeking an easy, no-churn frozen treat.
Ingredients
Ice Cream Base
- 1.5 cups heavy cream/whipping cream, cold
- ¾ cup powdered sugar
- 1 teaspoon vanilla extract
- 2 cups full-fat coconut milk, cold
- ½ can sweetened condensed milk (about 200 grams from a 400-gram can), cold
- ⅛ teaspoon coconut extract (optional)
Topping
- ½ cup dry shredded coconut/coconut flakes, toasted & unsweetened
Instructions
- Whip the Cream: In a large mixing bowl, combine the cold heavy cream, powdered sugar, and vanilla extract. Using a hand blender or stand mixer, whip the cream until it doubles in volume and forms stiff peaks. This creates the light and airy base essential for creamy texture.
- Mix Coconut Base: In a separate bowl, whisk together the cold full-fat coconut milk, sweetened condensed milk, and coconut extract until thoroughly combined. This mixture provides the coconut flavor and sweetness.
- Aerate the Coconut Mixture: Take a few scoops of the whipped cream and gently fold them into the coconut milk mixture. This step lightens the coconut mix, incorporating air to keep the ice cream creamy.
- Combine Mixtures: Gradually fold the coconut milk mixture back into the remaining whipped cream in two batches. Use a spatula to fold carefully and slowly, preserving as much air as possible to maintain fluffiness.
- Prepare for Freezing: Transfer the fully combined mixture into a rectangular shallow container. Smooth the surface, then cover it tightly with cling wrap or baking paper pressed gently onto the ice cream to prevent ice crystals. Seal with a lid, foil, or additional cling wrap.
- Freeze: Place the container in the freezer for at least 8 hours, ideally overnight, to allow the ice cream to set fully.
- Serve: Remove the ice cream from the freezer. Take off the cling wrap from the surface, then let the ice cream rest at room temperature for about 5 minutes to soften slightly before scooping.
- Add Topping: Serve the ice cream garnished with the toasted shredded coconut flakes for added texture and flavor.
Notes
- Keeping all liquid ingredients cold helps the ice cream freeze faster and results in a smoother texture.
- Coconut extract is potent; ⅛ teaspoon provides a balanced coconut flavor. Adjust up to ¼ teaspoon if you prefer a stronger coconut taste.
- Use full-fat coconut milk for the best creamy consistency and flavor.
- For a dairy-free version, substitute heavy cream with coconut cream and use appropriate sweeteners.
- Toast shredded coconut lightly in a dry pan over medium heat until golden brown, watching carefully to avoid burning.
Nutrition
- Serving Size: 1/2 cup (approx. 100g)
- Calories: 280
- Sugar: 22g
- Sodium: 50mg
- Fat: 22g
- Saturated Fat: 18g
- Unsaturated Fat: 3g
- Trans Fat: 0g
- Carbohydrates: 18g
- Fiber: 1g
- Protein: 3g
- Cholesterol: 70mg


