If you’re craving a dessert that feels like a dreamy twist on a shamrock shake but without all the fuss of turning on your oven, I’ve got just the thing. This No Bake Shamrock Shake Dessert Recipe is like a cool, minty celebration in a dish that you can whip up in no time. I absolutely love how this turns out — it’s creamy, refreshing, and perfect when you want to impress guests with St. Patrick’s Day vibes or just treat yourself to something special without heating up the kitchen.
What makes this recipe stand out is its simplicity and that classic shamrock shake flavor captured in a fun, no bake dessert form. When I first tried it, I was amazed at how easy it was to put together, and better yet, how everyone went crazy for the bright, minty taste combined with smooth creaminess and a hint of sweetness. You’ll find that having this in your recipe arsenal is a game changer for quick celebrations or last-minute gatherings.
Why You’ll Love This Recipe
- No Oven Required: Enjoy a delicious dessert without heating up your kitchen.
- Classic Shamrock Shake Flavor: Captures the beloved minty taste in a creamy, refreshing treat.
- Quick and Easy Prep: You can pull this together in under 20 minutes, perfect for last-minute cravings.
- Crowd-Pleaser: Friends and family always ask for the recipe once they taste it.

Ingredients You’ll Need
To get that nostalgic shamrock shake experience, the ingredients focus on cool creams, minty goodness, and just enough sweetness to keep things bright and refreshing. You’ll find most of these in your pantry or local grocery store—but the green food coloring or natural mint extract are key to nailing the look and flavor.
- Whipped Cream: For that light, airy texture and topping that mimics the classic shake’s creaminess.
- Sweetened Condensed Milk: Adds richness and sweetness without overpowering the mint flavor.
- Green Food Coloring: Because no Shamrock Shake is complete without that iconic green hue.
- Mint Extract: The secret hero for authentic shamrock shake flavor.
- Cream Cheese: Gives a subtle tang and extra creaminess to the dessert base.
- Optional Toppings (Chocolate Chips, Sprinkles): For a little fun crunch and festive flair.
Variations
I love how versatile this No Bake Shamrock Shake Dessert Recipe is — so feel free to tweak it to suit your tastes! I’ve experimented with swapping out different extracts and adding creative mix-ins, making it a fun recipe to personalize.
- For a Chocolate Mint Twist: I once added a layer of crushed chocolate sandwich cookies for texture, and it brought a delightful crunch that my family adored.
- Dairy-Free Version: Use coconut whipped cream and dairy-free cream cheese alternatives to keep it creamy without the dairy.
- Lower Sugar Option: Replace sweetened condensed milk with a sugar-free sweetener and use unsweetened whipped topping—just remember it’ll be less rich but still tasty.
- Seasonal Flair: Swap mint extract for peppermint around Christmas for a festive flavor change that’s just as delicious.
How to Make No Bake Shamrock Shake Dessert Recipe
Step 1: Whip Up the Creamy Base
Start by blending your softened cream cheese with sweetened condensed milk until silky smooth. I like to use a hand mixer here for ease — it quickly removes any lumps and creates a luscious texture. Once that’s well combined, mix in your mint extract and green food coloring until the color is vibrant but still inviting. This step is key because the flavor and appearance really set the tone for the whole dessert.
Step 2: Fold in the Whipped Cream Gently
Next, gently fold in your whipped cream to keep the dessert light and airy. If you stir too vigorously, you risk losing that lovely fluffiness, so patience here really pays off. When I first tried rushing this part, the dessert became denser than I wanted — so take your time and be gentle with your folding motions.
Step 3: Chill and Set
Pour the mixture into serving glasses or a trifle dish. Chill in the refrigerator for at least two hours or until it’s firm enough to hold its shape but still creamy and spoonable. This waiting time is tough because it smells so inviting, but trust me—it’s worth it. The flavors marry during chilling to give you that perfect shamrock shake experience.
Step 4: Add Your Favorite Garnishes
Top your dessert with a generous swirl of whipped cream, a sprinkle of chocolate chips or green sprinkles, or even a maraschino cherry if you want to get super festive. These garnishes not only add texture and visual appeal but also let you tailor each serving for your guests or family.
Pro Tips for Making No Bake Shamrock Shake Dessert Recipe
- Use Full-Fat Dairy: I find full-fat cream cheese and condensed milk give the best creamy texture and flavor.
- Don’t Overmix Whipped Cream: Folding gently is crucial to keep your dessert light and fluffy, just like a real shamrock shake.
- Adjust Mint to Taste: Mint extract can be strong; start with less and add more gradually so it never overpowers.
- Chill Thoroughly: Give it enough time in the fridge to set properly — it makes serving easier and flavors more intense.
How to Serve No Bake Shamrock Shake Dessert Recipe
Garnishes
When I serve this dessert, a dollop of fresh whipped cream with a few mini chocolate chips on top is my go-to. The chocolate adds a subtle crunch, and the cream keeps things dreamy. Sometimes I throw in a few green sugar sprinkles or even a cute shamrock-shaped candy for extra St. Patty’s Day charm — it makes the dessert feel special without any extra effort.
Side Dishes
This dessert pairs wonderfully with light snacks like salted pretzels or pistachio nuts — something that contrasts the sweetness nicely. I’ve also enjoyed it alongside a simple fruit salad to add a fresh bite. It’s great on its own, but pairing a few salty nibbles really balances out the minty richness.
Creative Ways to Present
For special occasions, I like serving this in clear parfait glasses layered with crushed mint cookies or Oreo crumbs to add texture and a pop of color. Another fun idea is to create a shamrock shape on top using green decorating sugar or edible glitter. These little touches make your dessert feel like a St. Patrick’s Day party in a glass!
Make Ahead and Storage
Storing Leftovers
I store leftover dessert in an airtight container in the fridge, and it stays creamy and fresh for up to 3 days. When I’m dealing with leftovers, I always give them a little stir before serving again to refresh the texture. It’s an easy dessert to prepare in advance, making it great for parties and gatherings.
Freezing
While this dessert freezes okay, I prefer to enjoy it fresh. Freezing can sometimes change the texture of the whipped cream, making it a bit icy after thawing. If you do freeze it, store it in an airtight container and thaw overnight in the fridge for best results.
Reheating
No reheating needed here! This is a chilled dessert best enjoyed cold or at fridge temperature. If you feel it’s too firm after storage, just leave it out for 5-10 minutes to soften slightly before serving.
FAQs
-
Can I make this No Bake Shamrock Shake Dessert Recipe vegan?
Absolutely! Swap the cream cheese for a vegan alternative, use dairy-free whipped topping, and substitute sweetened condensed milk with a plant-based sweetener like coconut condensed milk. Just be sure to check ingredients for any hidden dairy to keep it fully vegan.
-
How long does the dessert need to chill?
Give it at least two hours in the fridge to fully set and let the flavors meld together. For best results, chilling it overnight helps the texture become extra stable and creamy.
-
What if I don’t have mint extract?
You can substitute peppermint extract or even vanilla extract if you prefer a milder flavor. Keep in mind peppermint is stronger, so start with a small amount and adjust to taste.
-
Can I add alcohol to make a boozy version?
Yes! Adding a splash of crème de menthe or peppermint schnapps can turn this dessert into a festive adult treat. Just be careful not to add too much liquid so the texture stays just right.
Final Thoughts
This No Bake Shamrock Shake Dessert Recipe has quickly become one of my favorite easy indulgences — it feels special without being complicated. I love how it brings a little bright minty joy to my table and I’m always thrilled when friends ask for seconds. If you’re looking for a foolproof dessert that’s quick, crowd-pleasing, and perfect for St. Patrick’s Day vibes or just any day you want a minty treat, you absolutely need to try this. I promise you’ll love it as much as I do!
Print
No Bake Shamrock Shake Dessert Recipe
- Prep Time: 10 minutes
- Cook Time: 15 minutes
- Total Time: 25 minutes
- Yield: 6 servings
- Category: Dessert
- Method: Baking
- Cuisine: American
Description
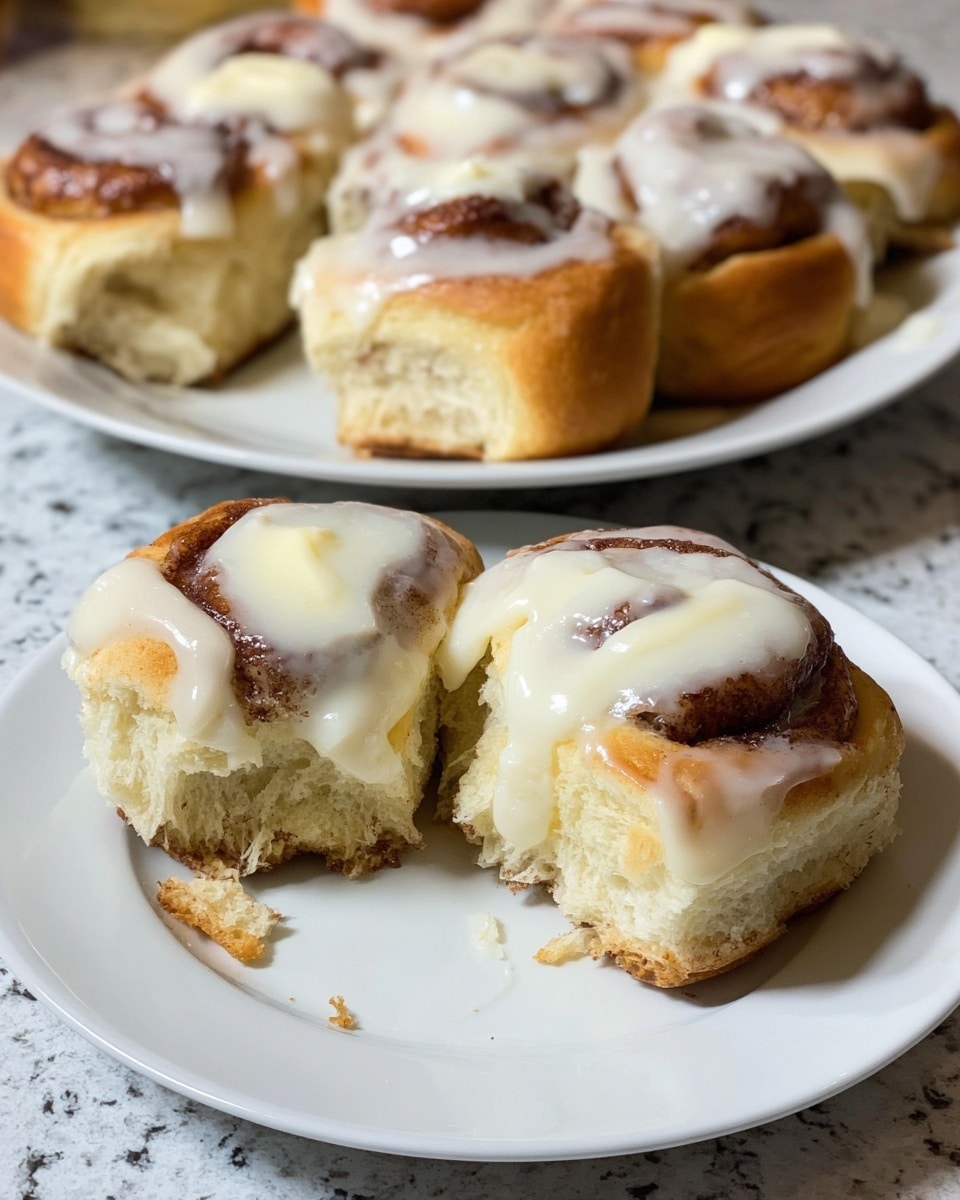
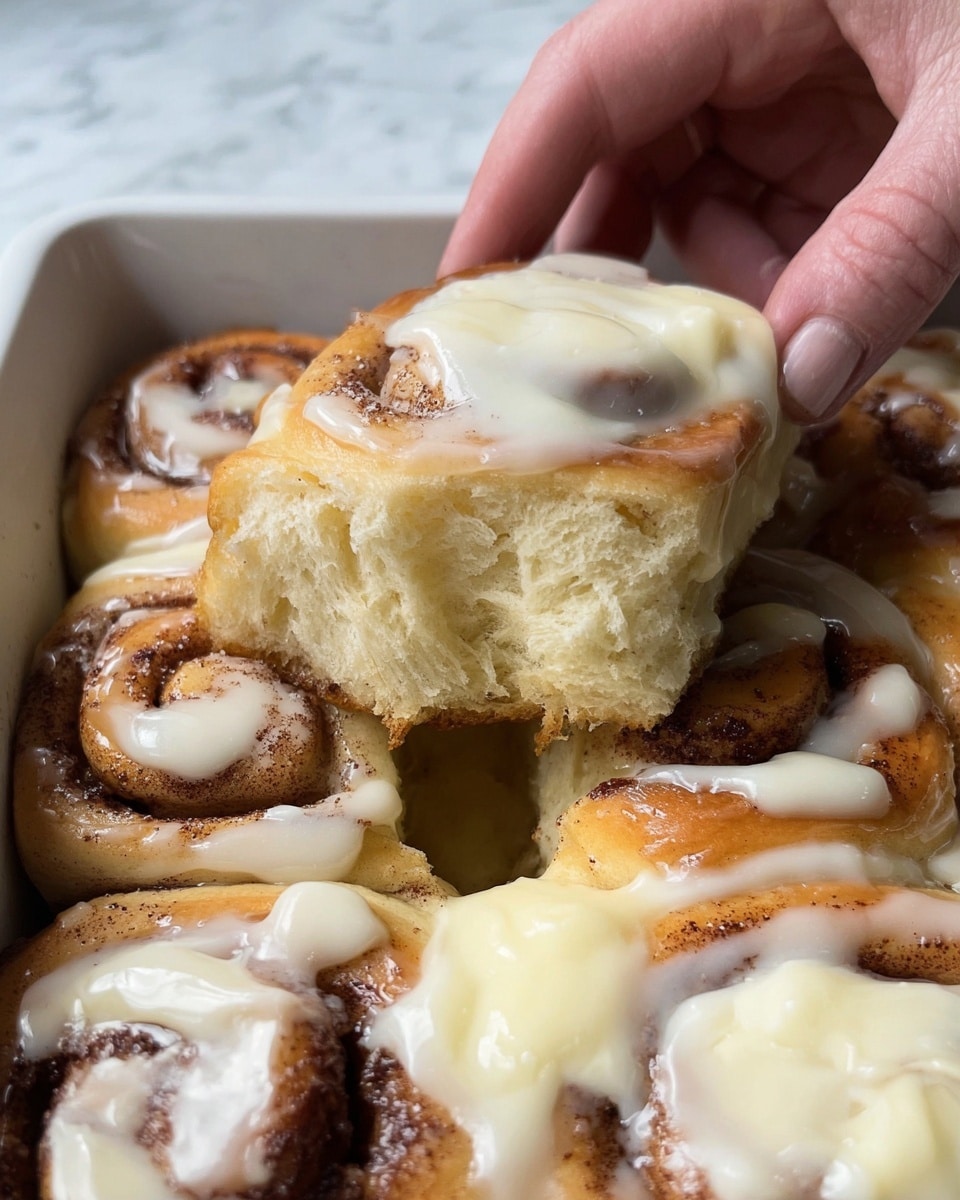
These Kings Hawaiian Cream Cheese Cinnamon Rolls are a delightful twist on classic cinnamon rolls using soft, sweet King’s Hawaiian rolls filled with a creamy, sweetened cream cheese mixture and baked until golden. Perfect for a comforting breakfast or sweet snack.
Ingredients
For the Rolls
- 1 (12 Count Package) King’s Hawaiian original sweet rolls
- 6 tbsp Salted Butter, melted
- 2 tbsp Brown Sugar
- 1 tbsp Ground Cinnamon
For the Cream Cheese Filling
- 8 oz Softened Cream Cheese
- 2 tbsp Granulated Sugar
- 1 Egg
Instructions
- Preheat and prepare: Preheat your oven to 375 degrees Fahrenheit and grease a 9×13-inch baking dish to prevent sticking and ensure easy removal of rolls.
- Prepare the rolls: Place the King’s Hawaiian rolls in the baking dish. Carefully cut a small square in the top of each roll and gently pull out some of the bread from inside, taking care not to cut through the bottom, creating a cavity for the filling.
- Make the cinnamon butter glaze: In a small bowl, combine the melted butter, brown sugar, and ground cinnamon. Mix well until fully combined. Brush this mixture generously over the tops and inside cavities of each roll, coating them thoroughly to infuse sweetness and cinnamon flavor.
- Prepare the cream cheese filling: In a mixing bowl, beat the softened cream cheese with a hand mixer until smooth and creamy. Add the granulated sugar and egg, mixing until the filling is well-blended and creamy in texture.
- Fill the rolls: Carefully spoon or pipe the cream cheese mixture into each prepared roll cavity, being generous to ensure each roll is filled.
- Bake: Place the baking dish in the preheated oven and bake for about 15 minutes, or until the rolls are golden brown and the cream cheese filling is set and slightly puffed.
- Cool and serve: Allow the rolls to cool slightly in the pan for a few minutes, then slice into individual portions. Serve warm for the best flavor and texture experience.
Notes
- Do not cut the bottom of the rolls when hollowing out the center to prevent filling leakage.
- The rolls are best served warm for a soft and gooey experience.
- If the cream cheese filling mixture feels too stiff, you can add a splash of milk or cream for easier filling.
- Store leftover rolls in an airtight container and reheat gently before serving.
- You can substitute salted butter with unsalted butter, adding a pinch of salt if desired.
Nutrition
- Serving Size: 1 roll
- Calories: 320
- Sugar: 15g
- Sodium: 220mg
- Fat: 15g
- Saturated Fat: 8g
- Unsaturated Fat: 6g
- Trans Fat: 0g
- Carbohydrates: 40g
- Fiber: 1g
- Protein: 6g
- Cholesterol: 70mg

