
If you’re looking for a dessert that combines creamy, sweet, and crunchy all in one slice, I’ve got just the thing—the Ultimate No Bake Peanut Butter Pie Recipe. I absolutely love how effortless it is to whip up, especially on days when I want something indulgent without turning on the oven. This pie has a rich peanut butter flavor that’s perfectly balanced by a smooth, airy filling that you and your family will keep coming back for.
One of the best things about this Ultimate No Bake Peanut Butter Pie Recipe is that you can prepare it ahead of time for gatherings or a simple weeknight treat. I remember first trying it during a summer potluck, and everyone was amazed it didn’t require baking. Once you make this, you’ll find it works wonderfully as a quick dessert fix and even doubles as a crowd-pleaser at parties.
Why You’ll Love This Recipe
- No Baking Required: Saves time and keeps your kitchen cool, perfect for hot days or quick dessert fixes.
- Creamy, Dreamy Texture: The silky peanut butter filling paired with whipped topping creates a luscious mouthfeel.
- Customizable: Easy to adapt with add-ins or toppings to match your favorite flavors.
- Perfect for Any Occasion: Works great for casual family dinners or festive celebrations alike.

Ingredients You’ll Need
This dessert is all about simplicity and flavor. The ingredients work beautifully together — the crust gives a buttery crunch, the peanut butter filling is rich yet fluffy, and the whipped topping adds lightness. Plus, these staples are easy to find at your local grocery store.
- Graham Cracker Crust: I like using store-bought or homemade for convenience and great texture.
- Creamy Peanut Butter: Choose smooth for the best spreadable filling and classic taste.
- Powdered Sugar: Helps sweeten the filling evenly without graininess.
- Whipped Topping (Cool Whip): It lightens the filling and makes the pie wonderfully fluffy.
- Milk: Necessary to blend smoothly with the pudding mix.
- Instant Peanut Butter Pudding Mix: This is the secret to that decadent peanut buttery custard without cooking.
- Vanilla Extract: A splash enhances the flavor and roundness of the filling.
Variations
I love tweaking this Ultimate No Bake Peanut Butter Pie Recipe to match different occasions or cravings. You’ll find that adding a few extra touches personalizes the pie beautifully — and it’s easy to make it suit your dietary needs or seasonal flavors.
- Chocolate Swirl: I like folding in some melted chocolate or topping with chocolate shavings for a rich twist.
- Crunch Boost: Adding chopped peanuts on top gives a great texture contrast that my family goes crazy for.
- Lower Sugar: Use a sugar substitute in the puddings and powdered sugar if you want a lighter version without compromising texture.
- Nut-Free Variation: Substitute sunflower seed butter to make it friendly for kids or guests with peanut allergies.
How to Make Ultimate No Bake Peanut Butter Pie Recipe
Step 1: Prep Your Crust
Start by crushing your graham crackers into fine crumbs—you can do this in a zip bag with a rolling pin or pulse them a few times in a food processor. Mix the crumbs with melted butter until you have a sandy, wet texture that will hold when pressed. Press this mixture into the bottom of your pie dish firmly, then pop it in the fridge for 10-15 minutes to set while you prepare the filling. I find chilling the crust first really helps it firm up without baking.
Step 2: Whip Up the Peanut Butter Filling
In a large bowl, blend together softened cream cheese, peanut butter, and powdered sugar until smooth and creamy. Then, gently fold in about half of your whipped topping to keep it light and airy. You’ll want to avoid overmixing here — just enough to combine everything nicely. This part always reminds me that simple ingredients can create magic.
Step 3: Mix and Set the Pie
Spread the peanut butter filling evenly over the chilled crust. Then top with the remaining whipped topping to add that perfect touch of cloud-like fluffiness. Chill the pie for at least 3 hours or overnight. This resting time lets the flavors meld and the texture firm up just right — trust me, it’s worth the wait!
Pro Tips for Making Ultimate No Bake Peanut Butter Pie Recipe
- Room Temperature Ingredients: Make sure your cream cheese and peanut butter are softened to avoid lumps in your filling.
- Don’t Skip Chilling: The pie needs time in the fridge to set properly and develop that perfect sliceable texture.
- Folding Method: Gently fold in the whipped topping instead of stirring vigorously to keep the filling light.
- Use Instant Pudding Mix: This ensures your filling thickens nicely without any stovetop work or baking.
How to Serve Ultimate No Bake Peanut Butter Pie Recipe
Garnishes
I usually love to sprinkle chopped roasted peanuts and a drizzle of melted chocolate on top to give a fun, elegant finish. Sometimes, a few dollops of whipped cream with a dusting of cocoa powder do wonders. These simple garnishes elevate the rustic pie into something that looks just as good as it tastes.
Side Dishes
To round out the sweetness, I like pairing the pie with fresh fruit like sliced strawberries or a crisp apple salad. It adds a refreshing balance and lightens the dessert experience. Plus, your guests will appreciate the contrast of textures and flavors.
Creative Ways to Present
For birthdays or holidays, I’ve served this pie in individual mason jars topped with a peanut butter cup or crushed candy bars for extra fun. Layering the filling with chocolate ganache in clear glasses looks spectacular too — it’s a real showstopper without any added effort!
Make Ahead and Storage
Storing Leftovers
Once assembled, the pie keeps beautifully refrigerated for up to 4 days. I always cover it tightly with plastic wrap or store it in an airtight container to prevent it from absorbing other fridge odors. Each day, the flavors deepen, and the texture remains creamy and fresh.
Freezing
I’ve frozen this pie a few times with good results — just make sure to wrap it well in plastic and foil to avoid freezer burn. When you’re ready to enjoy, thaw it overnight in the fridge and it’ll have almost the same creamy texture as fresh.
Reheating
This is one dessert best served cold, so reheating isn’t necessary. Just take it out of the fridge 10-15 minutes before serving to let it soften slightly for easier slicing.
FAQs
-
Can I use crunchy peanut butter instead of smooth?
Absolutely! Crunchy peanut butter will add a nutty texture to the filling, which some people really enjoy. Just keep in mind it might make the texture a bit more rustic rather than silky smooth.
-
Do I have to use instant pudding mix?
Using instant pudding mix is key for this no bake recipe because it thickens perfectly without heating. Regular pudding that requires cooking won’t set properly in the fridge and might cause the pie to be too soft.
-
Can I make this pie vegan or dairy-free?
Yes! Substitute dairy-free cream cheese, use a plant-based whipped topping, and choose a vegan peanut butter pudding mix. The crust can be replaced with a nut or oat-based crust that fits your needs.
-
How long will this pie stay fresh in the refrigerator?
When stored well, it stays fresh for 3 to 4 days. After that, the crust can start getting soggy, so try to enjoy it within that window for best texture.
Final Thoughts
This Ultimate No Bake Peanut Butter Pie Recipe is one of those desserts that’s not only delicious but also genuinely easy to make — and that’s a winning combination in my book. I love how it comes together quickly and yet feels so special when you serve it. Whether you’re indulging just for yourself or impressing guests, this pie won’t disappoint. Give it a try, and soon it might become your go-to dessert too!
Print
Ultimate No Bake Peanut Butter Pie Recipe
- Prep Time: 20 minutes
- Cook Time: 10 minutes
- Total Time: 30 minutes + chilling time
- Yield: 16 servings
- Category: Dessert
- Method: Baking
- Cuisine: American
Description
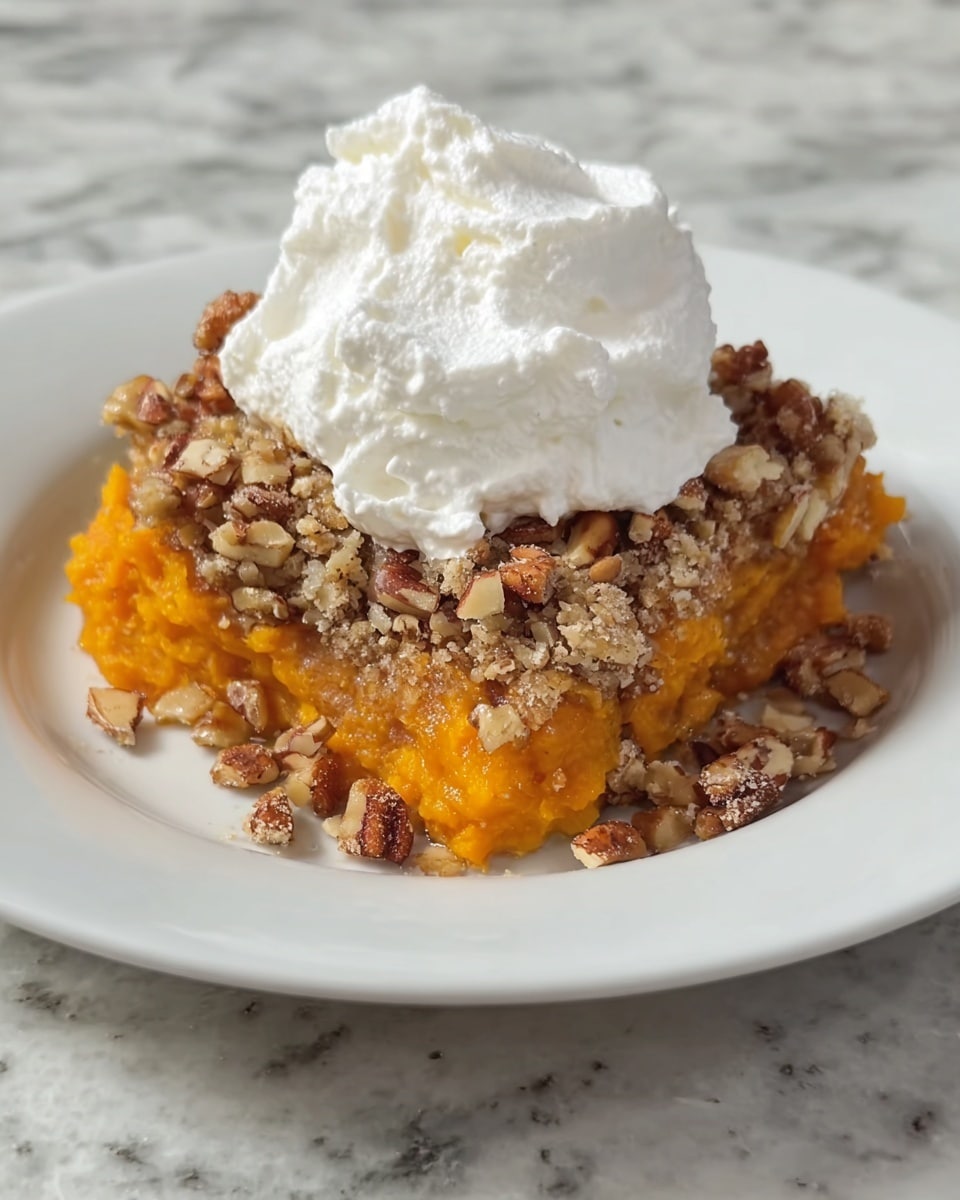
Butterscotch Lush Dessert is a luscious, layered treat featuring a buttery pecan cookie crust, creamy sweetened cream cheese layer, rich butterscotch pudding, and topped with fluffy whipped topping and crunchy pecans. This no-fuss, make-ahead American dessert is perfect for potlucks, holidays, and any occasion that calls for a decadent yet simple dessert.
Ingredients
Crust
- 11.3 oz package Keebler’s Pecan Sandies cookies, finely crushed
- 8 tablespoons salted butter, melted
- 1/2 cup all-purpose flour
Cream Cheese Layer
- 12 oz cream cheese, softened
- 1.5 cups confectioner’s sugar
- 1 cup Cool Whip (whipped topping)
Butterscotch Pudding Layer
- 2 (3.4 oz) boxes butterscotch instant pudding mix (instant, no-cook type)
- 3.5 cups milk
Topping
- 7 oz Cool Whip (whipped topping) (remaining after using 1 cup in cream cheese layer)
- 6 oz crushed pecans
Instructions
- Preheat and Prepare Crust: Preheat your oven to 325°F (163°C). Finely crush the Pecan Sandies cookies and transfer them to a mixing bowl. Combine the crushed cookies with the melted salted butter and all-purpose flour, mixing until well incorporated.
- Bake Crust: Press the cookie mixture evenly into the bottom of a 9×13 inch baking dish. Bake the crust for 10 minutes to set it. Once baked, remove from the oven and allow it to cool completely before adding the next layers.
- Make Cream Cheese Layer: Using a stand mixer or hand mixer, beat the softened cream cheese and confectioner’s sugar until smooth and creamy. Then fold in 1 cup of Cool Whip until combined. Set this mixture aside.
- Prepare Pudding Layer: In a mixing bowl, beat together the butterscotch instant pudding mixes and 3.5 cups of milk until the pudding thickens, about 2 minutes.
- Assemble Layers: Spread the cream cheese mixture evenly over the cooled cookie crust. Next, evenly spread the thickened butterscotch pudding over the cream cheese layer.
- Add Whipped Topping: Spread the remaining Cool Whip (about 7 oz) over the pudding layer to create the final creamy topping.
- Garnish and Chill: Sprinkle the crushed pecans evenly over the top of the whipped topping layer. Refrigerate the entire dessert for at least one hour before serving to allow layers to set and flavors to meld.
Notes
- Be sure to use instant butterscotch pudding mix, not the kind that requires cooking.
- Allow the crust to cool completely before spreading the cream cheese mixture to prevent melting and mixing layers.
- For best flavor, refrigerate for several hours or overnight.
- Can be stored covered in the refrigerator for up to 3 days.
- Make sure the cream cheese is softened to avoid lumps in the cream cheese layer.
Nutrition
- Serving Size: 1 slice (assuming 16 slices)
- Calories: 320 kcal
- Sugar: 20 g
- Sodium: 180 mg
- Fat: 20 g
- Saturated Fat: 8 g
- Unsaturated Fat: 10 g
- Trans Fat: 0.5 g
- Carbohydrates: 28 g
- Fiber: 1 g
- Protein: 4 g
- Cholesterol: 40 mg


