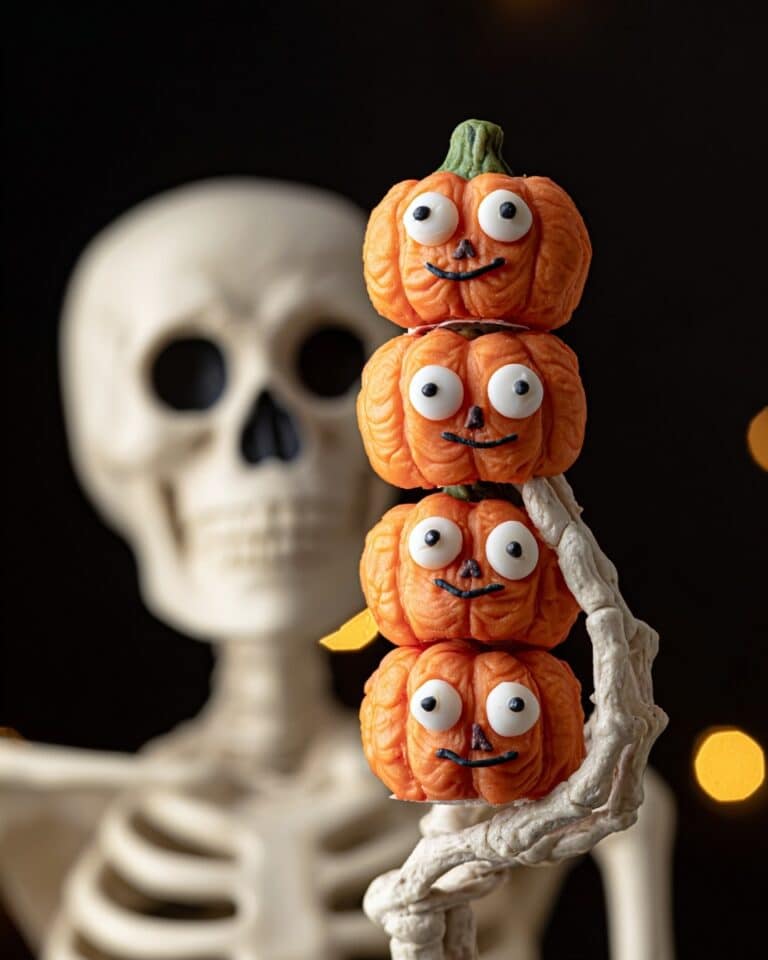
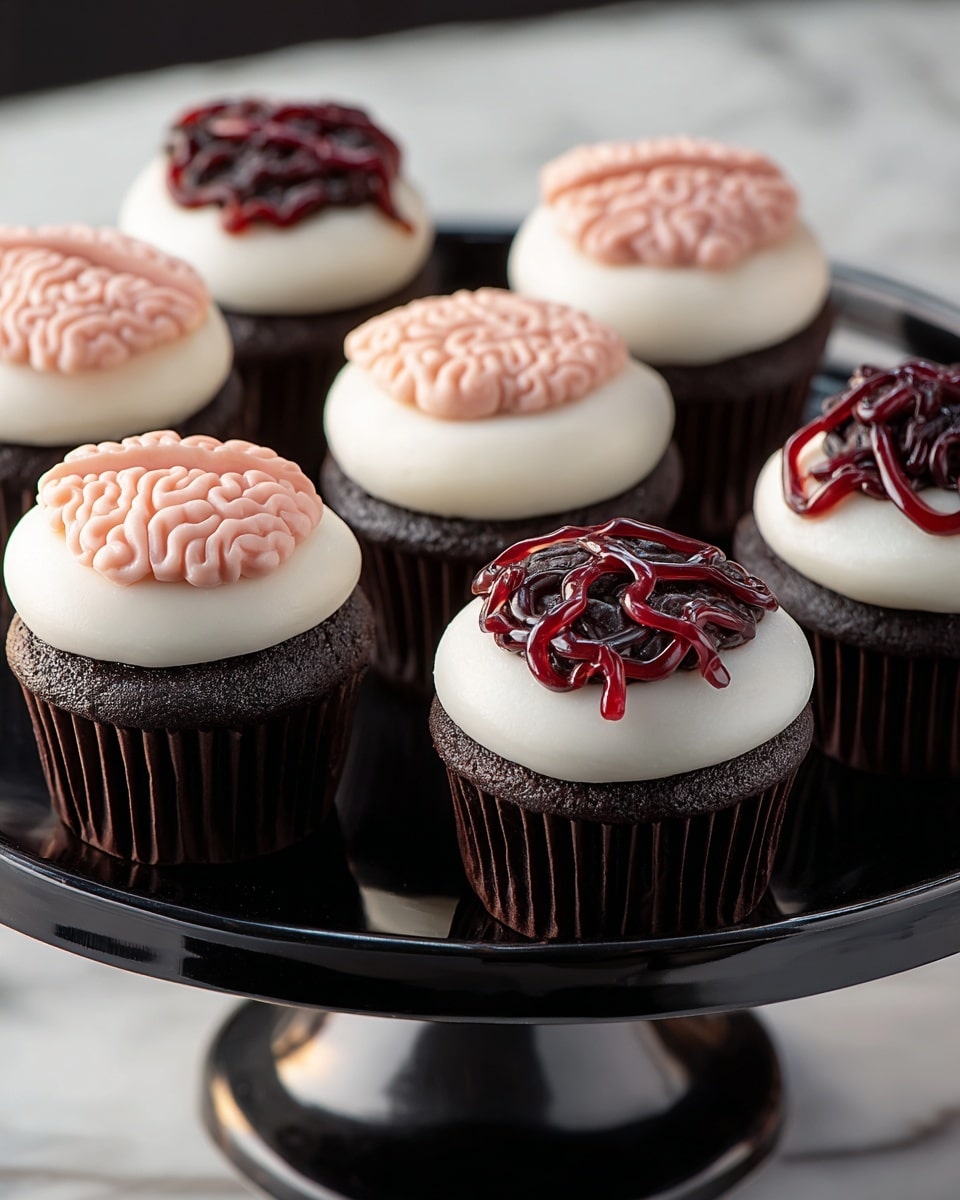
Today, I’m so excited to share something truly unique and delightfully creepy-fun — my Intestine & Brain Cupcakes Recipe. If you love a combination of spooky charm with a surprisingly tasty twist, these cupcakes will quickly become your go-to for Halloween parties or any time you want to wow your friends with something unexpected. Trust me, once you make them, you’ll be hooked by how fun and rewarding this recipe is to create!
Why You’ll Love This Recipe
- Creative and Eye-Catching: These cupcakes look incredibly detailed and fun — perfect conversation starters at any party.
- Delicious with Familiar Flavors: Underneath the spooky decoration, you’re still getting that classic cupcake taste you love.
- Perfect for Themed Events: They’re ideal for Halloween, anatomy lessons, or even quirky birthday celebrations.
- Intermediate Skill Level: Fun enough to challenge you, but straightforward with my tips to help you succeed.

Ingredients You’ll Need
What I love about the Intestine & Brain Cupcakes Recipe is how simple the ingredients list is — you can use your favorite cupcake base combined with fun decorating colors. Picking quality frosting and gel colorings really makes the details pop.
- Favorite cupcake recipe or box mix: Go with what you know and enjoy; I often use a vanilla or chocolate base for a nice neutral flavor.
- Rose Icing Colors Pink Food Coloring: Adds subtle pink shades perfect for realism in the brain details.
- Rose Gel Food Coloring: Gel colors give richer, more vibrant hues without thinning the frosting.
- Red-Red Icing Color: Provides the blood-red tones you’ll need for the intestines’ look.
- Red-Red Gel Food Coloring: An easy way to get deep red shades for glazing the intestines.
- Brown Food Coloring Icing Color: Adds dimension and depth by blending with peach tones.
- Brown Gel Food Coloring: Helps darken colors without changing texture.
- Creamy Peach Icing Color: This soft shade is crucial to mimic realistic brain tissue.
- Creamy Peach Gel Food Coloring: Gives frosting a beautiful peach tone with cling and gloss.
- Creamy White Decorator Icing: A smooth vanilla-flavored base for frosting and icing your cupcakes evenly.
Variations
I’m a big believer that every baker should feel free to make this recipe their own. Whether you want to try different colors or switch up the cupcake base, these variations let you experiment and still keep the fun intact.
- Different Base Flavors: I’ve had great success using red velvet or carrot cake instead of vanilla for more depth – my family especially liked the spice contrast with the brain frosting.
- Dairy-Free Options: Swap out traditional icing with coconut-based frosting for a vegan-friendly version — I tried it once and it worked wonderfully.
- Color Customizations: Sometimes I swap the shades of peach and red with neon colors for more of a fantasy look, which kids adore at birthday parties.
- Difficulty Level: If piping intimidates you, you can spread frosting first and use a toothpick to shape the designs slowly – it’s all about having fun!
How to Make Intestine & Brain Cupcakes Recipe
Step 1: Bake Your Cupcakes to Perfection
Start by preparing your cupcake batter as directed by your favorite recipe or box instructions. I recommend lining your muffin pan with black baking liners — it really makes the colors of the decorations pop. Bake your cupcakes, then cool them completely to room temperature. This is key because frosting warm cupcakes can melt your work and muddy the effect.
Step 2: Tint Your Frosting with Precision
Mix your creamy white decorator icing with the gel and liquid colorings to create the shades needed: one cup tinted peach (blend creamy peach and brown) for the brains, and another cup in dark red (combine red-red, rose, and brown) for the intestines. You’ll want the colors to look natural yet vibrant, so take your time layering colors gradually, especially the brown for subtle shading.
Step 3: Prepare Your Piping Bags and Tips
Grab three piping bags: one fitted with tip 4 filled with peach brain icing, another with tip 1A also peach for finer brain details, and the last with tip 8 loaded with your dark red intestines color. Getting organized here saves so much stress when it’s time to decorate!
Step 4: Smooth White Base Icing
Using a tapered spatula, apply a smooth layer of creamy white icing to each cupcake. This neutral background lets the intricate brain and intestine designs stand out perfectly.
Step 5: Pipe the Brains
On half of the cupcakes, pipe a rounded 1 1/4-inch oval mound in the center using tip 1A with peach icing. Then, outline each half of the brain with tip 4, and fill in with zig-zag patterns to mimic the brain folds. This is where patience pays off — don’t rush and enjoy piping these little ridges; it’s oddly relaxing!
Step 6: Create the Intestines
On the remaining cupcakes, use your tip 8 and dark red icing to pipe continuous elongated beads that loop and overlap, resembling squiggly intestines. Work slowly so your loops look natural and a little messy — that’s the charm! Chill the cupcakes afterward until the icing firms up.
Step 7: Add a Glossy Blood-Red Finish
Mix half a cup of piping gel with red-red and a touch of brown coloring to make a deep, blood-red glaze. Use a small brush to apply the gel over the intestine piping for a realistic shine and wet look. This little step takes your cupcakes from cute to fabulously gory!
Pro Tips for Making Intestine & Brain Cupcakes Recipe
- Color Blending: When mixing colors, add a tiny amount of brown gradually to get just the right tone—it’s easier to darken than lighten.
- Piping Patience: Don’t rush the piping detail; I found that slowing down really helps the folds and loops look natural and distinct.
- Use Sturdy Liners: Black liners not only enhance the spooky vibe but also hold up better against moist batters, preventing leaks.
- Chill Between Steps: After applying the base icing and after piping, chilling your cupcakes helps keep the shapes sharp and prevents smudging.
How to Serve Intestine & Brain Cupcakes Recipe
Garnishes
While the piping provides bold visuals, I sometimes sprinkle a pinch of edible glitter on the brains for an eerie, wet sheen effect. For the intestines, a light dusting of cocoa powder adds depth to the glazing and a touch of earthy flavor that surprises guests.
Side Dishes
I love pairing these cupcakes with simple sides like fresh fruit or a crisp green salad to balance the richness. For Halloween parties, I also serve them alongside a “potion” punch or some spooky-themed drinks — it turns the whole event into a feast for the eyes and palate.
Creative Ways to Present
For Halloween, I place them on cake stands lined with faux spider webs and decorate the table with anatomy charts or skeleton props to amp up the theme. Once, I gave each cupcake a tiny edible “label” on a toothpick, naming each “organ,” which was a huge hit with kids and adults alike.
Make Ahead and Storage
Storing Leftovers
These cupcakes store beautifully in an airtight container at room temperature for up to 2 days. I usually keep them out of direct sunlight to avoid frosting melting or colors fading, especially given the delicate detailing.
Freezing
If you want to make these ahead of time, you can freeze the plain cupcakes without frosting, wrapped tightly in plastic wrap and foil. Frost and decorate after thawing overnight in the fridge; this ensures your piped details stay fresh and crisp.
Reheating
Generally, these are best enjoyed at room temperature, so I let leftovers sit out for about 20 minutes before serving to soften slightly. Avoid microwaving since the frosting can melt and lose its artistic look.
FAQs
-
Can I use a store-bought frosting for the Intestine & Brain Cupcakes Recipe?
Absolutely! Store-bought creamy white decorator frosting works great as a base. Just make sure it’s thick enough to hold the piped shapes well — if it feels too runny, chilling it slightly or adding powdered sugar can help stiffen it.
-
How long does it usually take to decorate all 24 cupcakes?
Plan for about 1 to 1.5 hours of decorating time once your cupcakes are baked and cooled — it’s a patient process, but so worth it when you see the final results!
-
Can I make the look less scary for kids?
Definitely! Try using softer pastel colors or add cute edible eyes on the cupcakes to make the brains and intestines look friendlier and more cartoonish.
-
What should I do if my piping gel is too thick?
If your piping gel feels too thick to brush on smoothly, gently warm it up a bit or mix in a tiny drop of water until it spreads easily without losing color intensity.
Final Thoughts
This Intestine & Brain Cupcakes Recipe holds a special place in my heart because it combines a little bit of art, a touch of whimsy, and a lot of fun in the kitchen. I love how it challenges me creatively without being overwhelming, and it’s always a blast watching friends’ reactions when they see these edible “organs”. Give it a try — you’ll impress everyone and have a fantastic time doing it.
Print
Intestine & Brain Cupcakes Recipe
- Prep Time: 1 hr
- Cook Time: 30 min
- Total Time: 3 hr 30 min
- Yield: 24 cupcakes
- Category: Baking
- Method: Baking
- Cuisine: American
Description
Create creepy and delicious Intestine & Brain Cupcakes perfect for Halloween or themed parties. These spooky cupcakes feature intricately piped brain shapes and squiggly intestines using tinted icing and gel colors, adding a fun and eerie touch to your dessert table.
Ingredients
Cupcakes
- Favorite cupcake recipe or box mix (enough for 2 batches / 24 cupcakes)
For Frosting and Decoration
- Creamy White Decorator Icing, 4 lb. Tub
- Rose Icing Color Pink Food Coloring, 1 oz.
- Rose Gel Food Coloring, 1 oz.
- Red-Red Icing Color, 1 oz.
- Red-Red Gel Food Coloring, 1 oz.
- Brown Food Coloring Icing Color, 1 oz.
- Brown Gel Food Coloring, 1 oz.
- Creamy Peach Icing Color, 1 oz.
- Creamy Peach Gel Food Coloring, 1 oz.
- 1/2 cup Piping Gel
Instructions
- Bake Cupcakes: Prepare the cupcakes according to your favorite cake recipe or box mix instructions. Line a muffin pan with black baking liners, fill each with batter, then bake as directed. Once baked, cool the cupcakes completely to room temperature before decorating.
- Prepare Tinted Frosting: Tint 1 cup of white icing by combining creamy peach icing color and brown food coloring to create the peach color used for the brains. Tint another 1 cup of white icing mixing red-red, rose, and brown food colors to achieve a dark red color for the intestines.
- Set Up Decorating Bags: Prepare three piping bags: one with tip 4 filled with peach brain color icing, one with tip 1A also with peach brain color icing, and one with tip 8 filled with the dark red intestine color icing.
- Ice Cupcakes Base: Using a tapered spatula and the creamy white icing, spread a smooth, even layer of icing over each cupcake as the base coat.
- Pipe Brains: On half of the cupcakes, use the tip 1A and peach icing to pipe a 1 1/4-inch oval-shaped rounded mound in the center to form the brain shape. Outline each half of the brain with tip 4 and peach icing, then fill the surface with zigzag piping strokes to simulate brain folds.
- Pipe Intestines: On the remaining cupcakes, use tip 8 and the dark red intestine icing to pipe continuous elongated beads forming overlapping loops that resemble slightly squiggly intestinal lines.
- Chill Cupcakes: Refrigerate the cupcakes to allow the icing to firm up before applying the decorative gel.
- Prepare Blood Gel: Mix 1/2 cup of piping gel with red-red and a touch of brown icing colors to create a dark, blood-red gel.
- Apply Blood Gel: Use a small brush to carefully paint the blood-red gel over the piped intestines, adding a glossy, gory finish to the cupcakes.
Notes
- Use black baking liners to enhance the spooky look of the cupcakes.
- Allow cupcakes to cool completely before icing to prevent melting.
- Different piping tips create the distinct textures for brains and intestines; ensure you have tips 1A, 4, and 8 ready.
- Chill cupcakes before applying piping gel to avoid smearing the colors.
- For best results, use gel food coloring for more vibrant colors that won’t thin the icing.
Nutrition
- Serving Size: 1 cupcake
- Calories: 320
- Sugar: 28g
- Sodium: 150mg
- Fat: 15g
- Saturated Fat: 7g
- Unsaturated Fat: 6g
- Trans Fat: 0g
- Carbohydrates: 42g
- Fiber: 1g
- Protein: 3g
- Cholesterol: 40mg