If you’re looking for a fun, festive activity that even the littlest bakers can tackle without a hitch, I absolutely recommend this Kid-Easy Halloween Cookie House Recipe. It’s one of those delightful projects where kids get to unleash their creativity, and you get a spectacularly cute—and delicious—Halloween centerpiece to show for it. Trust me, between the chocolatey cookie walls and colorful candy decorations, this recipe is a total winner for Halloween parties or simply a cozy afternoon of kitchen fun!
Why You’ll Love This Recipe
- Super Simple for Kids: The decorating kit makes it easy for little hands to create a spooky masterpiece without frustration.
- Built-In Creativity: Kids get to pick and choose candy decorations, so no two houses look the same—that personal touch shines.
- Festive and Functional: Not only does it look amazing on your Halloween table, but it’s also a tasty treat everyone can enjoy afterward.
- Minimal Prep Time: Thanks to the ready-to-decorate kit and simple icing steps, you can get this done quickly even on a busy day.

Ingredients You’ll Need
Everything you need for this Kid-Easy Halloween Cookie House Recipe is conveniently bundled in a decorating kit, which is a lifesaver when you want something quick and foolproof. The best part is, the components complement each other perfectly to create that spooky, chocolatey vibe we all crave in October.
- Ready-to-Decorate Halloween Chocolate Cookie House Decorating Kit: This comes with pre-baked cookies shaped as house parts and some basic icing—perfect for minimal mess and stress.
- Black Sanding Sugar: Adds a subtle sparkle and eerie feel to your base—great for that spooky Halloween effect.
- Gray Icing: Used for outlining windows and doors; very versatile and easy for kids to pipe.
- Purple Icing: Perfect for roofing—using the back of a spoon to spread it adds texture and fun).
- Black Tube Icing: Ideal for outlining spider webs to give your house a creepy-cool look.
- Yellow Fondant: I love rolling this into little doorknobs and decorative logs—it adds a cute 3D effect.
- Assorted Candy Decorations: Think colorful candies that stick well with icing; they bring the house to life!
Variations
While I adore this kid-easy version as is, I like to mix things up based on the kids’ mood or dietary preferences. It’s super flexible, which means you can easily swap out candies or icing colors to match your vibe—or even simplify for tiny hands.
- Gluten-Free: I once used a gluten-free cookie kit when a friend visited, and it worked beautifully without any difference in sturdiness.
- Vegan-Friendly: Swap out traditional fondant and icing for plant-based varieties—I found that many stores now carry vegan decorating supplies that work just as well.
- Extra Spooky: Add edible googly eyes and licorice “spiders” for an extra creepy house—it got my nephews squealing with delight.
- Simpler Version: If you want to keep it super easy, just decorate the cookie walls and enjoy as oversized Halloween cookies instead of building the house structure.
How to Make Kid-Easy Halloween Cookie House Recipe
Step 1: Prepare Your Icing and Decorating Bags
To get started, grab the gray icing from your kit and squeeze it into a decorating bag with a small round tip. I always double-knot mine so it doesn’t leak, and it makes outlining edges way easier for kids to manage. This step sets you up well for all the pretty detailing later on.
Step 2: Outline Doors and Windows
Use the gray icing and your decorating bag to carefully outline the door, windows, and even the little windowpanes. I find these outlines give your cookie house structure and separate areas for candy decorating. Then, roll tiny yellow fondant balls for doorknobs and stick them on with a dab of icing—you’re already making the house come alive!
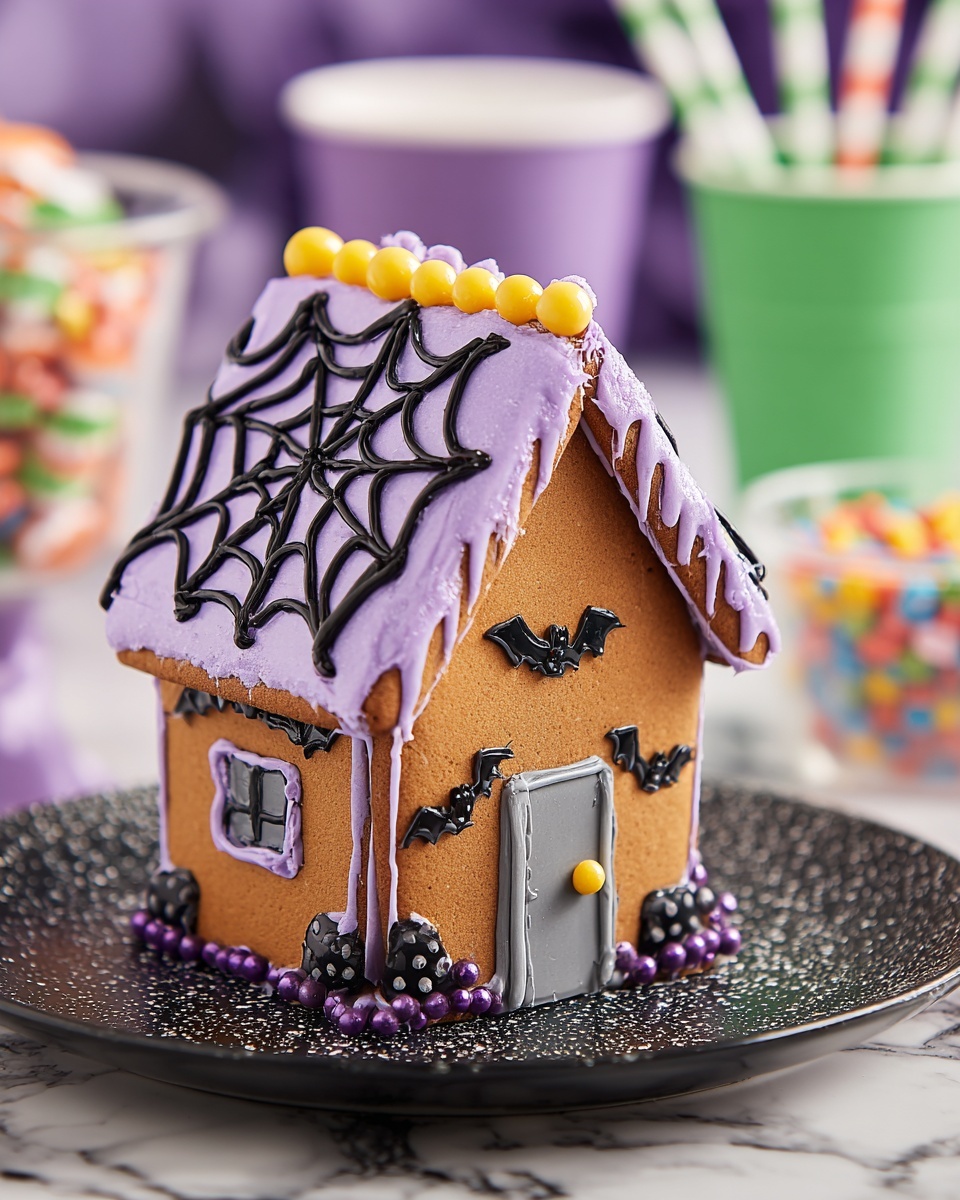
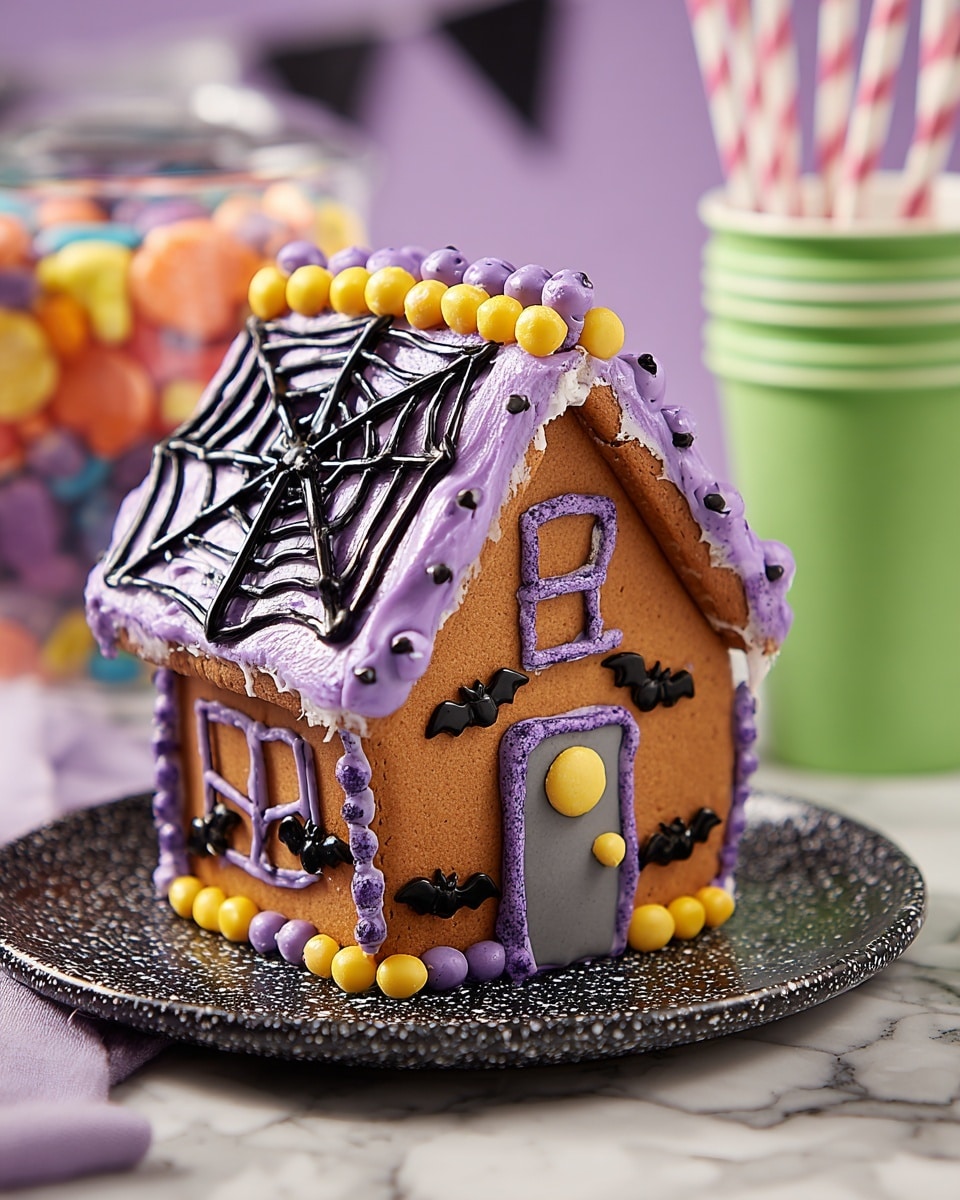
Step 3: Decorate the Roof
This is my favorite part! I use purple icing and the back of a spoon to spread it across the roof pieces—it creates a lovely textured look that’s way easier to get even than piping. Once the base is done, outline a spider web using black tube icing for a spooky vibe. Don’t forget to stick on plenty of candy here; it’s the perfect candy canvas. For a sweet finishing touch, roll a yellow fondant log and secure it at the roof’s peak with icing—it adds a charming bit of detail kids love.
Step 4: Add Finishing Touches to the Front of the House
Again with the black tube icing, outline a spider web on the front wall—and then the fun part: attach colorful candy pieces wherever you like. Kids especially enjoy this because they can really make the house their own with their candy choices. I like to suggest a mix of bright and dark candies to keep things interesting and Halloween-appropriate.
Step 5: Optional Base Decoration
If you want to go the extra mile, use a spoon to spread icing over the base where the house will sit, then sprinkle some black sanding sugar on top for that eerie, sparkling ground effect. It’s totally optional but adds an extra wow factor, especially for younger kids proud of their handiwork.
Pro Tips for Making Kid-Easy Halloween Cookie House Recipe
- Get Your Workspace Ready: Lay out all decorations and icing before starting—it keeps kiddos focused and minimizes waiting time.
- Use Gentle Pressure When Piping: I noticed when kids squeeze too hard, the icing goes everywhere. Show them how just a little can make big designs.
- Patience Is Key: Let each decorated section dry for a few minutes before moving on, especially before adding heavier candies on the roof or walls.
- Avoid Overloading with Candy: Too much candy makes assembling tricky; I recommend a balanced approach for both looks and stability.
How to Serve Kid-Easy Halloween Cookie House Recipe
Garnishes
I like to dust a tiny bit of powdered sugar or edible glitter over the finished house for a magical dusk effect—totally optional, but it makes the cookie house look so enchanting under Halloween party lights. You can also add small plastic pumpkins or candy corn around it to create an entire Halloween scene.
Side Dishes
This cookie house pairs perfectly with warm drinks like hot chocolate or spiced apple cider—great for cozying up with family while you admire your cookie masterpiece and nibble a bit. I’ve also served it alongside simple popcorn balls for an all-around Halloween snack spread.
Creative Ways to Present
One year, I placed our cookie house on a large cake board lined with crushed Oreo crumbs for a “dark earth” effect and surrounded it with mini candy pumpkins and edible spider rings. It totally wowed the kids at the party! You might also build a little spooky village by lining up several houses in different decorating styles.
Make Ahead and Storage
Storing Leftovers
Once fully assembled and decorated, you can store the cookie house at room temperature in an airtight container for a couple of days. I’ve found it stays fresh and the candies remain nice and firm if kept out of direct sunlight and heat.
Freezing
Freezing assembled cookie houses isn’t something I recommend because the delicate candies and icing might crack or weep upon thawing. However, if you want to freeze the cookie pieces before decorating, that works great—just thaw fully before assembling.
Reheating
Since it’s a cookie house, reheating isn’t necessary—but if the cookies do get a bit stale, a quick 5-10 seconds in the microwave (without decoration) can revive some chewiness. Just be careful not to melt your hard-earned candy art!
FAQs
-
Can very young kids help with this Kid-Easy Halloween Cookie House Recipe?
Absolutely! The decorating kit and pre-made cookies make it accessible for kids as young as 3 or 4, though they’ll need some supervision with piping and handling small candies. I’ve found that involving little kids in rolling fondant balls or sticking candies is a fun and safe way to participate.
-
What if some candy won’t stick to the icing?
This can happen if the icing isn’t tacky enough. Try adding a fresh dab of icing as “glue” before pressing candy down, and make sure the icing hasn’t dried out too much. A slightly warm spoon can help smooth the icing for better adhesion.
-
Can I make the cookie house ahead of time?
You can prepare and decorate the house up to a day in advance. Store it in an airtight container at room temperature to keep cookies crisp and decorations intact. Avoid refrigeration as it can cause the icing to soften and candies to sweat.
-
What other themes work with this cookie house kit?
While this kit is Halloween-themed, you can repurpose the same idea for other holidays using different icing colors and candy decorations—think Christmas, Easter, or birthday themes for year-round fun.
Final Thoughts
I honestly love this Kid-Easy Halloween Cookie House Recipe because it brings the whole family around the kitchen table, sharing laughs, creativity, and a little friendly competition for who decorates the spookiest roof. I used to struggle to find Halloween activities that entertained my kids and made a great party addition, and this hands-down became our go-to. So grab a kit, pull up some chairs, and get ready for a sweet Halloween tradition you’ll look forward to year after year.
Print
Kid-Easy Halloween Cookie House Recipe
- Prep Time: 10 minutes
- Cook Time: 0 minutes
- Total Time: 10 minutes
- Yield: 1 decorated cookie house
- Category: Dessert
- Method: No-Cook
- Cuisine: American
Description
Create a spooky and fun Halloween-themed chocolate cookie house using a ready-to-decorate kit. This kid-friendly recipe involves simple decorating steps using various icings, fondant, and candy to build an eye-catching edible Halloween house perfect for seasonal festivities.
Ingredients
Decorating Kit Supplies
- Ready-to-Decorate Halloween Chocolate Cookie House Decorating Kit
- Black Sanding Sugar, 3.25 oz.
- Gray Icing
- Purple Icing
- Black Tube Icing
- Yellow Fondant
- Various Candy Pieces (for decoration)
Instructions
- Prepare Icing: Place the gray icing into a decorating bag fitted with a tip to allow for precise piping during decoration.
- Decorate Door and Windows: Using the gray icing in the decorating bag, carefully outline the door, windows, and windowpanes on the cookie house. Roll a small ball of yellow fondant to create a doorknob and attach it securely with icing. Add candy pieces as additional decoration around these areas.
- Decorate Roof: Apply purple icing to the roof using the back of a spoon for an even spread. Use black tube icing to pipe an outline of a spider web design across the roof surface. Attach more candy for visual interest. Roll a log shape from the yellow fondant and affix it to the roof peak with icing. Add further candies to complete the look.
- Decorate Front of House: Pipe another spider web outline on the front of the house with black tube icing. Adorn with candy pieces to amplify the spooky theme.
- Optional – Decorate Base: Use a spoon to spread icing on the base platform of the house and sprinkle black sanding sugar or other decorative sugar on top. This step enhances the overall presentation of the cookie house display.
Notes
- The kit includes most of the structural cookie components, so no baking is required.
- Use a gentle hand when piping to ensure clean outlines and details.
- Fondant can be softened by kneading to make shaping easier for small details like doorknobs and logs.
- Feel free to customize the candy decorations to your preference for a unique look.
- Adult supervision may be helpful for younger kids during decorating.
Nutrition
- Serving Size: 1 house
- Calories: 450
- Sugar: 40g
- Sodium: 200mg
- Fat: 20g
- Saturated Fat: 8g
- Unsaturated Fat: 10g
- Trans Fat: 0g
- Carbohydrates: 65g
- Fiber: 3g
- Protein: 3g
- Cholesterol: 15mg