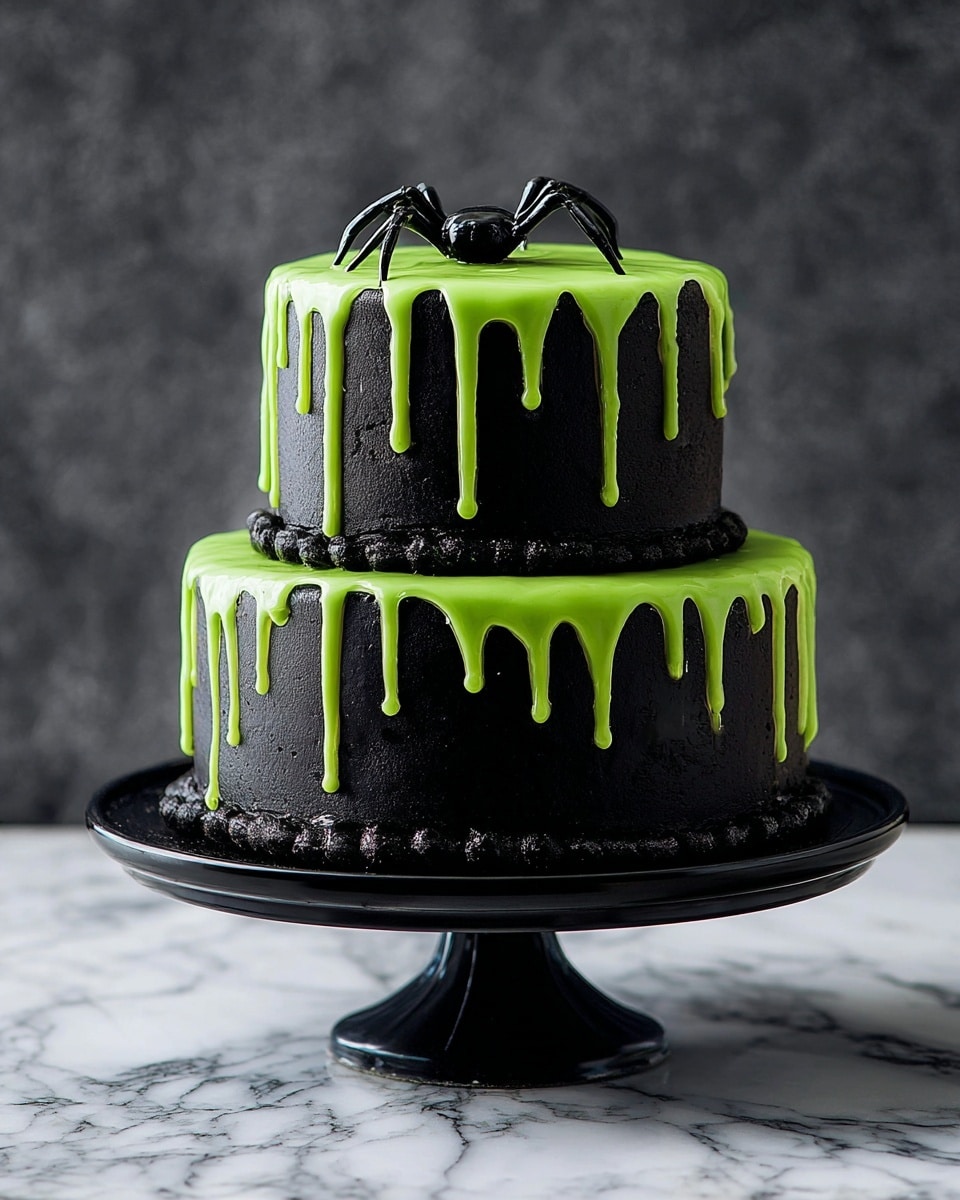
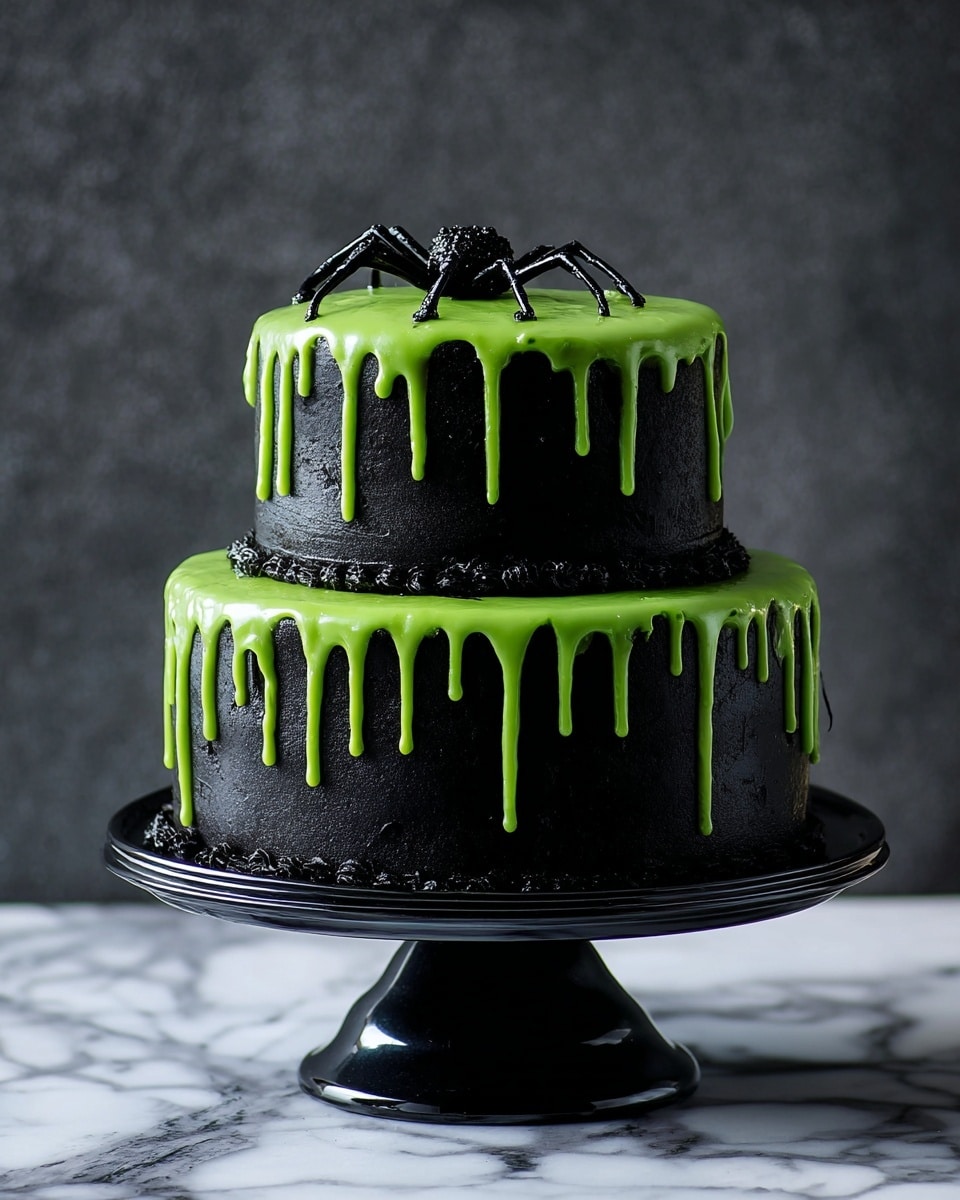
If you’ve been on the hunt for a showstopper dessert that’s both spooky and scrumptious, I’ve got just the thing for you. This Dreadful Drip Cake Recipe is hands-down one of my favorite festive treats – perfect for Halloween or any time you want to impress with some eerie elegance. It’s got that killer black icing, a wickedly smooth green drip, and a velvety buttercream that will have your friends begging for the secret. Trust me, this isn’t just a cake; it’s an experience you’ll want to make again and again.
Why You’ll Love This Recipe
- Dramatic yet Simple: You’ll love how this cake looks elaborate but is actually straightforward to make.
- Perfect Texture Combo: The soft Victoria sponge paired with silky buttercream and glossy drip creates amazing layers you’ll savor.
- Kid-Friendly Fun: The green drip icing sparks delight in kids and adults alike without scary tastes or weird ingredients.
- Customizable: You can easily tweak colors and decorations to match your party theme or personal flair.

Ingredients You’ll Need
The magic of this Dreadful Drip Cake Recipe lies in the harmony of a few simple ingredients – premium sponges paired with a rich buttercream, black ready-to-roll icing, and a luscious green drip that steals the show. Using ready-made black icing saves you time and achieves a flawless finish every single time.
- Tesco Finest Victoria sponges: Using store-bought sponges helps you skip baking time but still get that moist, classic vanilla flavor.
- Unsalted butter: Make sure it’s softened to room temperature for smooth, creamy buttercream.
- Icing sugar: Sifted for a silky texture that blends effortlessly with butter.
- Ready-to-roll black icing: Essential for the rich, jet-black exterior; rolling it out on nonstick baking paper is a must.
- White chocolate: Use finely chopped for easy melting in the drip icing.
- Double cream: Heats up the chocolate for that perfect creamy drip consistency.
- Green gel food colour: Gives that eerie, vibrant shade without thinning out the icing.
Variations
I love making this Dreadful Drip Cake Recipe my own by switching up colors and layering in different flavors—it invites your creativity and lets you embrace your personal style while sticking to the core technique.
- Flavor swap: I once added a hint of raspberry jam in the buttercream for a tangy surprise that went perfectly with the vanilla sponge.
- Color changes: Try a neon purple or blood-red drip instead of green for a totally different creepy vibe.
- Dairy-free option: Swap butter and cream with coconut-based alternatives; just be sure to use compatible icing brands.
- Smaller cakes: Make mini versions for party favors or a fun cupcake lineup with matching drip icing.
How to Make Dreadful Drip Cake Recipe
Step 1: Prepare the Sponges and Buttercream Cover
Start by placing one Tesco Finest Victoria sponge on a 22cm cake board (pro tip: wrap the board in black icing or parchment paper to keep things tidy). Take the second sponge and cut it down to a 10cm diameter—this smaller circle will crown your cake later. Next, whip up the buttercream by gently beating softened butter with sifted icing sugar until it’s fluffy yet firm enough to hold its shape. Spread a smooth layer over both sponges separately using an offset spatula or palette knife. This crumb coat helps seal in crumbs and creates a clean canvas for the black icing.
Step 2: Cover Your Cakes with Black Icing
Roll out about 120g of the black ready-to-roll icing into a 17cm circle on nonstick baking paper. Lightly brush the backside with a tiny bit of cold water—don’t go heavy here or it gets sticky. Carefully lay it over the larger sponge, wet side down, and trim away any extra icing from the edges (save those trimmings for later). Next, measure your cake’s height and circumference and roll out a matching rectangle of black icing to wrap around the cake sides. Apply water sparingly to help the icing stick without dissolving. Smooth everything gently with a cake smoother or your hands; this step takes patience, but you’ll get a perfect satin-like finish. Repeat the same process for the smaller sponge but roll the top icing to a neat 10cm circle.
Step 3: Prepare the Green Drip Icing
Place the finely chopped white chocolate in a heatproof bowl. Warm the double cream on the stove just until bubbles begin to form around the edge—don’t let it boil or scorch. Pour the hot cream straight over the chocolate and stir gently until smooth and creamy. Let it cool for five minutes, then blend in the green gel food coloring until it reaches a bright, even hue. Allow the mixture to cool to just below room temperature; if it’s too warm, it’ll run off too quickly, and if it’s too cold, it won’t drip properly.
Step 4: Apply the Drip and Assemble
Pour or pipe the green drip icing carefully over the top edge of both cakes, letting it elegantly trickle down the sides. Don’t rush this—slow and steady drips look more natural and dramatic! Once the drip sets slightly, place the smaller sponge atop the larger one at the center, pressing gently to secure. If you find your cake a bit unstable, use a skewer to anchor both layers in place. At this point, you can dust a little extra icing sugar around the base for a ghostly touch or add some edible glitter if you want to get fancy.
Pro Tips for Making Dreadful Drip Cake Recipe
- Buttercream Softness: Always ensure your butter is at room temp for easily whipped, smooth buttercream—cold butter will clump the icing.
- Water Use for Icing: Use a barely damp brush when sticking icing to avoid puckering or melting the surface.
- Drip Consistency: If your drip is too runny, refrigerate briefly to thicken; if too thick, add a splash more cream to loosen.
- Layer Stability: Using a skewer to hold layers steady can save disaster during display or transport.
How to Serve Dreadful Drip Cake Recipe
Garnishes
I like to finish my Dreadful Drip Cake with some subtle garnishes—think edible blackberries or a sprinkle of edible silver dust for that mystical vibe. Sometimes I add a few stylish Halloween picks or spiderweb sugar decorations to keep it playful and spooky without overwhelming the design.
Side Dishes
This cake pairs beautifully with a scoop of vanilla bean ice cream or a dollop of lightly whipped cream to balance the richness. For drinks, a strong black coffee or berry-infused iced tea complements the flavors wonderfully, especially when serving a crowd.
Creative Ways to Present
Hosting a Halloween party? Place the cake on a black slate board surrounded by faux spider webs and candles for maximum effect. I’ve also served mini versions with themed cake toppers on a tiered stand for a fun dessert buffet that gets lots of oohs and aahs.
Make Ahead and Storage
Storing Leftovers
I store leftover Dreadful Drip Cake in an airtight cake container in the fridge to keep the buttercream fresh and the drip shiny. I find it tastes even better after a day when all the flavors mellow and meld.
Freezing
If you want to freeze it, slice into individual servings first and wrap each piece tightly in plastic wrap and foil. This helps maintain texture, and when thawed overnight in the fridge, the cake stays delicious without sogginess.
Reheating
I usually don’t reheat this one because it’s best served cool, but if you prefer a softer buttercream feel, leave slices at room temperature for 30 minutes before serving – that lets the textures settle perfectly.
FAQs
-
Can I bake my own sponge cakes instead of using store-bought ones?
Absolutely! Using homemade Victoria sponge cakes can add a more personal touch and extra freshness. Just make sure they are fully cooled and level before applying buttercream and icing to prevent any uneven layers.
-
How do I prevent the green drip from melting the black icing?
Let your drip icing cool to just below room temperature before applying. Hot drip can cause the black icing to soften or melt. Applying the drip slowly and in small amounts also helps maintain crisp lines.
-
Can I make this cake vegan or dairy-free?
Yes, with some swaps! Use dairy-free butter and coconut cream instead of regular butter and cream. Also, look for vegan-ready-to-roll icing and dairy-free white chocolate alternatives to keep the drip effect.
-
What if my drip is not dripping?
If your chocolate drip is too thick and won’t drip properly, warm it gently to loosen it slightly or add a teaspoon of cream to achieve the right consistency so it drips smoothly down the sides.
-
Can I prepare this cake in advance?
You sure can! I often assemble the cake a day ahead and let it chill in the fridge, which helps the layers marry beautifully. Just add any delicate garnishes right before serving for best results.
Final Thoughts
This Dreadful Drip Cake Recipe holds a special place in my kitchen – it’s one of those recipes that brings a little theatrical flair without being intimidating. Whether you’re hosting a Halloween bash or just want to surprise your loved ones, the looks and tastes combine to create a memorable moment. Give it a whirl, trust the process, and enjoy the fun of making something delightfully dreadful in the best way possible!
Print
Dreadful Drip Cake Recipe
- Prep Time: 40 minutes
- Cook Time: 0 minutes
- Total Time: 50 minutes plus cooling time
- Yield: 16 servings
- Category: Cake
- Method: No-Cook
- Cuisine: British
Description
This dramatic Dreadful Drip Cake recipe features two Tesco Finest Victoria sponges layered with smooth buttercream and covered in sleek black icing. Finished with a vibrant green chocolate drip that cascades down the sides, this cake is both visually striking and delicious, perfect for Halloween or any themed celebration. The recipe includes clear instructions for assembling, covering, and decorating the cake to achieve a professional finish.
Ingredients
Cake and Buttercream
- 2 Tesco Finest Victoria sponges
- 150g unsalted butter
- 300g icing sugar, plus extra for dusting
- 2 x 250g packs ready-to-roll black icing
Drip Icing
- 300g white chocolate, finely chopped
- 150ml double cream
- 1 x 10g tube green gel food colour
Instructions
- Prepare the Sponges: Place one whole sponge cake on a 22cm cake board. Trim the second sponge to create a 10cm diameter round and set aside.
- Make Buttercream: In a bowl, gradually beat the unsalted butter with icing sugar until smooth and combined, creating a creamy buttercream.
- Buttercream Application: Spread the buttercream over both sponges separately, smoothing the surface with a palette knife to create an even coating.
- Cover Large Cake with Black Icing: Roll out approximately 120g of black ready-to-roll icing into a 17cm circle on nonstick baking paper. Lightly brush the icing surface with a little cold water and place it wet side down on the large cake, trimming any excess and reserving trimmings.
- Cover Sides of Large Cake: Measure the cake’s height and circumference, roll out a rectangle of black icing to match. Brush sparingly with water and adhere it to the side of the cake, smoothing by hand or with a cake smoother.
- Cover Small Cake: Roll out the remaining black icing to cover the small cake with a 10cm circle on top, applying the same water-brushing and smoothing technique.
- Prepare Drip Icing: Heat the double cream in a pan over medium heat just until bubbles form. Pour over finely chopped white chocolate in a heatproof bowl and stir until smooth. Let cool for 5 minutes, then stir in green gel food colouring until the icing is bright and evenly colored. Allow to cool further to near room temperature.
- Apply Green Drip: Pour or pipe the green chocolate icing over the cakes, allowing it to drip naturally down the sides for a dramatic effect. Let the drip set slightly.
- Assemble Cake: Place the smaller iced cake on top of the larger one. If needed, use a skewer to hold the cakes securely in place.
Notes
- Cover the cake board with icing to create a neat presentation.
- Brush water sparingly on icing to avoid melting it.
- Use a palette knife or cake smoother to get a clean, smooth finish on buttercream and icing.
- Let the drip icing cool to near room temperature before pouring to avoid melting the black icing.
- A skewer can be used for extra stability when stacking cakes.
- This recipe serves 16 and requires cooling time before decorating.
Nutrition
- Serving Size: 1 slice (1/16 cake)
- Calories: 595 kcal
- Sugar: 71 g
- Sodium: 0.3 g
- Fat: 28 g
- Saturated Fat: 17 g
- Unsaturated Fat: Estimated 9 g
- Trans Fat: 0 g
- Carbohydrates: 83 g
- Fiber: 0.7 g
- Protein: 3.4 g
- Cholesterol: 55 mg

