
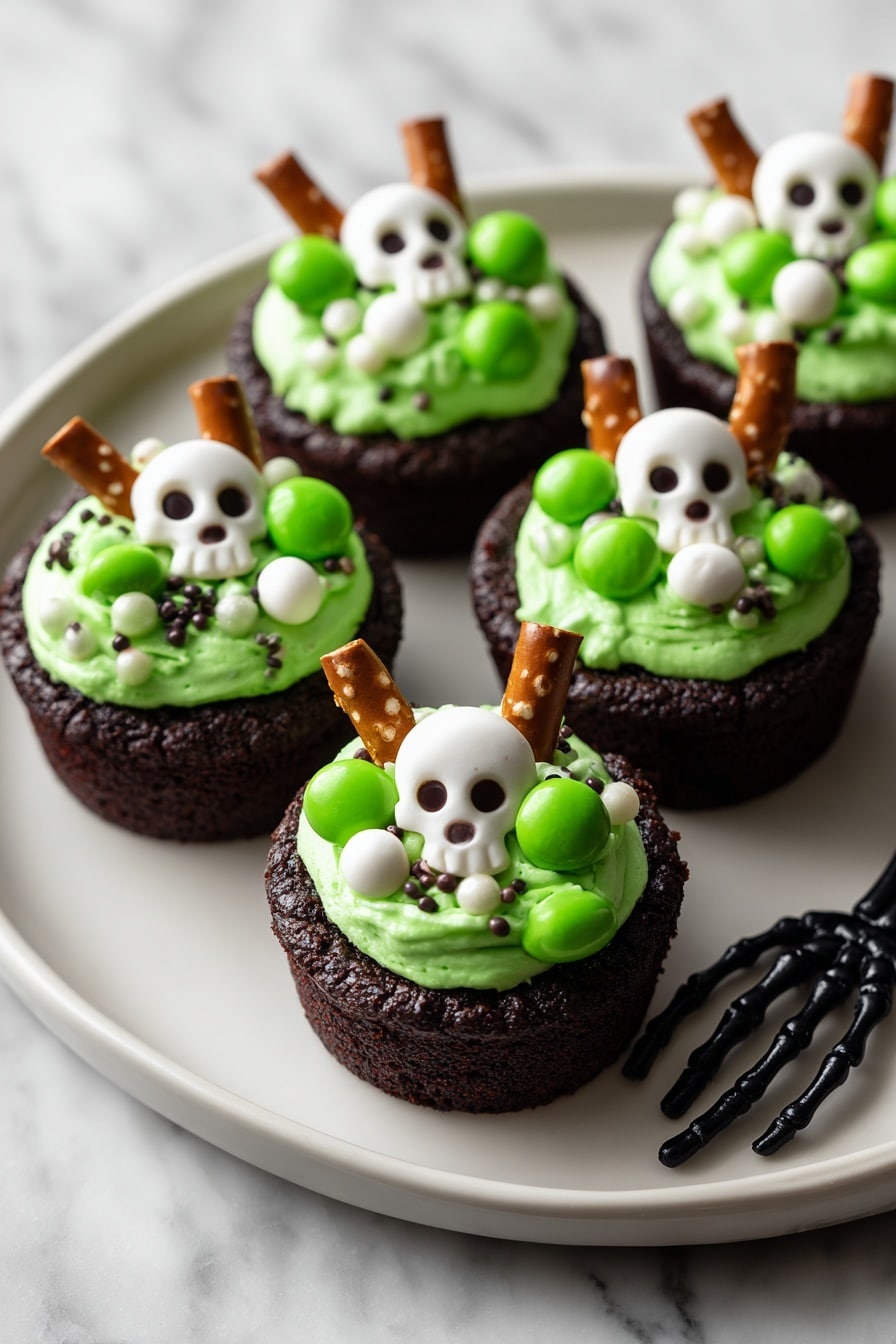
If you’re looking for a magical twist to your dessert lineup, you’ll absolutely enjoy this Cauldron Cookie Cups Recipe. It’s perfect for Halloween parties, themed gatherings, or just because you want a fun, whimsical treat that everyone will go crazy for. The combo of rich, fudgy cookie cups and creamy, vibrant green frosting is seriously fan-freaking-tastic, and I can’t wait to share all my tips with you so your batch turns out just right.
Why You’ll Love This Recipe
- Super Simple: Using a boxed cake mix makes these cookie cups quick and foolproof—plus, no weird ingredients needed.
- Fun & Festive: The green buttercream frosting and cute Halloween decorations make these a showstopper for parties.
- Customizable: You can easily adjust decoration or even the frosting color to suit your vibe or occasion.
- Kid-Friendly: My kids loved helping me press the dough and add sprinkles—it’s a fantastic family activity.

Ingredients You’ll Need
This recipe balances the rich chocolatey flavor of Devil’s Food cake mix with a silky, creamy buttercream that turns these cookie cups into little cauldrons bubbling with sweetness. Plus, the decorations bring them to life, making the whole thing a delight to prepare and devour.

- Devil’s Food cake mix: This is the base of your cookie cups, providing the deep chocolate flavor and structure needed.
- Eggs: Help bind everything together—make sure they’re room temperature for best results.
- Canola or vegetable oil: Adds moisture without overwhelming the chocolate flavor.
- Black food coloring (optional): If you want that super dark, spooky look for your cookie cups, a few drops go a long way.
- Unsalted butter: For the buttercream; soften it well so it creams easily.
- Powdered sugar: Gives the frosting its sweetness and structure.
- Vanilla extract: Just a teaspoon to add warmth and depth to your frosting.
- Salt: Balances the sweetness in the frosting.
- Milk: Adjust this to get the perfect buttercream consistency that’s smooth and pipeable.
- Green food coloring: For that witchy potion look in your frosting.
- Round green sprinkles, Halloween sprinkles, candy eyeballs, pretzel sticks: These decorations take your cauldron cookie cups from tasty to tempting—don’t skip these!
Variations
I love mixing things up with this Cauldron Cookie Cups Recipe—to make it truly your own, a little creativity goes a long way. Whether you’re after a vegan option or something extra spooky, you can customize it easily.
- Vegan Variation: Swap the eggs with flax eggs and use a dairy-free butter or margarine; just be sure to check the cake mix ingredients for any non-vegan additions.
- Flavor Twist: I once added a teaspoon of peppermint extract to the frosting for a surprising but delightful mint chocolate vibe—my guests couldn’t stop guessing!
- Color Fun: Try different food coloring shades—purple or orange frosting make great alternatives, especially if you want a different holiday feel.
- Decoration Swap: Move away from pretzel sticks and try edible glitter or candy canes for a winter twist.
How to Make Cauldron Cookie Cups Recipe
Step 1: Prep Your Mini Muffin Pans
Start by heating your oven to 350°F and lightly greasing three 12-count mini muffin pans. I like to use a non-stick spray, then give a quick dusting of flour to ensure the cookie cups release smoothly. If you’re pressed for time, silicone muffin pans are a forgiving alternative since nothing sticks!
Step 2: Mix Your Cauldron Cookie Dough
Grab a large bowl and combine your Devil’s Food cake mix, eggs, oil, and if you’re going for that dramatic look, a few drops of black food coloring. Mix just until blended—overmixing can make the dough tough, so keep it gentle. You’ll notice the batter is thicker than typical cake batter, which is perfect for forming sturdy cookie cups.
Step 3: Form and Bake the Cookie Cups
Scoop about half a tablespoon of dough into each muffin cup and flatten it gently with your fingers—this helps even baking and makes room for the filling later. Bake for 8 to 10 minutes until the edges are just set but the centers still look soft.
Don’t skip the next part: immediately after pulling the pans out of the oven, press the back of a tablespoon lightly into the warm cookie to make a little well. I discovered this trick really locks in that perfect cauldron shape that holds all your luscious frosting.
Set these aside and let them cool completely before decorating—that way your frosting stays neat and pretty.
Step 4: Whip Up Your Bubbling Frosting
While your cookie cups cool, start on the buttercream. Beat softened butter until creamy. Gradually add powdered sugar, vanilla, and salt—scrape the bowl down to keep the texture consistent. Add milk a bit at a time until the frosting is smooth and pipeable.
Then, stir in enough green food coloring to achieve that bubbling, witchy potion look I love so much. Feel free to experiment here; brighter greens give a playful vibe, while darker shades look a bit spooky and mysterious.
Step 5: Assemble and Decorate Your Cauldron Cookie Cups
Use a piping bag or just a zip-top bag with a corner snipped off to fill the cooled cookie cups generously with your green buttercream. Then comes the fun part—scatter round green sprinkles, candy eyeballs, and Halloween-themed sprinkles on top.
Break pretzel sticks in half and insert them like tiny stirring rods, giving your cauldrons that authentic bubbling effect. Watching this come together never gets old for me!
Pro Tips for Making Cauldron Cookie Cups Recipe
- Don’t Overbake: Pull the cookies out when edges are set but centers are still soft—remember, they’ll firm up and hold shape as they cool.
- Warm Dough Helps Shape: Pressing the indentation while cookie cups are still warm is key for getting that perfect cavity.
- Frosting Consistency: Adjust milk carefully—too much can make it runny, too little makes piping tricky. I like a frosting that holds its shape but is easy to spread or pipe.
- Store Properly: Keep finished cookie cups in an airtight container at room temp to preserve their softness, and don’t refrigerate unless you plan to eat within a week.
How to Serve Cauldron Cookie Cups Recipe
Garnishes
I’m a sucker for those candy eyeballs—they add so much character! I also love the mix of round green sprinkles and spooky Halloween confetti sprinkles for texture and fun. Pretzel sticks as stirrers not only look awesome but add a slight crunch and salty balance.
Side Dishes
If you’re serving these at a party, they pair beautifully with a simple glass of cold milk or a hot cup of spiced cider. For grown-ups, a vibrant berry cocktail or a smooth coffee works wonders against the sweetness.
Creative Ways to Present
For Halloween parties, I once placed the cookie cups on a bed of dry ice for that smoky, mystical effect—guests were amazed! You can also serve them on rustic wooden platters or inside Halloween-themed cupcake wrappers for easy grab-and-go magic.
Make Ahead and Storage
Storing Leftovers
I store leftover cookie cups in an airtight container at room temperature, and they stay soft and fresh for about 3 to 4 days. If I know we won’t eat them that fast, I pop the container in the fridge, where they last close to a week without losing flavor.
Freezing
The undecorated cookie cups freeze beautifully. I like to freeze them in a single layer on a baking sheet, then transfer to a freezer-safe bag or container. They keep for up to three months—perfect for prepping ahead of a party. Just thaw fully and frost when ready to serve.
Reheating
If you want to refresh the cookie cups after freezing, I gently warm them for 10-15 seconds in the microwave—just enough to take the chill off without melting the edges. Then pipe the frosting fresh so it looks as vibrant as when you first made it.
FAQs
-
Can I use a different cake mix for the Cauldron Cookie Cups Recipe?
Absolutely! While Devil’s Food cake mix gives the richest chocolate flavor, you can experiment with other flavors like red velvet, chocolate chip, or even spice cake to create unique cauldron cookie cups. Just keep in mind that the flavor and color may change accordingly.
-
How do I prevent the cookie cups from sticking to the pans?
Lightly grease your mini muffin pans with non-stick spray and consider a quick dusting of flour for ultimate release. Silicone pans are even easier because they’re naturally non-stick. Also, avoid overbaking since that can make the cookie cups adhere more firmly.
-
Can I make the frosting ahead of time for the Cauldron Cookie Cups Recipe?
Yes, you can make the buttercream frosting a day ahead. Store it covered tightly in the fridge and bring it to room temperature before using, then re-whip briefly to regain that smooth, pipeable texture.
-
What’s the best way to decorate if I don’t have candy eyeballs?
No worries! You can use small chocolate chips, mini M&Ms, or create eyes with white frosting and dots of chocolate for the pupils. Sprinkles and edible glitter also add fun textures and colors to keep your cauldrons looking spooky and festive.
Final Thoughts
I absolutely love how this Cauldron Cookie Cups Recipe brings a playful, magical vibe to any occasion. When I first tried making these, I was amazed by how simple ingredients come together to create something that feels special and whimsical. You’ll find that it’s a crowd-pleaser, a conversation starter, and a super fun baking project all rolled into one. Give it a go—you might just start a new tradition with these charming little cauldrons of deliciousness!
Print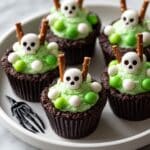
Cauldron Cookie Cups Recipe
- Prep Time: 20 minutes
- Cook Time: 8-10 minutes
- Total Time: 28-30 minutes
- Yield: 36 mini cookie cups
- Category: Dessert
- Method: Baking
- Cuisine: American
Description
These spooky Cauldron Cookie Cups are a fun and festive Halloween treat featuring rich devil’s food cookie cups filled with creamy green buttercream frosting and decorated with candy eyeballs, sprinkles, and pretzel stir sticks to resemble bubbling potions.
Ingredients
Cookies
- 1 (15.25 ounce) box Devil’s Food cake mix
- 2 large eggs
- 1/2 cup canola or vegetable oil
- Black food coloring (optional)
Frosting
- 1 cup unsalted butter, softened
- 3 cups powdered sugar
- 1 teaspoon vanilla extract
- 1/2 teaspoon salt
- 1-3 tablespoons milk
- Green food coloring
Decorations
- Round green sprinkles
- Halloween sprinkles
- Candy eyeballs
- Pretzel sticks
Instructions
- Prepare oven and pans: Preheat the oven to 350°F (175°C) and lightly grease three 12-count mini muffin pans to ensure the cookies do not stick.
- Mix cookie dough: In a large bowl, combine the Devil’s Food cake mix, eggs, canola oil, and black food coloring (if using). Stir until the mixture is fully incorporated and smooth.
- Form cookie cups: Scoop about 1/2 tablespoon of dough and place it into each cup of the mini muffin pans. Flatten the dough slightly with your fingers for even baking.
- Bake cookies: Bake the cookie dough in the preheated oven for 8-10 minutes, or until the edges are set but the centers remain soft.
- Create indentations: Remove the pan from the oven and immediately press the back of a 1 tablespoon measuring spoon into the center of each warm cookie to form a cup shape. Allow cookies to cool completely in the pans.
- Make buttercream frosting: In a medium bowl, beat the softened butter until creamy. Gradually add powdered sugar, then vanilla extract and salt, beating continuously until smooth. Add milk one tablespoon at a time until the frosting is smooth and pipeable. Mix in green food coloring until you achieve your preferred shade.
- Fill cookie cups: Once cookies are cool, pipe the green buttercream into the centers of each cookie cup to mimic bubbling potions.
- Decorate: Garnish each filled cookie cup with round green sprinkles, candy eyeballs, and festive Halloween sprinkles. Break pretzel sticks in half and insert one into each cookie cup to serve as a stir stick.
- Serve: Present your creative Cauldron Cookie Cups and enjoy the spooky treat!
Notes
- Store the decorated cookie cups in an airtight container at room temperature for 3-4 days to maintain freshness.
- You can refrigerate the cookie cups for up to a week if you prefer to keep them chilled.
- The undecorated cookie cups can be frozen for up to three months; thaw before frosting and decorating.
Nutrition
- Serving Size: 1 cookie cup
- Calories: 180
- Sugar: 16g
- Sodium: 110mg
- Fat: 10g
- Saturated Fat: 5g
- Unsaturated Fat: 4g
- Trans Fat: 0g
- Carbohydrates: 22g
- Fiber: 1g
- Protein: 1g
- Cholesterol: 25mg
