
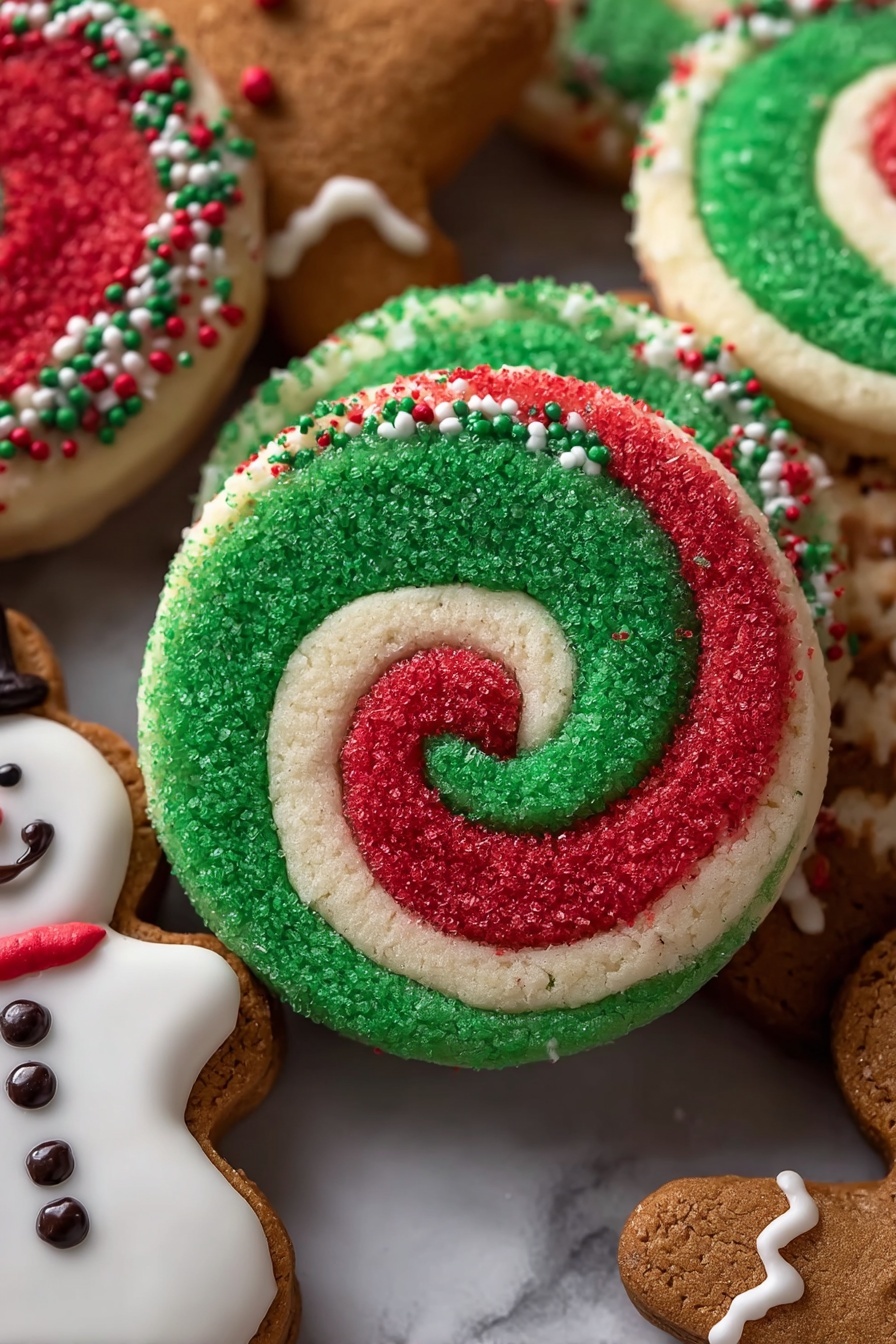
If you’re looking to wow everyone this holiday season, I’ve got just the thing for you: a Colorful Swirled Christmas Cookies Recipe that’s as fun to make as it is to eat. These swirled beauties bring a burst of festive red and green right to your kitchen, wrapped up in buttery, tender cookie dough that melts in your mouth. I absolutely love how these cookies look on the plate, and I promise, you’ll find that they taste even better than they look. Stick with me through this recipe, and by the end, you’ll be handing out gifts that everyone will talk about long after the holidays.
Why You’ll Love This Recipe
- Festive and Fun: The vibrant red and green swirls instantly brighten up your holiday cookie tray.
- Simple Yet Impressive: Despite looking fancy, this recipe is totally doable even if you’re not an expert baker.
- Perfect Texture: Soft, tender bites with a gentle snap make these cookies irresistible.
- Customizable: You can easily swap sprinkles or adjust colors to suit your style or dietary preferences.

Ingredients You’ll Need
All these ingredients blend harmoniously to give you the perfect texture and rich flavor. Plus, each one is easy to find at your regular grocery store. I’ve added some handy tips next to each to help you pick the best options for your cookies.
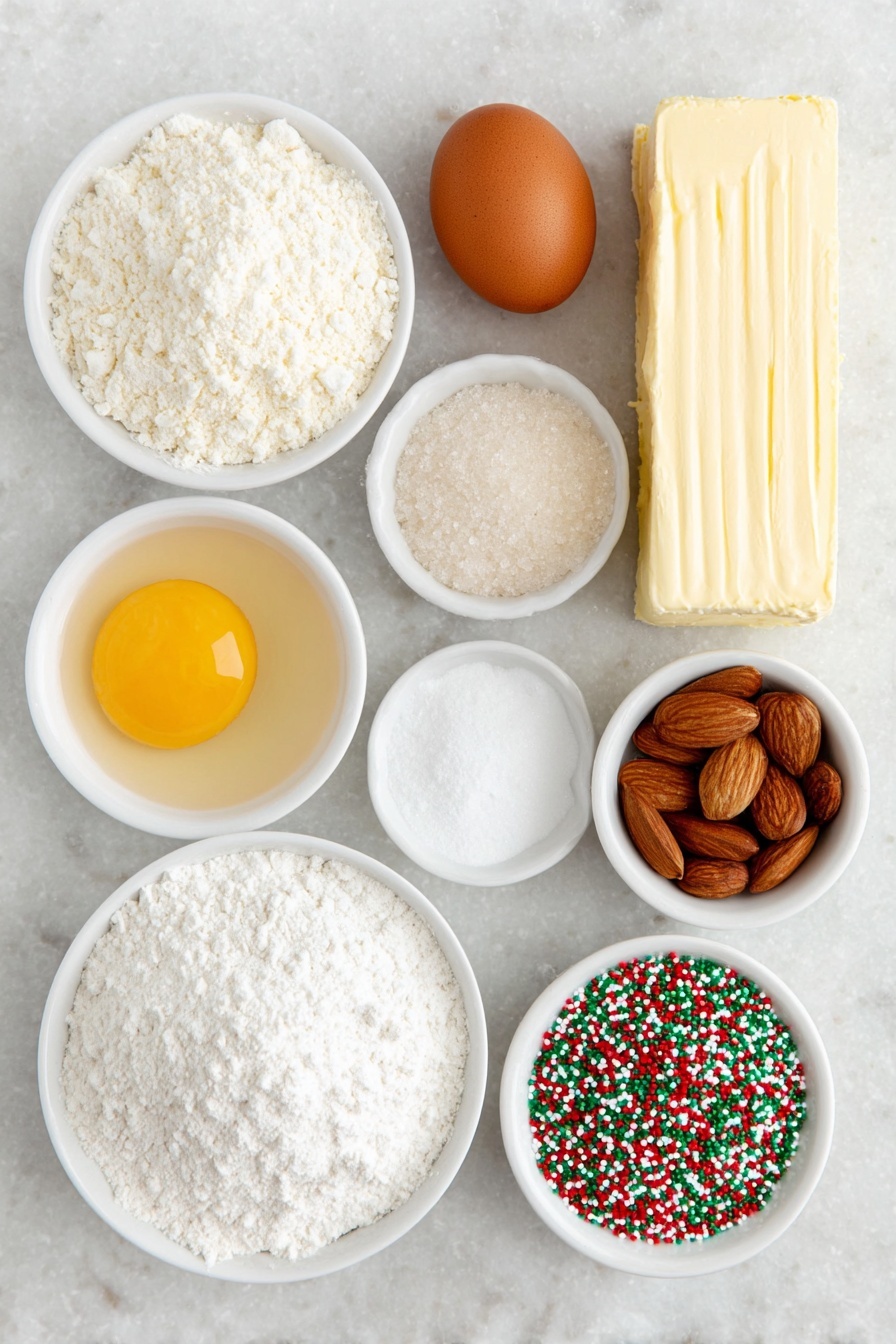
- Unsalted Butter: Use room temperature butter for smooth, creamy mixing and better texture.
- Granulated Sugar: Provides sweetness and helps create that tender crumb.
- Large Egg: Room temperature eggs mix better and add richness.
- Almond Extract: Adds a subtle nutty note that makes these cookies extra special.
- Vanilla Extract or Vanilla Bean Paste: Vanilla bean paste gives you those lovely specks and more depth, but plain extract works wonderfully too.
- All-purpose Flour: Make sure it’s fresh for the best rise and texture.
- Cornstarch: A secret weapon that keeps cookies tender and soft.
- Baking Powder: Helps the cookies rise perfectly without getting too fluffy.
- Fine Salt: Balances the sweetness and enhances the flavors.
- Christmas Sprinkles (nonpareils recommended): Adds joyful crunch and color around the edges.
- Red and Green Gel Food Coloring: Gel colors give vibrant hues without altering dough consistency.
Variations
I like to tweak this recipe depending on the occasion or what I have on hand. Don’t hesitate to make the Colorful Swirled Christmas Cookies Recipe your own by experimenting with flavors and decorating styles.
- Nut-Free Version: I’ve made this without almond extract for little ones with allergies—vanilla takes center stage beautifully.
- Different Colors: When Valentine’s Day rolls around, swapping red and green for pink and white is a fun twist that everyone loves.
- Gluten-Free Option: Using a 1:1 gluten-free flour blend works well, just be mindful of slight texture differences.
- Sprinkle-Free: If sprinkles aren’t your thing, try rolling the log in finely chopped nuts or coconut flakes for a different crunch.
How to Make Colorful Swirled Christmas Cookies Recipe
Step 1: Cream Butter and Sugar Until Fluffy
This step sets the stage for light, tender cookies. Using a stand mixer or handheld mixer, beat your softened unsalted butter with granulated sugar at medium-high speed. You’ll notice the color lighten and the texture become fluffier—this means air is incorporated into the dough, which helps the cookies stay soft after baking. It usually takes about 2 minutes, but be patient here; it makes a noticeable difference!
Step 2: Add Wet Ingredients and Mix
Once your butter-sugar mixture is light and fluffy, add the egg along with almond extract and vanilla (or vanilla bean paste). Mix on medium speed until everything’s incorporated and smooth. Don’t forget to scrape down the sides with a spatula to get all that goodness mixed evenly.
Step 3: Combine Dry Ingredients and Incorporate Slowly
Sift together your flour, cornstarch, baking powder, and salt before adding them to the wet ingredients. Turn the mixer to low speed and add the dry ingredients gradually. Mixing just until combined is key here — overmixing develops gluten, which can make cookies tough. Stop when you no longer see dry flour patches, scraping the bowl as needed.
Step 4: Divide and Color the Dough
Now the fun part! Divide your dough evenly into three portions. I weigh mine to keep them about the same size — roughly 10 ounces (305g) each — so the swirls are balanced. Leave one portion plain, then add red gel food coloring to one and green to the other. Mix each just until the color is evenly distributed, then flatten each dough ball into a rectangle (around 1/3 inch thick) before wrapping tightly in plastic wrap. This helps later when you roll out the layers.
Step 5: Chill the Dough Thoroughly
Chilling is essential. I often chill mine in the fridge for 30 minutes, but if you can spare an hour or even overnight, you’re golden. Cold dough makes rolling out easier and prevents spreading during baking. If chilling overnight, just let it soften on the counter for 5 minutes before rolling.
Step 6: Roll, Stack, and Form Your Swirls
Unwrap each dough portion and roll them out on a piece of plastic wrap to around 7×12 inches. We’re rolling on plastic wrap for easy cleanup and less mess. Next, stack the layers on a sheet of parchment paper: green on the bottom, plain in the middle, red on top. Gently roll over the stack with your rolling pin to ensure they stick together.
Trim uneven edges, then cut one long edge at an angle — I love this trick to make the spiral pop visually. Using the angled edge, roll the dough into a tight spiral log. Parchment helps here by letting you roll the dough onto itself smoothly. Seal the seam with your finger, spreading green dough at the joint for a neat finish.
Step 7: Coat with Sprinkles and Slice
Pour Christmas sprinkles on a rimmed baking sheet and roll the dough log gently to coat the outside completely. These add that festive crunch and extra flair. Using a sharp knife, slice the log into cookies about 1/3 inch thick. If the dough feels too soft or squishy, pop it in the fridge for 15-30 minutes to firm up—it’ll slice like a dream afterward.
Step 8: Bake to Perfection
Arrange your cookies at least an inch apart on lined baking sheets. Bake one sheet at a time in a preheated 350°F (175°C) oven for 12-14 minutes. Rotate the pan halfway through to make sure they brown evenly. The moment those edges get a hint of golden and the centers look set (but still soft) is when you take them out. They’ll crisp up as they cool, so don’t be tempted to bake them until brown.
Step 9: Cool and Enjoy
Let your cookies cool on the pan for about 15 minutes before moving them to a wire rack to finish cooling. This keeps their delicate shape intact. After they’re fully cool, I can tell you from experience, these cookies will fly off the tray — they’re just that good!
Pro Tips for Making Colorful Swirled Christmas Cookies Recipe
- Use Gel Food Coloring: I learned early on that gel colors give much brighter hues without changing the dough’s texture, unlike liquid colors.
- Chill in Portions: Flattening and chilling each dough portion separately makes rolling and stacking way easier and less messy.
- Slice with a Sharp Knife: A sharp blade ensures clean cuts and keeps the beautiful swirls intact—dull knives tend to squish the dough.
- Don’t Overbake: These cookies continue cooking a bit on the hot pan after baking, so taking them out slightly underdone keeps them soft and tender.
How to Serve Colorful Swirled Christmas Cookies Recipe
Garnishes
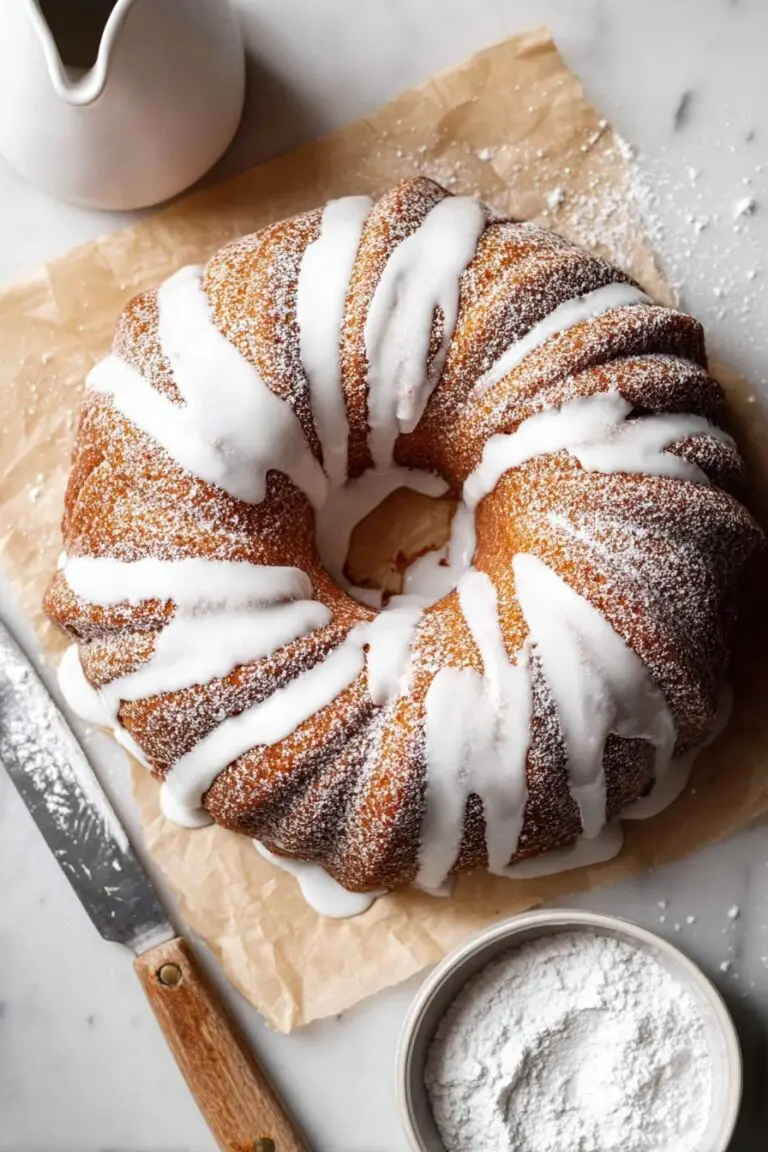
I usually stick with the classic Christmas sprinkles on the edges—they add a cute, festive crunch that’s hard to resist. But when I want to dress them up, I sprinkle a little powdered sugar on top or gently drizzle white chocolate. Both add a subtle sweetness and make the cookies look even more magical.
Side Dishes
These cookies pair beautifully with a warm cup of spiced hot chocolate or freshly brewed coffee — both balance the sweetness perfectly. I’ve also served these alongside a simple fruit platter or cheese board during holiday parties to balance rich flavors with fresh bites.
Creative Ways to Present
I love gifting these nestled in colorful holiday tins layered with parchment, or wrapped in clear cellophane tied with a festive ribbon. For parties, arranging them on a tiered dessert stand makes a dazzling centerpiece everyone will admire before they dig in.
Make Ahead and Storage
Storing Leftovers
I keep leftovers in an airtight container at room temperature, and they stay soft and tasty for up to 5 days. I learned the hard way that preserving moisture is key, so avoid storing them in the fridge unless your home is excessively warm.
Freezing
Freezing works great too! I usually slice the cookie logs first, then flash freeze the individual cookies on a tray before transferring them to a freezer bag. This way, I can pull out exactly how many I need later, and they maintain their fresh-baked taste once thawed.
Reheating
To freshen up frozen or stored cookies, I pop them in a warm oven at 300°F (150°C) for about 5 minutes—just enough to warm and soften without drying them out. This trick really revives that just-baked magic and makes your cookies taste irresistible.
FAQs
-
Can I make the dough ahead of time?
Absolutely! You can prepare the dough up to two days in advance and keep it wrapped tightly in the fridge. Just make sure to let it soften a bit on the counter before rolling. This flexibility is great if you want to spread out your holiday baking.
-
What’s the best way to keep the swirls crisp and distinct?
Keep the dough cold throughout all the steps—especially when rolling and slicing. Room temperature dough can become sticky and lose its shape, making the swirls blend together. Chilling prevents spreading, so your cookies come out perfectly defined.
-
Can I substitute sprinkles with something else?
Yes! If you want to avoid sprinkles, chopped nuts or shredded coconut can add a nice texture. Some people also like rolling the cookie log in finely crushed candy canes for a peppermint twist. Just press gently so the coating sticks without squishing the dough.
-
How do I make sure my cookies don’t spread too much in the oven?
The key is chilling the dough thoroughly after coloring and forming the log. Also, avoid adding any extra liquid like liquid food coloring. Cut slices consistently about 1/3 inch thick and bake on a cool baking sheet to prevent spreading.
Final Thoughts
This Colorful Swirled Christmas Cookies Recipe has quickly become one of my holiday favorites because it’s as joyful to make as it is to share. The bright, festive swirls make your cookie plate stand out, and the flavor brings back that nostalgic holiday warmth. Whether you’re baking for family, friends, or that neighborhood cookie exchange, I hope you give this recipe a try and make it your own. Trust me, once you master this swirl technique, you’ll be spreading holiday cheer with every bite.
Print
Colorful Swirled Christmas Cookies Recipe
- Prep Time: 20 minutes
- Cook Time: 12 minutes
- Total Time: 2 hours 2 minutes
- Yield: 20 cookies
- Category: Dessert
- Method: Baking
- Cuisine: American
Description
These Swirled Christmas Cookies are festive, soft, and tender butter cookies featuring colorful red and green swirls with a delightful burst of Christmas sprinkles. Perfect for holiday celebrations, they combine almond and vanilla flavors with a fun spiral design that adds a special touch to your cookie platter.
Ingredients
Cookie Dough
- 1 cup (2 sticks) unsalted butter, room temperature (226g)
- 1 1/4 cups granulated sugar (250g)
- 1 large egg, room temperature (56g)
- 2 tsp almond extract (10g)
- 1 tsp vanilla extract or vanilla bean paste (5g)
- 3 cups all-purpose flour (390g)
- 1 tsp cornstarch (3g)
- 1 tsp baking powder (4g)
- 1 tsp fine salt (6g)
Decoration
- 1 cup Christmas sprinkles (nonpareils recommended)
- Red gel food coloring
- Green gel food coloring
Instructions
- Cream Butter and Sugar: In a large bowl or stand mixer, beat the unsalted butter and granulated sugar on medium-high speed for several minutes until the mixture lightens in color and becomes fluffy.
- Add Egg and Extracts: Mix in the large egg, almond extract, and vanilla extract or vanilla bean paste on medium speed until fully incorporated, scraping the bowl as necessary.
- Combine Dry Ingredients: Add flour, cornstarch, baking powder, and salt to the butter mixture. Mix at low speed just until incorporated, making sure to scrape the sides and bottom of the bowl thoroughly.
- Divide and Color Dough: Divide the dough evenly into three portions (~10 oz. or 305g each). Leave one portion plain, color one green, and one red using gel food coloring. Flatten each into a rectangle about 1/3 inch thick and wrap tightly in plastic wrap.
- Chill Dough: Refrigerate the dough for 30 minutes, freeze for 10 minutes, or chill overnight. If chilled overnight, allow dough to sit at room temperature for 5 minutes before rolling.
- Preheat Oven and Prepare Baking Sheets: Preheat oven to 350°F (175°C) approximately 30 minutes before baking. Line baking sheets with silicone mats or parchment paper.
- Roll Out Dough: Unwrap each dough portion and roll on plastic wrap to about 7×12 inches. Stack dough in order: green on bottom, plain in middle, red on top on parchment paper. Gently roll with a rolling pin to adhere layers and trim edges to even out.
- Form Spiral Log: Cut one long side of dough at an angle for a spiral effect. Roll dough tightly from the angled edge into a log, sealing seam by gently pressing dough to avoid separation.
- Coat with Sprinkles: Pour Christmas sprinkles on a rimmed tray and roll or press the cookie log into sprinkles until completely coated.
- Slice Cookies: Using a sharp knife, cut the log into 1/3-inch thick slices. Keep the dough cold; if it softens too much, chill for 15-30 minutes before slicing. Arrange slices about 1 inch apart on prepared baking sheets.
- Bake Cookies: Bake one tray at a time in the oven’s middle rack for 12-14 minutes. Rotate pan halfway through to ensure even baking. Remove cookies just before edges brown as they will firm while cooling.
- Cool Cookies: Let cookies cool on the baking sheet for 15 minutes, then transfer to a wire rack to cool completely.
- Store and Serve: Store in an airtight container at room temperature for up to 5 days. Enjoy these colorful and tender holiday treats!
Notes
- This recipe yields approximately 20 swirled cookies; cookie size and thickness impact yield and bake time.
- You can double the recipe to produce more cookies for larger gatherings.
- Use gel food coloring to achieve vibrant colors without altering dough consistency.
- Fully creaming butter and sugar incorporates air, resulting in tender, soft cookies.
- Chilling dough is essential to minimize spreading and maintain cookie shape.
- Cut cookies evenly at about 1/3 inch thickness to ensure uniform baking.
- Remove cookies from the oven before browning edges; underbaking slightly helps keep them soft.
Nutrition
- Serving Size: 1 cookie
- Calories: 160 kcal
- Sugar: 10 g
- Sodium: 70 mg
- Fat: 8 g
- Saturated Fat: 5 g
- Unsaturated Fat: 3 g
- Trans Fat: 0 g
- Carbohydrates: 20 g
- Fiber: 0.5 g
- Protein: 2 g
- Cholesterol: 30 mg

