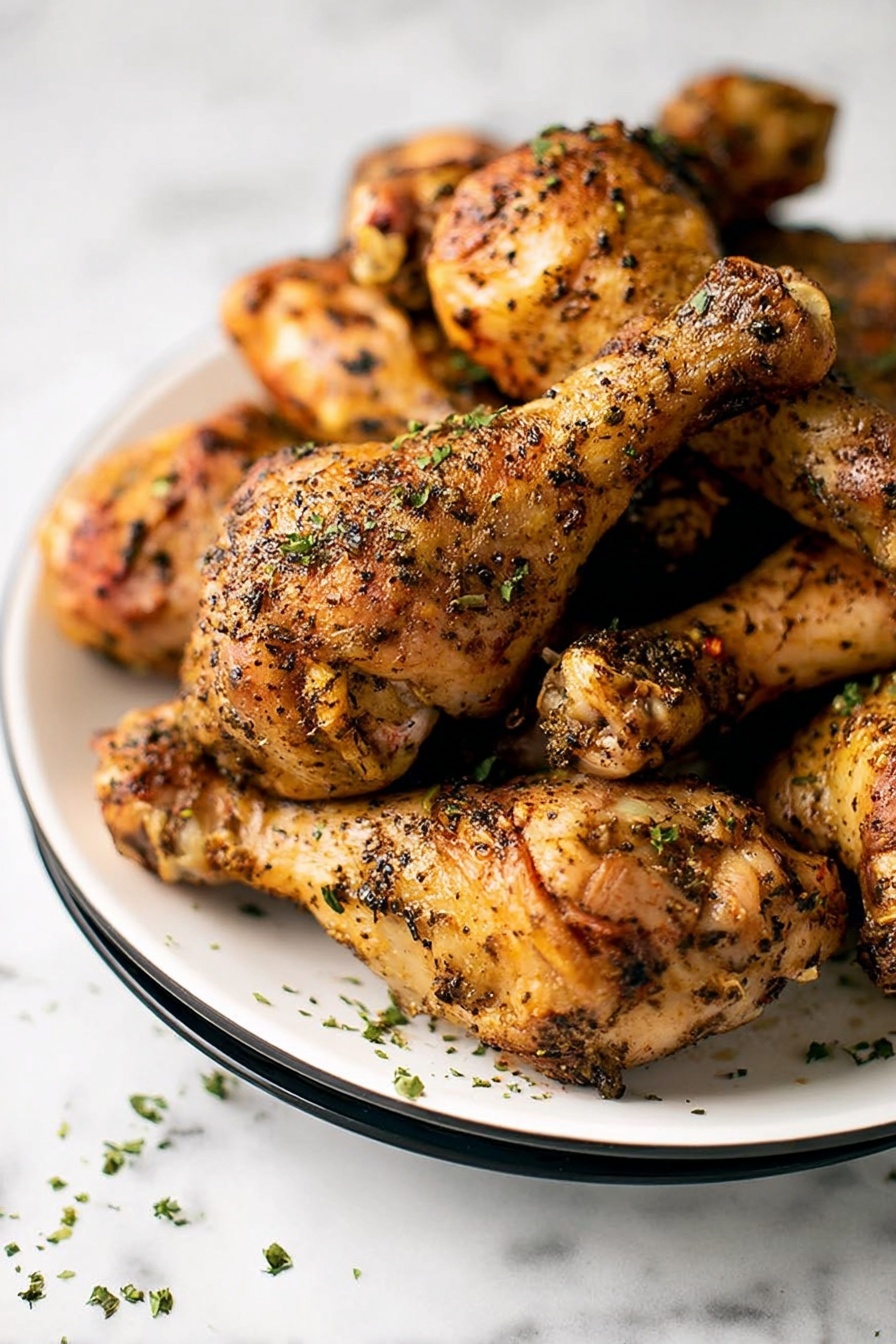
If you’ve ever wondered how to get that perfect, mouthwatering crunch on your chicken without frying, you’re going to love this Crispy Baked Chicken Legs Recipe. I absolutely love how it turns out—crispy skin, juicy meat, and minimal fuss. Once you try this method, you’ll find it’s your new go-to for weeknight dinners or casual gatherings. Stick around, because I’m about to share all the tips and secrets that make this recipe foolproof and irresistibly tasty!
Why You’ll Love This Recipe
- Crispy Skin Without Frying: Thanks to a clever baking powder trick, the skin comes out perfectly crunchy every time.
- Juicy, Tender Meat: Baking on a rack helps the heat ventilate around the chicken, ensuring juicy inside and crispy outside.
- Simple Ingredients, Big Flavor: You probably already have everything in your pantry to whip this up tonight.
- Minimal Prep, Maximum Impact: With a quick dry-brining step, you’ll boost flavor and texture with very little effort.

Ingredients You’ll Need
The magic of this recipe lies in its simplicity. The baking powder elevates your chicken skin to crispy greatness, while poultry seasoning adds that cozy, familiar flavor. When shopping, fresh chicken legs with skin on will give you the best results.
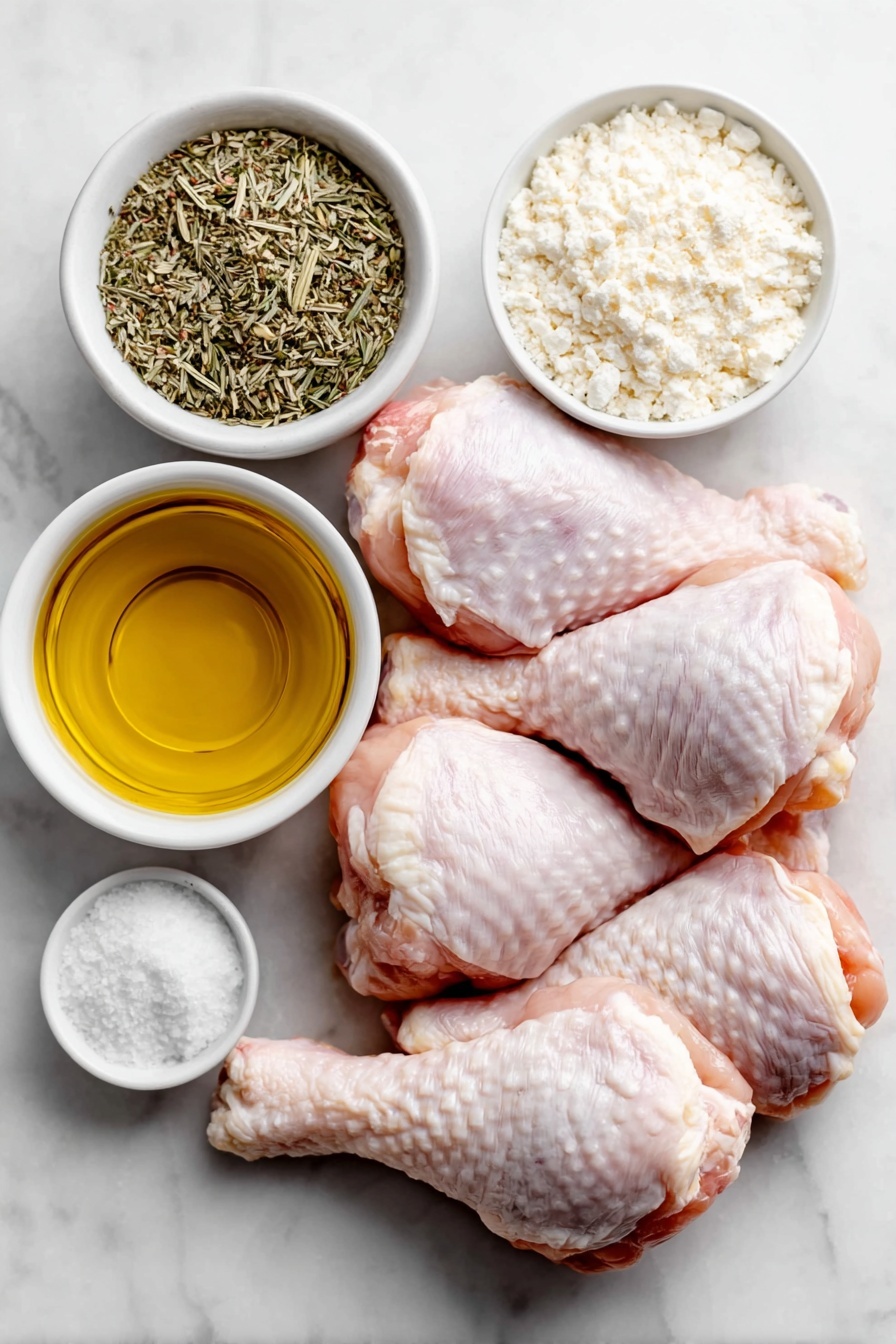
- Chicken drumsticks: Fresh or thawed all work—just make sure to remove excess fat for crispier skin.
- Olive oil: Helps the seasoning stick and promotes browning without overpowering flavor.
- Poultry seasoning: I like classic blends with sage and thyme; feel free to swap with your favorite seasoning or a mix of garlic powder and smoked paprika for a twist.
- Salt: Essential for flavor and to help draw moisture from the skin for crispiness.
- Black pepper: Freshly cracked for the best aroma and bite.
- Baking powder: This is the secret weapon to cracking that crispy crust without frying.
Variations
I love tweaking this recipe depending on the occasion. Don’t hesitate to make it your own—whether that means changing up the seasoning or adjusting cooking times for a different result.
- Spicy Kick: Add cayenne pepper or chili powder to the seasoning mix—my family goes crazy when I turn up the heat this way.
- Herb Freshness: Toss in some fresh rosemary or thyme before baking to infuse an herby aroma that’s irresistible.
- Glazed Finish: Brush the legs with barbecue sauce during the last 5 minutes of baking for a sticky, finger-licking finish.
- Low-Sodium Option: Reduce salt and boost flavor with garlic powder, smoked paprika, or lemon zest to keep it heart-healthy without sacrificing taste.
How to Make Crispy Baked Chicken Legs Recipe
Step 1: Dry-Brine for Ultimate Crispiness
The first time I tried this, I skipped drying the chicken properly, and the skin turned out soggy. The secret is to pat each drumstick super dry and then set them on a wire rack lined with paper towels. Cover them with more paper towels and stick them in the fridge for at least two hours, or if you can, overnight. This step pulls moisture from the skin, setting the stage for that coveted crunch.
Step 2: Preheat and Prep the Rack
When your chicken has had time to dry, preheat your oven to 400°F. Toss out those soggy paper towels and give your wire rack a generous spray with non-stick cooking spray to prevent sticking. This rack setup is key—it lets the hot air circulate all around the chicken legs, crisping every inch evenly.
Step 3: Season and Coat the Chicken Legs
In a large bowl, mix olive oil, poultry seasoning, salt, black pepper, and baking powder. Here’s a little trick: I use my hands (clean ones, of course!) to toss the chicken—I find it helps coat every nook and cranny better than stirring with a spoon. Don’t rush; take a moment to ensure each drumstick is nicely coated for full flavor and crispy magic.
Step 4: Bake to Crispy Perfection
Arrange the chicken legs on the wire rack, leaving a bit of breathing room between each piece. Bake for 35-40 minutes until the skin is golden brown and an instant-read thermometer hits 165°F at the thickest spot. If you don’t have a thermometer, look for clear juices and wobbly but firm meat. Resist the urge to flip or poke during baking—let the oven work its magic.
Step 5: Rest Before Serving
Once out of the oven, let your chicken rest for about 5 minutes. This helps all those juices redistribute, giving you tender, juicy bites. I know it’s tempting to dig in immediately, but trust me—this step makes a noticeable difference in every mouthful.
Pro Tips for Making Crispy Baked Chicken Legs Recipe
- Dry the Skin Thoroughly: Moisture is the enemy of crispiness; I learned the hard way to let the chicken air-dry in the fridge for hours for best results.
- Don’t Skip the Baking Powder: Unlike baking soda, baking powder adds a lovely crisp without altering flavor—it’s my game changer for baked chicken.
- Use a Wire Rack: Elevating the chicken lets hot air circulate and the fat drip away, which means less soggy spots around the skin.
- Avoid Overcrowding the Pan: Give each piece space! Crowded chicken steams instead of crisps, and you’ll miss that golden crunch.
How to Serve Crispy Baked Chicken Legs Recipe
Garnishes
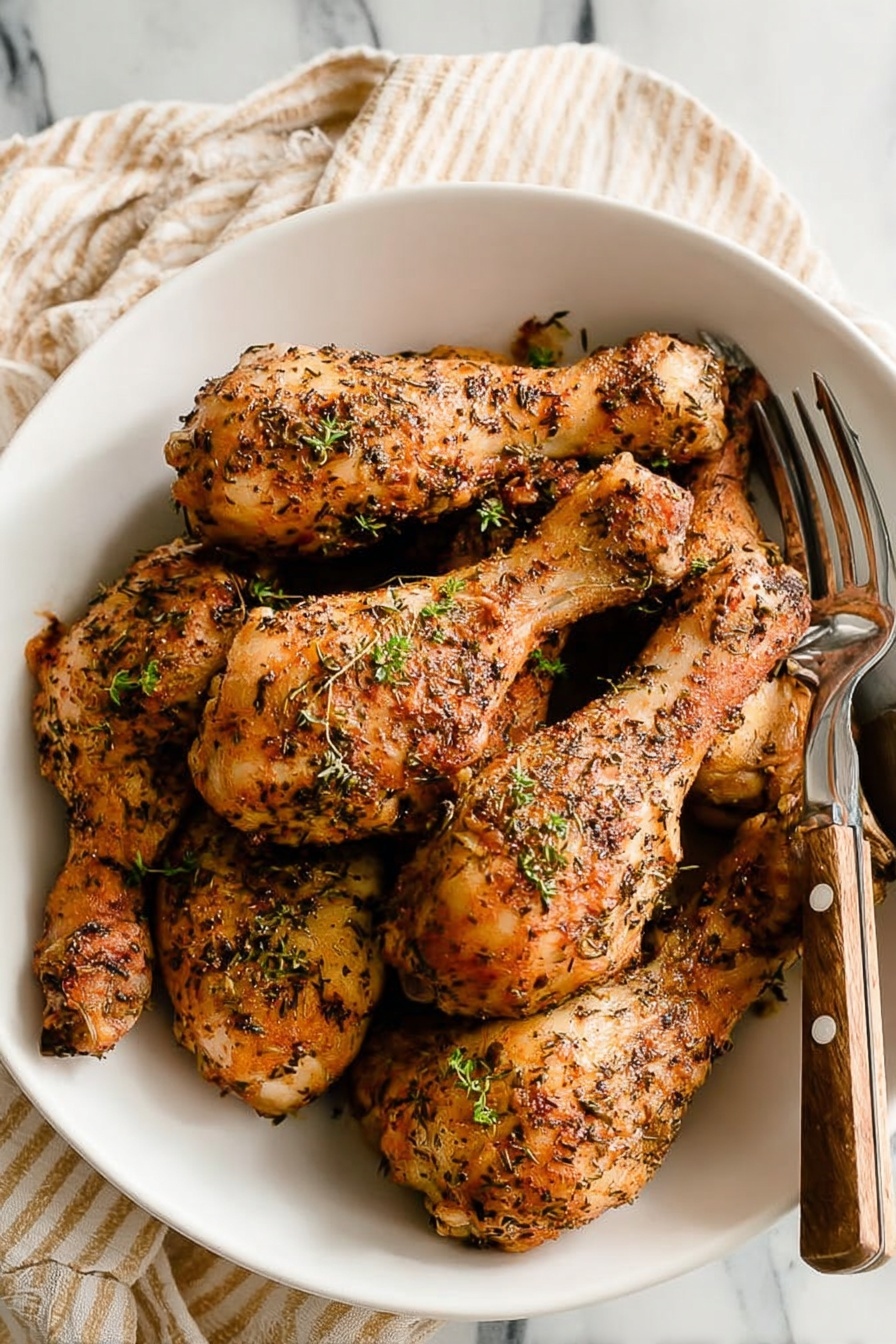
I like to sprinkle freshly chopped parsley or cilantro right before serving to add a touch of brightness and color. A squeeze of fresh lemon over the top really wakes up the flavors and adds a zesty punch that pairs beautifully with the rich, crispy skin.
Side Dishes
This chicken pairs perfectly with roasted veggies like carrots and Brussels sprouts, creamy mashed potatoes, or a crisp green salad tossed with vinaigrette. For a quick weeknight meal, I often serve it alongside steamed rice and sautéed garlic green beans.
Creative Ways to Present
For parties, try serving the chicken legs on a large wooden board with dipping sauces like honey mustard or spicy aioli. I’ve also wrapped them in parchment bundles with herbs and lemon slices for a fun rustic look that guests love. It’s an easy way to elevate this humble dish for special occasions.
Make Ahead and Storage
Storing Leftovers
I place any leftover crispy baked chicken legs in an airtight container and refrigerate them for up to 3-4 days. To keep that skin from getting soggy, I let the chicken cool completely before sealing and avoid stacking pieces too tightly.
Freezing
If I want to save some chicken for later, I wrap each leg tightly in plastic wrap and then pop them in a freezer-safe bag—this recipe freezes really well for up to 2 months. When I’m ready to enjoy, I thaw overnight in the fridge before reheating.
Reheating
To bring back that crispy skin after refrigeration, I reheat the legs on a wire rack in a 375°F oven for about 10-15 minutes. This method helps the outside stay crisp without drying out the meat. Avoid microwaving, as it can make the skin rubbery.
FAQs
-
Can I use chicken thighs instead of legs for this Crispy Baked Chicken Legs Recipe?
Absolutely! Chicken thighs have a slightly different texture but will crisp up beautifully with this method. Just keep an eye on the cooking time—thighs may cook a bit faster, so check for an internal temperature of 165°F to keep them juicy and safe.
-
What does baking powder do in the Crispy Baked Chicken Legs Recipe?
Baking powder helps draw moisture from the chicken skin and creates tiny bubbles in the skin surface as it bakes, resulting in a delightfully crispy texture similar to frying but without all the oil.
-
Can I marinate chicken before using this recipe?
You can, but be cautious with marinades that add extra moisture or acidity—it might interfere with getting crispy skin. A dry rub or simple seasoning mix, like in this recipe, usually gives the best results.
-
Is it necessary to use a wire rack?
While not strictly necessary, a wire rack elevates the chicken so air can circulate evenly around it. This helps the skin crisp all over and prevents soggy bottoms. If you don’t have one, flipping halfway through baking helps, but results may vary.
Final Thoughts
This Crispy Baked Chicken Legs Recipe has become a staple in my household because it’s so darn easy and dependable. Whether you’re feeding a crowd or just craving some crispy comfort food, it never disappoints. I recommend you give it a try—you’ll be amazed at how satisfying baked chicken can be when you nail that golden crunch without the mess of frying. You’ve got this!
Print
Crispy Baked Chicken Legs Recipe
- Prep Time: 15 minutes
- Cook Time: 35 minutes
- Total Time: 50 minutes
- Yield: 8 servings
- Category: Main Dish
- Method: Baking
- Cuisine: American
Description
This Crispy Baked Chicken Legs Recipe delivers perfectly seasoned, golden-brown drumsticks with a delightfully crunchy skin and juicy interior. Using a simple mix of poultry seasoning, baking powder, and olive oil, followed by oven baking on a rack allows excess fat to drip away, ensuring crispiness without frying. Ideal for a flavorful, fuss-free dinner that everyone will enjoy.
Ingredients
Chicken
- 2 pounds chicken drumsticks, cleaned with excess fat removed
Seasoning Mix
- 2 tablespoon olive oil
- 2 tablespoon poultry seasoning or seasoning of choice
- ½ teaspoon salt, plus more if desired
- ½ teaspoon black pepper, plus more if desired
- 2 teaspoon baking powder
Instructions
- Dry the chicken: Place a cooling rack over a large baking sheet and layer with paper towels. Arrange the chicken drumsticks on top of the wire rack and tent with additional paper towels. Transfer to the refrigerator for at least two hours, preferably overnight. If short on time, pat the chicken legs as dry as possible with paper towels to remove excess moisture.
- Preheat and prepare the rack: Preheat the oven to 400 ℉ (204 ℃). Discard the paper towels from the cooling rack and spray the rack lightly with non-stick cooking spray to prevent sticking.
- Season the chicken: In a large mixing bowl, combine the olive oil, poultry seasoning, salt, black pepper, and baking powder. Add the chicken drumsticks to the bowl and use your hands to gently but thoroughly coat each piece evenly with the seasoning mixture.
- Arrange and bake: Transfer the seasoned chicken legs to the prepared wire rack, spacing them evenly to allow air circulation for even baking. Place the baking sheet in the oven and bake for 35 to 40 minutes, or until a digital meat thermometer inserted into the thickest part of the drumstick registers 165 ℉ (74 ℃).
- Rest and serve: Remove the chicken legs from the oven and let them rest for 5 minutes to allow juices to redistribute before serving crispy, juicy chicken drumsticks.
Notes
- Leftover chicken legs can be stored in an airtight container in the refrigerator for up to 3-4 days.
- For extra crispiness, avoid overcrowding the baking rack and ensure the chicken skin is as dry as possible before seasoning.
- Baking powder helps create that crispy skin without frying, so don’t skip it.
- Use a meat thermometer to guarantee safe internal temperature while avoiding overcooking.
Nutrition
- Serving Size: 1 drumstick (approx. 85g)
- Calories: 180
- Sugar: 0.2g
- Sodium: 350mg
- Fat: 12g
- Saturated Fat: 3.5g
- Unsaturated Fat: 7.5g
- Trans Fat: 0g
- Carbohydrates: 1g
- Fiber: 0g
- Protein: 18g
- Cholesterol: 80mg


