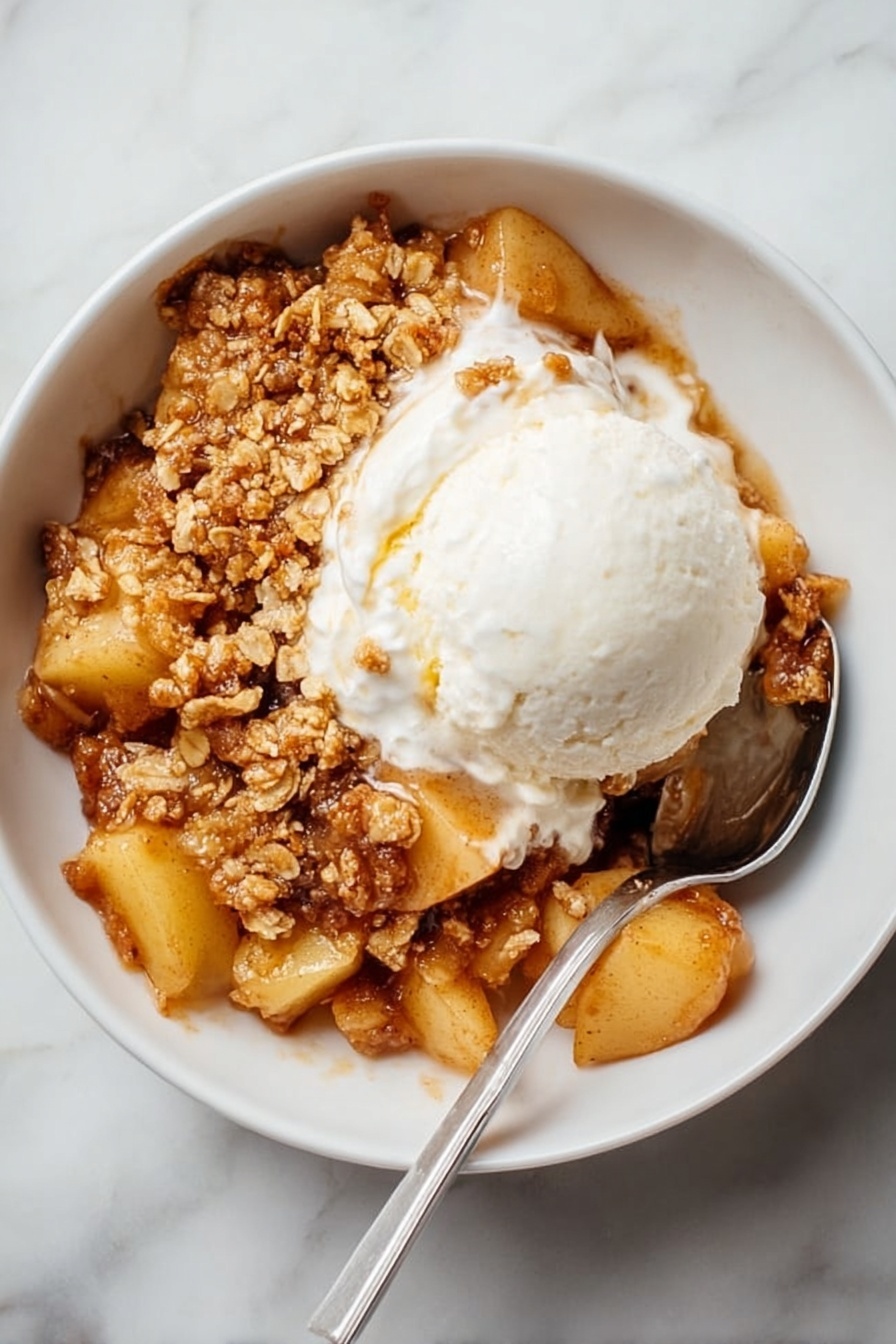
If you’re craving a comforting dessert that’s ridiculously easy to whip up, you’re going to adore this Easy Apple Crisp Recipe. I absolutely love how this turns out every single time—the apples get perfectly tender and juicy, while the crunchy oat topping is just heavenly. Whether you’re baking for a casual weeknight treat or impressing guests, this recipe will have you coming back for seconds (and maybe thirds!). Let me walk you through all the tips, tricks, and secrets to make sure you nail this one in your own kitchen.
Why You’ll Love This Recipe
- Super Simple Ingredients: Uses pantry staples and basic fresh apples for easy shopping and prep.
- Perfectly Balanced Flavors: The lemon juice and spices bring out the bright, warm apple taste you’ll want every time.
- Crispy Topping That’s Just Right: Oats and butter combine for a crunchy, golden finish you can’t resist.
- Crowd-Pleaser Every Time: My family goes crazy for this recipe, and I bet yours will too!

Ingredients You’ll Need
The magic in this Easy Apple Crisp Recipe comes from combining juicy apples with a buttery oat topping that crisps up beautifully in the oven. Choosing the right apples and fresh spices really makes a difference, and there’s a little trick with the flour that helps thicken the fruit juices perfectly without making it soggy.
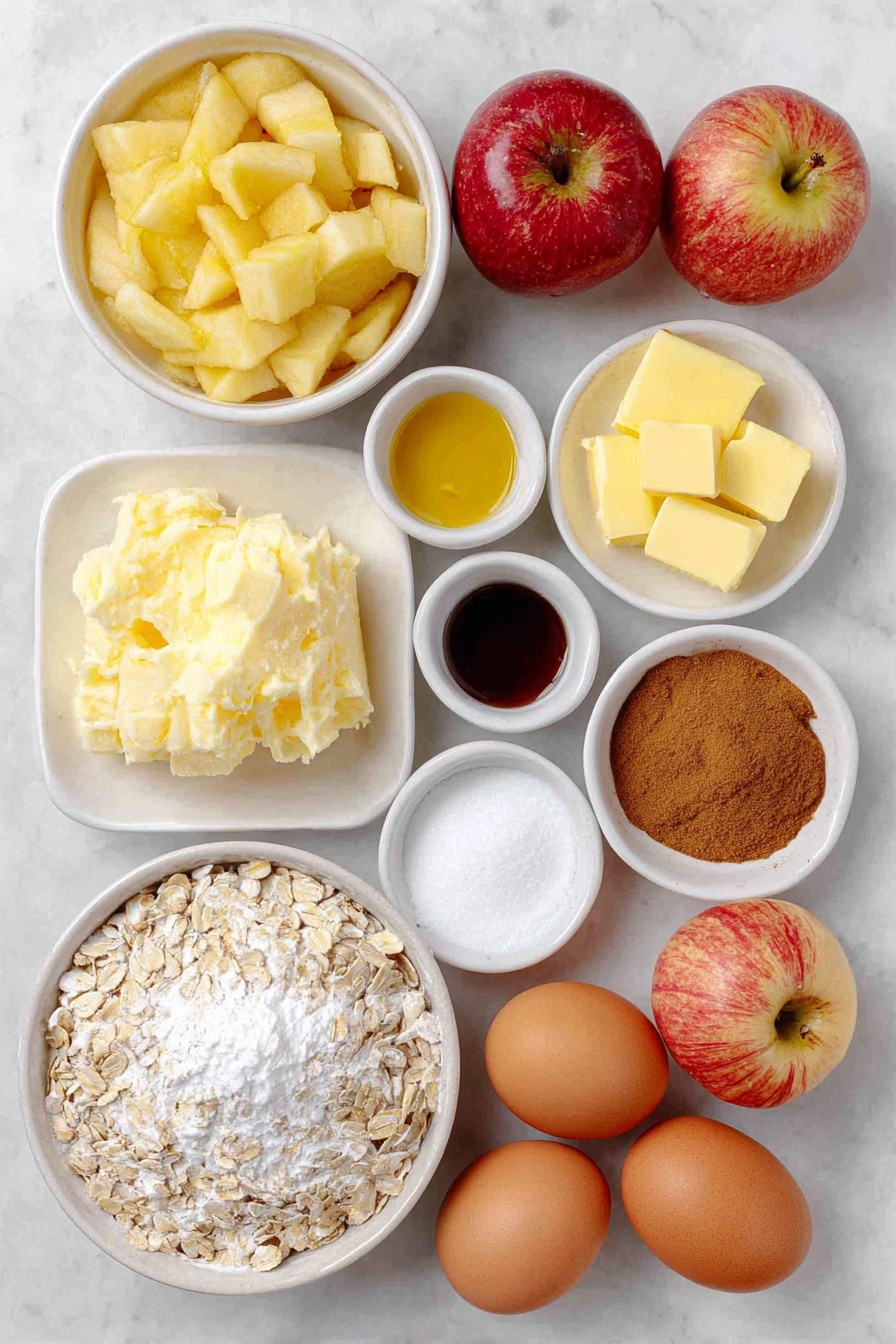
- Apples: I prefer tart, firm varieties like Granny Smith or Honeycrisp so they hold their shape and bring a nice tang.
- All-purpose flour: Used in both the apple mixture and the topping to help thicken and crisp things up.
- Brown sugar: Adds rich sweetness and a hint of molasses flavor.
- Lemon juice: Brightens the apple flavor and prevents browning.
- Vanilla extract: Just a touch to deepen the flavor profile.
- Cinnamon and nutmeg: Classic warm spices that pair perfectly with apples.
- Sea salt: Balances the sweetness and enhances all the flavors.
- Rolled oats: For that irresistible crisp texture on top.
- Cold unsalted butter: Cubed and worked into the topping for that flaky, crumbly finish.
Variations
I love experimenting with this Easy Apple Crisp Recipe, and I encourage you to make it your own! Sometimes I swap the apples for pears or add nuts for extra crunch, and each twist brings something new to the table.
- Adding chopped walnuts or pecans: My family loves the crunchy texture this brings to the topping — especially with a little extra cinnamon sprinkled on top.
- Using gluten-free flour: If you’re gluten-sensitive, I’ve found that a one-to-one gluten-free flour blend works wonderfully in both the apple mixture and the topping.
- Mixing apple varieties: I like combining tart Granny Smith with sweeter Fuji apples for a more complex flavor and texture.
- Spiced up with ginger or cloves: For a holiday spin, I add a pinch of ground ginger or cloves along with the cinnamon and nutmeg.
How to Make Easy Apple Crisp Recipe
Step 1: Prep Your Apples Just Right
Peeling and chopping the apples into uniform ¾-inch pieces is key so everything cooks evenly. Toss them with a bit of flour and brown sugar—this helps the apples thicken up while baking and makes them extra juicy. Don’t skip the fresh lemon juice here; it brightens the apples and stops them from turning brown while you prep the rest. Mix in your vanilla, cinnamon, nutmeg, and salt, then spread this fruity goodness in a buttered 8×8-inch baking dish.
Step 2: Whip Up That Crunchy Topping
In another bowl, combine the oats, flour, brown sugar, cinnamon, and salt. Here’s my favorite part—work cold cubed butter into the mix using two forks or your fingertips until it looks crumbly, almost like coarse meal. This technique is what makes the topping so irresistibly crisp and buttery after baking. Sprinkle that mixture evenly over your apples, covering every bit.
Step 3: Bake and Reveal Your Delicious Apple Crisp
Start by covering the baking dish with foil to keep the apples juicy as they soften. Bake at 375°F for about 35-40 minutes until you see the apples bubbling. Then uncover and bake for an additional 10-15 minutes to get the topping golden and crisp. The smell? Absolutely heavenly. Let it cool for at least 10 minutes before diving in—this resting time helps the juices thicken up so your crisp isn’t runny.
Pro Tips for Making Easy Apple Crisp Recipe
- Choosing Your Apples: I’ve learned that a mix of tart and sweet apples creates a brighter, more complex flavor that everyone notices.
- Cold Butter Is Key: Keeping the butter cold until you’re ready to mix it in gives you that perfect crumbly texture for the topping.
- Don’t Skip the Rest Time: Letting the crisp cool before serving helps the filling thicken up beautifully—patience pays off.
- Avoid Overmixing the Topping: Mixing too much can melt the butter early and make it soggy instead of crispy.
How to Serve Easy Apple Crisp Recipe
Garnishes
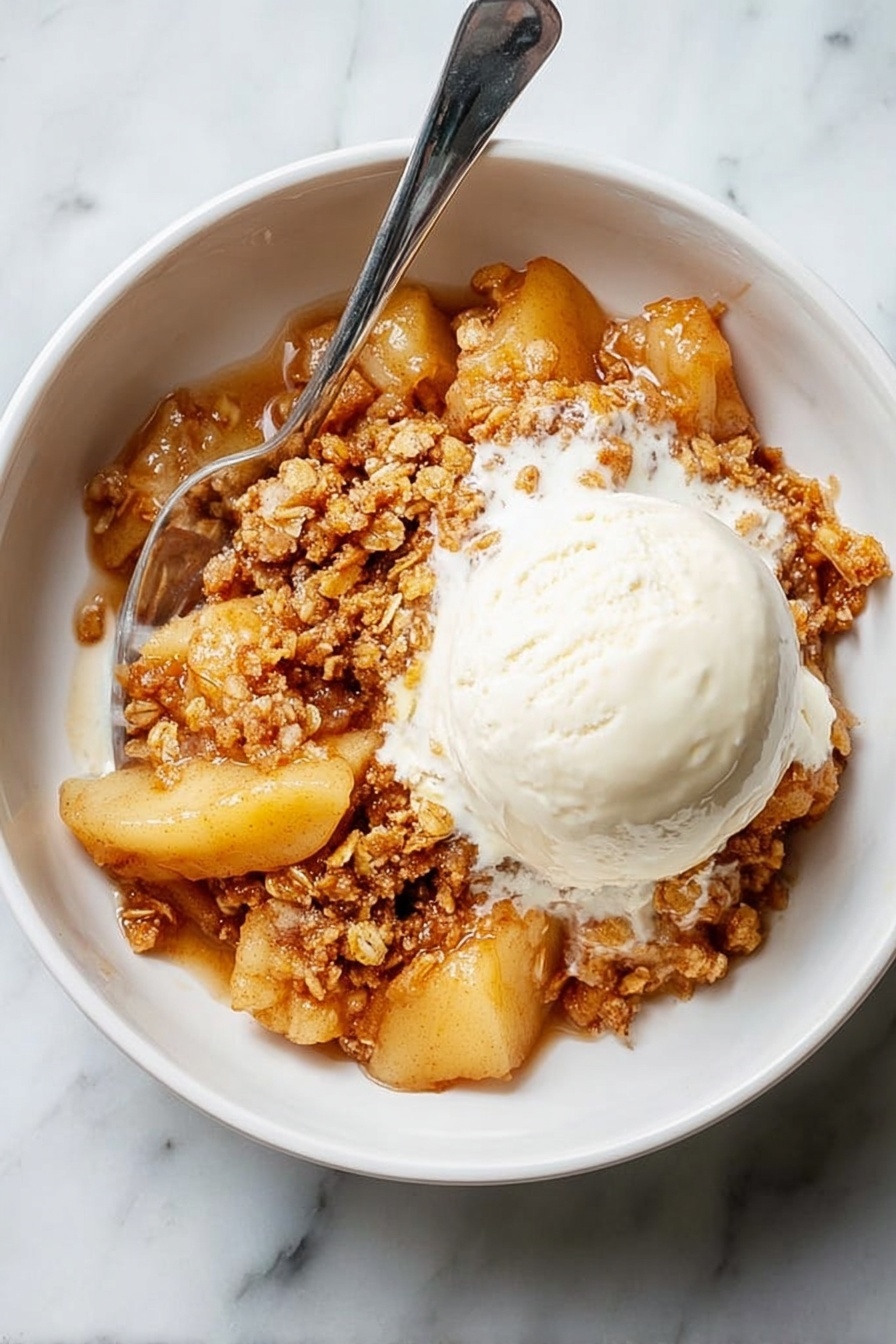
I love topping my apple crisp with a scoop of vanilla ice cream or a dollop of freshly whipped cream—the contrast of warm and cold makes it feel extra special. Sometimes a sprinkle of toasted nuts or a drizzle of caramel sauce takes it to the next level, especially for celebrations.
Side Dishes
If I’m serving this for a cozy fall dinner, I’ll pair the apple crisp with simple roasted chicken or pork chops. The sweet and tart dessert is a perfect way to finish off a savory meal without feeling too heavy.
Creative Ways to Present
For a special occasion, I’ve baked this apple crisp in individual ramekins or mini cast-iron skillets to give guests their own personal dessert. It makes serving easy and feels a little fancy! I even like to sprinkle some festive cinnamon sugar on top for holidays.
Make Ahead and Storage
Storing Leftovers
Once cooled, I cover leftovers tightly with plastic wrap or a lid and store them in the fridge. The flavors actually mellow and blend nicely overnight. It keeps well for about 3 to 4 days, and I love grabbing a quick second helping straight from the fridge or reheated.
Freezing
I’ve frozen baked apple crisp successfully by wrapping it tightly in foil and placing it in a freezer-safe container. When thawed overnight in the fridge, the texture stays surprisingly good—it’s a great make-ahead dessert for busy weeks.
Reheating
To reheat, I gently warm individual portions in the microwave for about 30-45 seconds or pop the entire dish in a 350°F oven for 15-20 minutes until warmed through and the topping crisps up again. This way, it tastes almost as fresh as the first time!
FAQs
-
What kind of apples are best for this Easy Apple Crisp Recipe?
I recommend using firm, tart apples like Granny Smith or Honeycrisp. These apples hold their shape during baking and provide a nice balance of sweetness and acidity, which makes the dessert more flavorful and less mushy.
-
Can I make this apple crisp gluten-free?
Absolutely! Just swap the all-purpose flour with a 1:1 gluten-free flour blend. Make sure the oats you use are certified gluten-free as well. The crisp will still turn out delicious and crunchy.
-
How do I prevent the topping from getting soggy?
Using cold butter and working it into dry ingredients without overmixing helps create a crumbly texture that crisps well. Also, covering the crisp for the first part of baking keeps the apples from drying out but removing the cover towards the end lets the topping brown nicely.
-
Can I prepare this recipe ahead of time?
Yes! You can assemble the apple crisp completely and keep it covered in the fridge for up to 24 hours before baking. Just add a few extra minutes to the baking time if it’s straight from the fridge.
Final Thoughts
This Easy Apple Crisp Recipe has become a staple in my kitchen because it combines simple ingredients with comforting flavors that everyone loves. I remember the first time I made it — the smell filled the whole house and the first bite was pure joy. It’s perfect for those cozy evenings when you want a quick dessert that feels like a warm hug. I’m confident you’ll enjoy making and sharing this as much as I do, and I can’t wait to hear how it becomes part of your family’s favorites too!
Print
Easy Apple Crisp Recipe
- Prep Time: 15 minutes
- Cook Time: 55 minutes
- Total Time: 1 hour 10 minutes
- Yield: 6 servings
- Category: Dessert
- Method: Baking
- Cuisine: American
Description
This Easy Apple Crisp is a comforting, classic dessert featuring tender, cinnamon-spiced apples topped with a buttery, crunchy oat crumble. Perfectly baked to golden perfection, it’s a warm and inviting treat ideal for cozy evenings or holiday gatherings.
Ingredients
For the Apples
- 6 large apples, 2½ pounds, peeled, cored, and chopped into ¾-inch pieces
- 2 tablespoons all-purpose flour
- 2 tablespoons brown sugar
- 2 teaspoons fresh lemon juice
- 1 teaspoon vanilla extract
- 1 teaspoon cinnamon
- ½ teaspoon nutmeg
- ¼ teaspoon sea salt
Crumble Topping
- ¾ cup whole rolled oats
- ½ cup all-purpose flour, spooned and leveled
- ½ cup brown sugar
- ½ teaspoon cinnamon
- ¼ teaspoon sea salt
- ½ cup cold unsalted butter, 1 stick, cubed, plus more for the pan
Instructions
- Preheat and Prepare the Dish: Preheat your oven to 375°F (190°C) and grease an 8×8-inch baking dish with butter to prevent sticking.
- Prepare the Apples: In a large bowl, combine the peeled and chopped apples with all-purpose flour, brown sugar, fresh lemon juice, vanilla extract, cinnamon, nutmeg, and sea salt. Toss everything well to coat the apples evenly. Spread this mixture evenly in the prepared baking dish.
- Make the Crumble Topping: In a medium bowl, whisk together the rolled oats, flour, brown sugar, cinnamon, and sea salt. Use two forks, a pastry cutter, or your hands to incorporate the cold cubed butter into the dry ingredients until the mixture forms coarse crumbs.
- Assemble and Bake: Sprinkle the crumble topping evenly over the apples in the baking dish. Cover the dish with foil and bake it in the preheated oven for 35 to 40 minutes, until the apples start bubbling.
- Finish Baking Uncovered: Remove the foil and continue baking the apple crisp uncovered for an additional 10 to 15 minutes, or until the apples are tender and the topping turns golden brown and crispy.
- Cool and Serve: Remove the apple crisp from the oven and allow it to cool for at least 10 minutes to set before serving. Enjoy warm for the best texture and flavor.
Notes
- Choosing firm, tart apples like Granny Smith or Honeycrisp provides the best balance of flavor and texture.
- Adjust the sugar in the topping or filling according to the sweetness of your apples.
- For extra flavor, consider adding chopped nuts like walnuts or pecans to the crumble topping.
- This dessert can be served with vanilla ice cream or whipped cream for an indulgent treat.
- Leftovers can be stored in the refrigerator for up to 3 days and reheated gently before serving.
Nutrition
- Serving Size: 1 serving (approximately 1 cup)
- Calories: 310
- Sugar: 27g
- Sodium: 110mg
- Fat: 13g
- Saturated Fat: 7g
- Unsaturated Fat: 4g
- Trans Fat: 0g
- Carbohydrates: 45g
- Fiber: 5g
- Protein: 2g
- Cholesterol: 30mg


