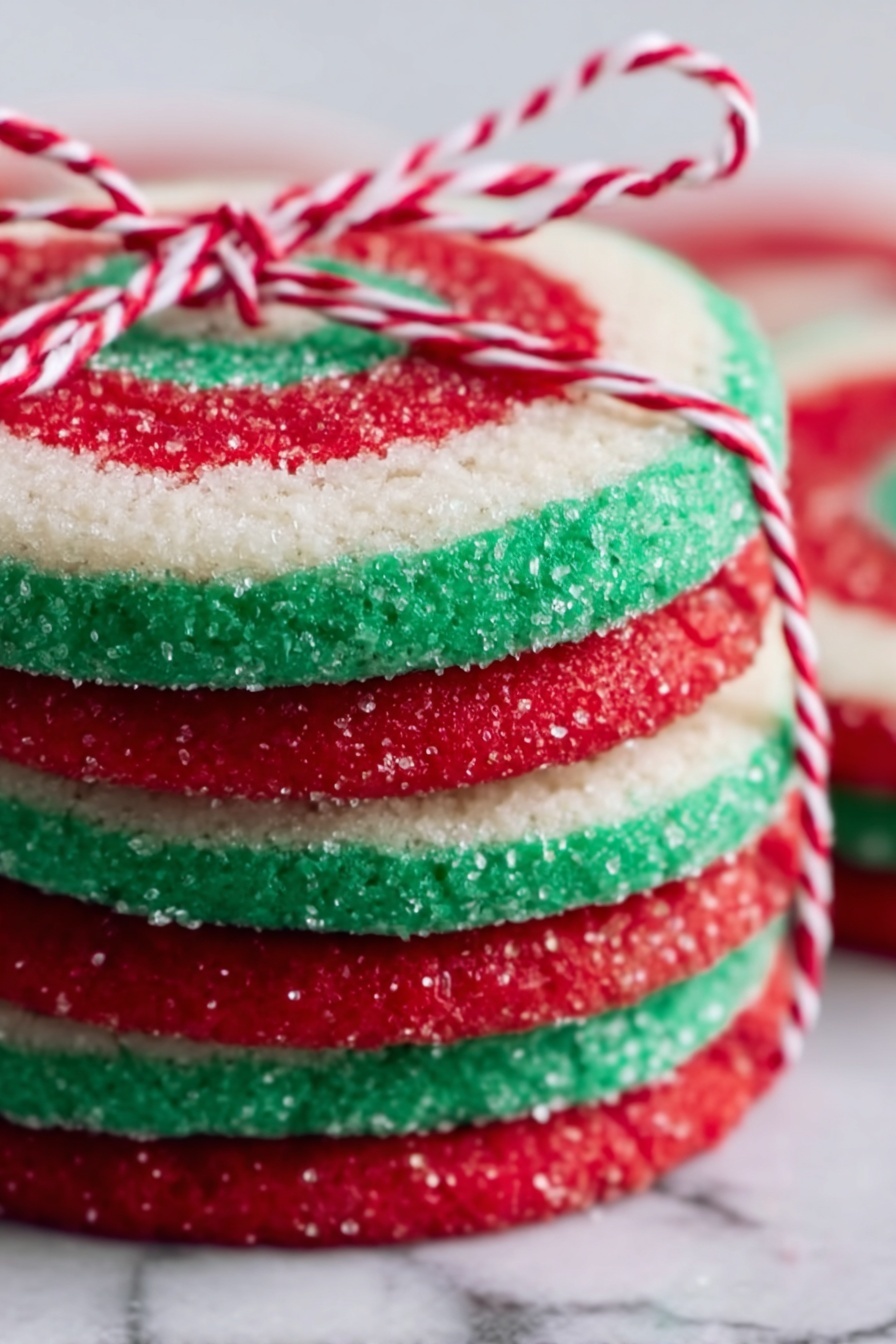
If you’re looking to add a little magic to your holiday baking lineup, let me introduce you to my all-time favorite: the Festive Christmas Pinwheel Cookies Recipe. These cookies are not just pretty—they’re a delightful swirl of buttery sweetness and vibrant holiday colors that light up any cookie tray. I absolutely love how these turn out every time, and I’m excited to walk you through the steps so you can nail them just right in your kitchen.
Why You’ll Love This Recipe
- Festive and Fun: The swirling red, green, and white colors bring holiday cheer to any cookie jar or dessert plate.
- Simple Ingredients: You probably already have everything you need in your pantry—no complicated shopping trips required.
- Perfect Textures: Crispy edges with a soft center make these cookies irresistible and melt-in-your-mouth delightful.
- Make-Ahead Friendly: Prepare the dough ahead of time and freeze the logs for baking fresh cookies whenever you want.

Ingredients You’ll Need
To make your Festive Christmas Pinwheel Cookies recipe come alive, you’ll want ingredients that balance buttery richness with a touch of sweetness, plus vibrant color. Here’s what I recommend grabbing before you start, along with a few little tips to get the best results.
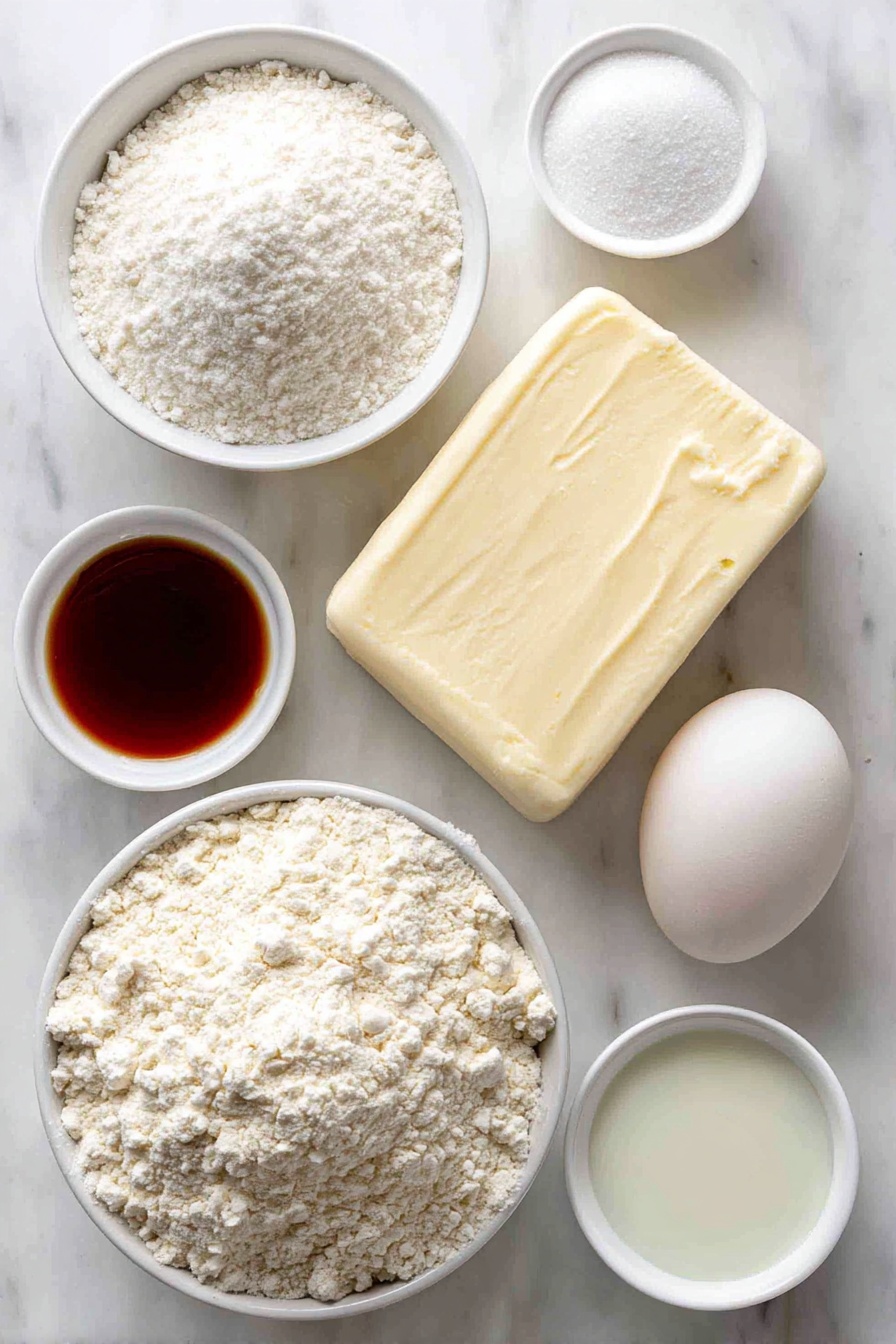
- All-purpose flour: This gives the cookies structure without being too dense—don’t skip the sifting for a smooth dough.
- Baking powder: Just a pinch to help with a light, tender bite.
- Salt: Balances the sweetness and brings out flavor—never underestimate a little salt in your cookies!
- Unsalted butter: Softened is key for creaming; I always leave mine out for about an hour before starting.
- Granulated sugar: For that classic sweetness and slight crispiness on the edges.
- Egg: Acts as the binder for the dough.
- Vanilla extract: Nothing beats that warm, comforting vanilla note.
- Red and green food coloring: I prefer gel colors—they deliver vivid shades with less liquid, keeping the dough’s texture spot-on.
- Milk (optional): Just a splash can help soften the colored dough if it gets tough to handle.
Variations
I love making this recipe my own depending on the mood and occasion—there’s so much room for creativity! Feel free to tweak colors, flavors, or even dough types to make these pinwheels uniquely yours.
- Try different flavors: Adding a teaspoon of almond extract or swapping vanilla for peppermint extract gives a festive twist the family goes crazy for.
- Use natural food coloring: Beet juice powder for red, spinach powder for green—perfect if you want to keep things natural without artificial dyes.
- Chocolate pinwheels: Replace green dye with cocoa powder for a rich chocolate swirl that’s always a hit.
- Gluten-free option: I once replaced the flour with a gluten-free blend, and while the texture changed a bit, they still tasted divine!
How to Make Festive Christmas Pinwheel Cookies Recipe
Step 1: Prepare the dough base with care
Start by whisking together your flour, baking powder, and salt in a medium bowl—this ensures everything is evenly combined. Next, cream the softened butter and sugar in a large bowl until it looks fluffy and smells sweetly buttery; this usually takes me around 3 to 4 minutes with a hand mixer. Adding the egg and vanilla next brings the dough together with a lovely aroma. Then, reduce the mixer speed and gradually add your dry ingredients—mix gently until you have a soft, uniform dough. Don’t overmix here or your cookies might get tough.
Step 2: Divide and add your festive colors
Divide the dough into three equal parts. Leave one as the classic vanilla (white) layer. Add red gel food coloring to the second portion and mix until the color is vibrant and even. Do the same with green food coloring for the third. If any dough feels too stiff, a tablespoon of milk helps loosen it up without making it sticky. I discovered this trick the hard way—too firm dough is a nightmare to roll out!
Step 3: Roll out the layers and chill
Using parchment paper on top and bottom, roll each colored dough into a rectangle roughly a quarter-inch thick and about the same size for stacking. Then transfer to a baking sheet and pop them in the fridge for 30 minutes. Chilling firms each layer for a clean assembly and makes the rolling-up part way easier than wrestling with sticky dough.
Step 4: Layer, roll, and chill your pinwheel log
Pull the chilled rectangles from the fridge—stack green dough on the white, then red on the green, carefully aligning the edges as best as you can. A gentle press with your rolling pin helps these layers stick together. Then, roll tightly from one edge to the other to form that iconic spiral log shape. Wrap the dough log in plastic wrap and chill it for at least 2 hours or overnight. I promise the waiting is worth it: firm dough slices cleanly, and your spirals look gorgeous.
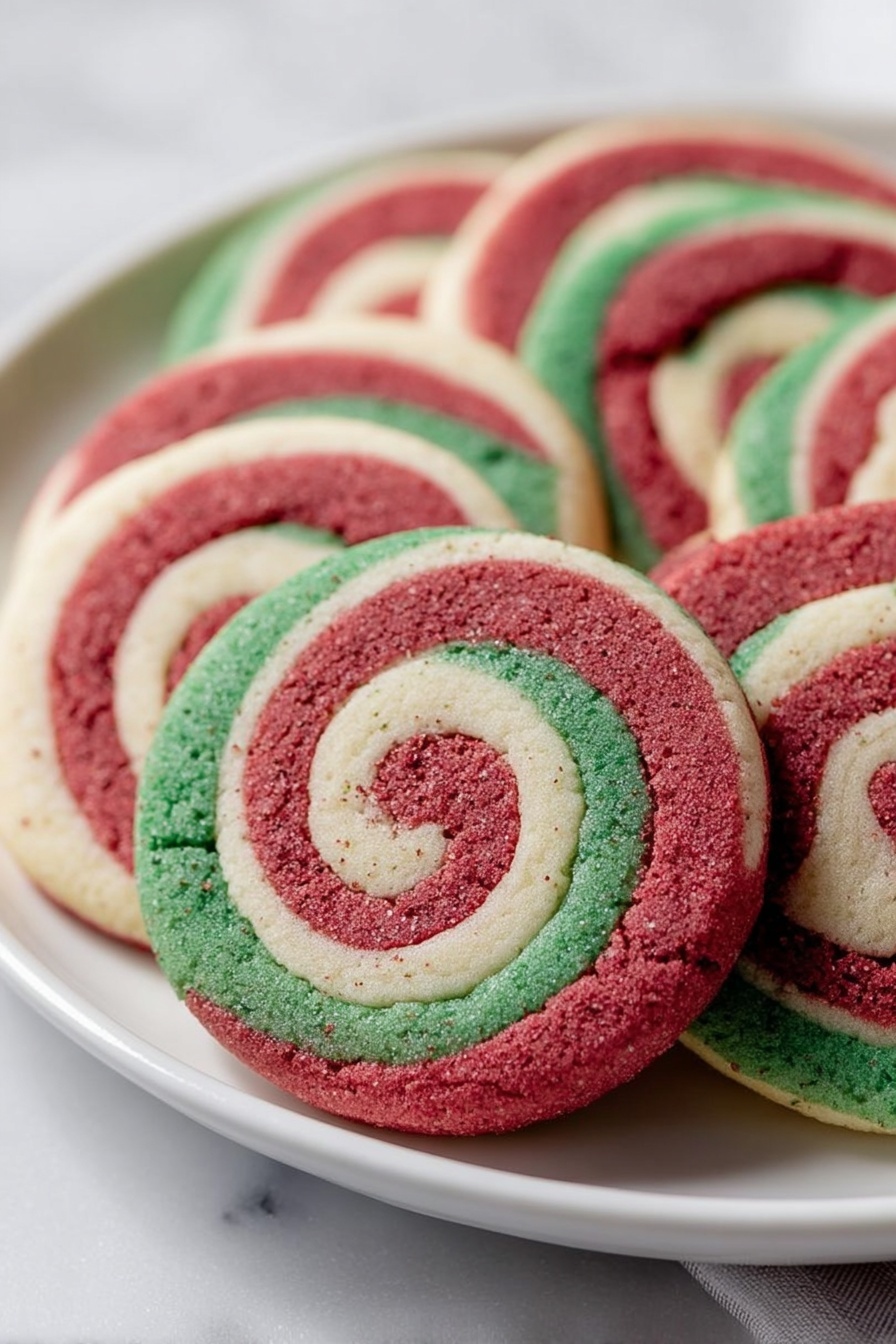
Step 5: Slice and bake your festive pinwheel cookies
Preheat your oven to 350°F (175°C) and line some baking sheets with parchment paper. Using a sharp knife, slice your dough log into quarter-inch thick rounds. Spacing each cookie about 2 inches apart keeps them from sticking as they bake. Bake for 10 to 12 minutes, watching closely—the edges should set but not brown. Let the cookies cool on the sheets for a few minutes before moving them to wire racks. This cooling period helps them firm up without breaking. Enjoy the charming swirl and the wonderful scent filling your kitchen!
Pro Tips for Making Festive Christmas Pinwheel Cookies Recipe
- Use gel food coloring: This avoids adding extra liquid that can make your dough too soft or sticky.
- Chill thoroughly: I’ve found that skipping a proper chill leads to messy spirals and tricky slicing—don’t rush this!
- Trim edges for perfect spirals: Before stacking, cutting your rectangles into crisp, even edges makes the rolls neater and the cookies prettier.
- Slice with a sharp, warm knife: Running your knife under hot water between slices helps achieve smooth, clean cookie rounds.
How to Serve Festive Christmas Pinwheel Cookies Recipe
Garnishes
I usually keep these cookies garnished simply—they’re already so festive! But I do like placing a few edible glitter dusted snowflakes or tiny candy stars on top right after baking for a little sparkle. Another favorite is a light drizzle of white chocolate on cooled cookies for a sweet contrast that’s both beautiful and delicious.
Side Dishes
These pinwheels pair beautifully with classic holiday drinks like hot cocoa, eggnog, or a spiced latte. For a party spread, I like setting them next to a cheese board and fresh fruit—it’s a sweet surprise alongside savory nibbles. Trust me; your guests will love the mix!
Creative Ways to Present
For gift-giving, I love stacking the cookies in a clear jar tied with a festive ribbon—it’s instant holiday charm. At parties, arranging these cookies in a spiral pattern on a holiday-themed platter mirrors the pinwheel design and makes an eye-catching centerpiece. Sometimes I use cookie cutters on the chilled dough log before baking to create mini pinwheel shapes too, which look adorable on a dessert table.
Make Ahead and Storage
Storing Leftovers
Once cooled, store your pinwheel cookies in an airtight container at room temperature. I usually keep mine on a paper towel-lined plate inside the container to absorb any moisture—this keeps them crisp for up to a week. Just remind everyone to try not to devour them all in one sitting!
Freezing
I swear by freezing the rolled dough logs before slicing. Wrapped tightly in plastic wrap and placed in a freezer bag, these logs keep well for up to 3 months. When you’re ready for fresh cookies, just slice and bake directly from the freezer—adding a minute or two to the bake time.
Reheating
If you want warmed cookies (because who doesn’t?), pop them in a 300°F oven for 5 minutes. This revives that fresh-baked softness without drying them out. Microwave reheating makes them too soft and sometimes chewy, so I avoid that method.
FAQs
-
Can I use natural food coloring in the Festive Christmas Pinwheel Cookies Recipe?
Absolutely! Natural food colorings like beet powder for red or spinach powder for green work well. Just keep in mind they may produce more muted colors and could slightly change the dough’s texture, so add them sparingly and adjust as needed.
-
How do I prevent the dough from cracking when rolling into the pinwheel log?
Chilling is your best friend here. Be sure each dough layer is chilled firm but pliable before stacking and rolling. If any dough feels too dry, add a teeny bit of milk to soften it. Roll slowly and gently to avoid cracks. If cracks happen, press dough back smoothly before chilling again.
-
Why do my pinwheel cookies lose their shape while baking?
Most likely, the dough wasn’t chilled enough or was too warm when sliced. Firm, cold dough holds its shape better on the baking sheet. Also, avoid over-baking as browning edges may result from heat spreading if the dough is too soft.
-
Can I add chocolate chips or nuts to this recipe?
You can, but be cautious—adding mix-ins might disrupt the smooth layering needed for neat spirals. If you want to experiment, try folding finely chopped nuts or mini chips into the plain dough layer before rolling it thin.
Final Thoughts
Making these Festive Christmas Pinwheel Cookies recipe has become one of my favorite holiday traditions—it’s simple, fun, and every time I slice that colorful log, there’s a quiet thrill about how perfect the spirals will be. These cookies bring so much joy to my family and friends (and a few happy “oohs” and “ahhs” too!). I can’t recommend giving them a try enough; they’re a sweet slice of holiday cheer you’ll want to bake again and again.
Print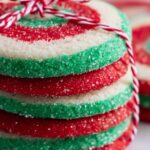
Festive Christmas Pinwheel Cookies Recipe
- Prep Time: 45 minutes
- Cook Time: 12 minutes
- Total Time: 57 minutes
- Yield: 35 cookies
- Category: Dessert
- Method: Baking
- Cuisine: American
Description
These Christmas Pinwheel Cookies are festive and colorful treats featuring vibrant red, green, and white spirals. Soft, buttery, and lightly sweetened, these cookies are perfect for holiday celebrations and easy to make with distinct layers of colored dough rolled into a charming spiral design.
Ingredients
Dry Ingredients
- 2 ½ cups all-purpose flour
- ½ teaspoon baking powder
- ¼ teaspoon salt
Wet Ingredients
- ¾ cup unsalted butter, softened
- 1 cup granulated sugar
- 1 large egg
- 1 teaspoon vanilla extract
Coloring and Optional
- Red food coloring
- Green food coloring
- 1 tablespoon milk (optional, for easier dough handling)
Instructions
- Prepare the Dough Base: In a medium bowl, whisk together the flour, baking powder, and salt, then set aside. In a large mixing bowl, cream the softened butter and granulated sugar together until light and fluffy, about 3 to 4 minutes. Add the egg and vanilla extract, mixing until fully incorporated. Gradually add the dry ingredients to the wet mixture on low speed, mixing until a soft, uniform dough forms.
- Divide and Color the Dough: Divide the dough evenly into three portions. Leave one portion plain for the white layer. Add red food coloring to the second portion and mix until evenly colored. Add green food coloring to the third portion and mix thoroughly. If any portion feels too firm, mix in 1 tablespoon of milk to soften slightly.
- Roll Out the Dough: Roll each dough portion between two sheets of parchment paper into a rectangle about ¼ inch thick and similar in size. Transfer each sheet to a baking sheet and chill for 30 minutes to firm the layers, which will help with assembly.
- Layer and Roll the Dough: Once firm, remove the dough sheets from the refrigerator. Stack the green dough over the white dough, then the red dough over the green, aligning the edges as closely as possible. Use a rolling pin to gently press the layers together. Starting from one edge, tightly roll the layered dough into a log to create the spiral shape. Wrap the dough log in plastic wrap and refrigerate for at least 2 hours or overnight until firm.
- Slice and Bake: Preheat the oven to 350°F (175°C) and line baking sheets with parchment paper. Using a sharp knife, slice the chilled dough log into ¼ inch thick rounds. Arrange the cookie slices 2 inches apart on the prepared baking sheets. Bake for 10 to 12 minutes, or until the edges are set but not browned. Let the cookies cool on the baking sheet for several minutes before transferring to a wire rack to cool completely.
Notes
- For sharper pinwheel spirals, trim the edges of each dough rectangle before stacking.
- Use gel food coloring for more vibrant color without adding extra liquid to the dough.
- If the dough becomes too sticky during rolling or slicing, chill it further to firm up for easier handling.
Nutrition
- Serving Size: 1 cookie
- Calories: 110
- Sugar: 7g
- Sodium: 55mg
- Fat: 6g
- Saturated Fat: 3.5g
- Unsaturated Fat: 2g
- Trans Fat: 0g
- Carbohydrates: 14g
- Fiber: 0.3g
- Protein: 1g
- Cholesterol: 20mg

