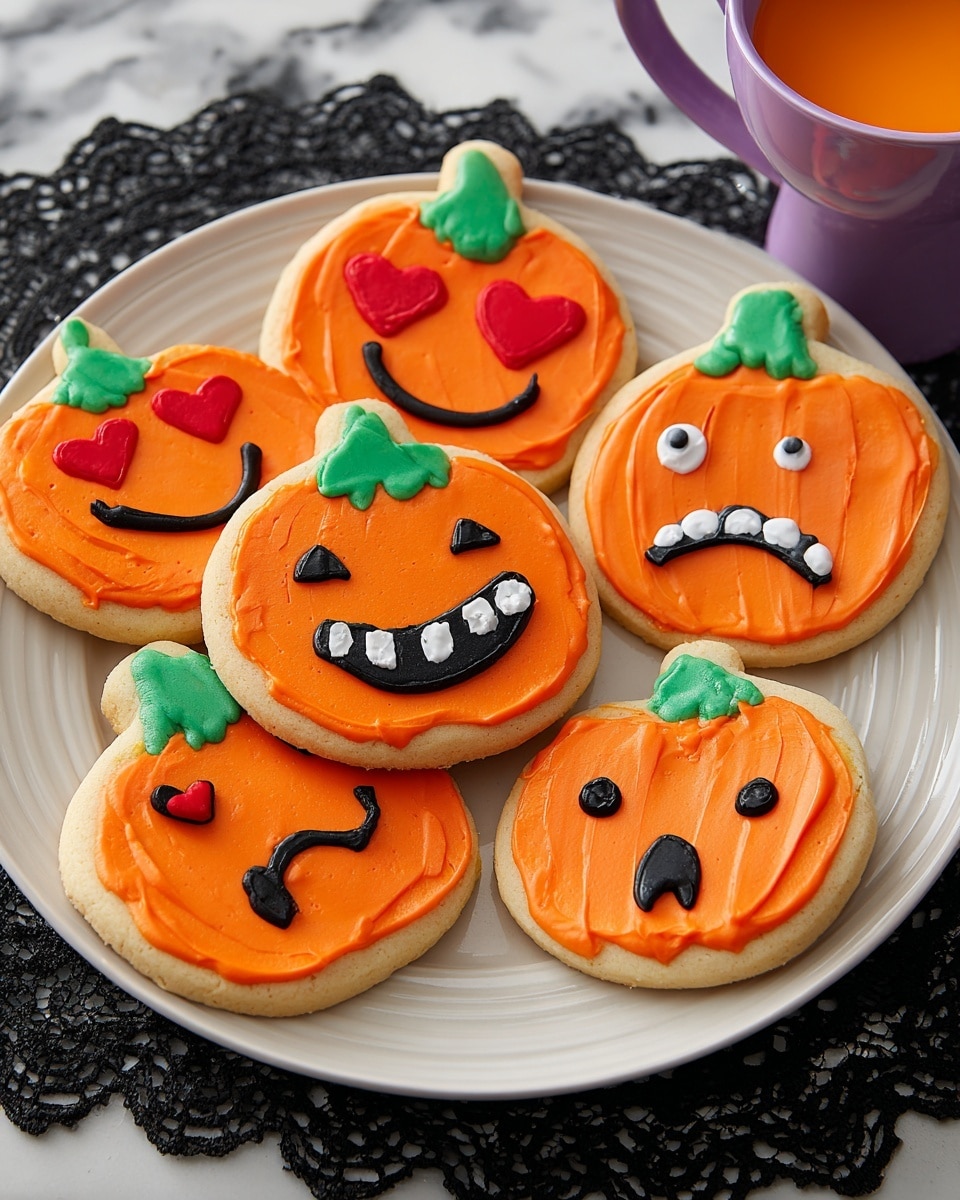
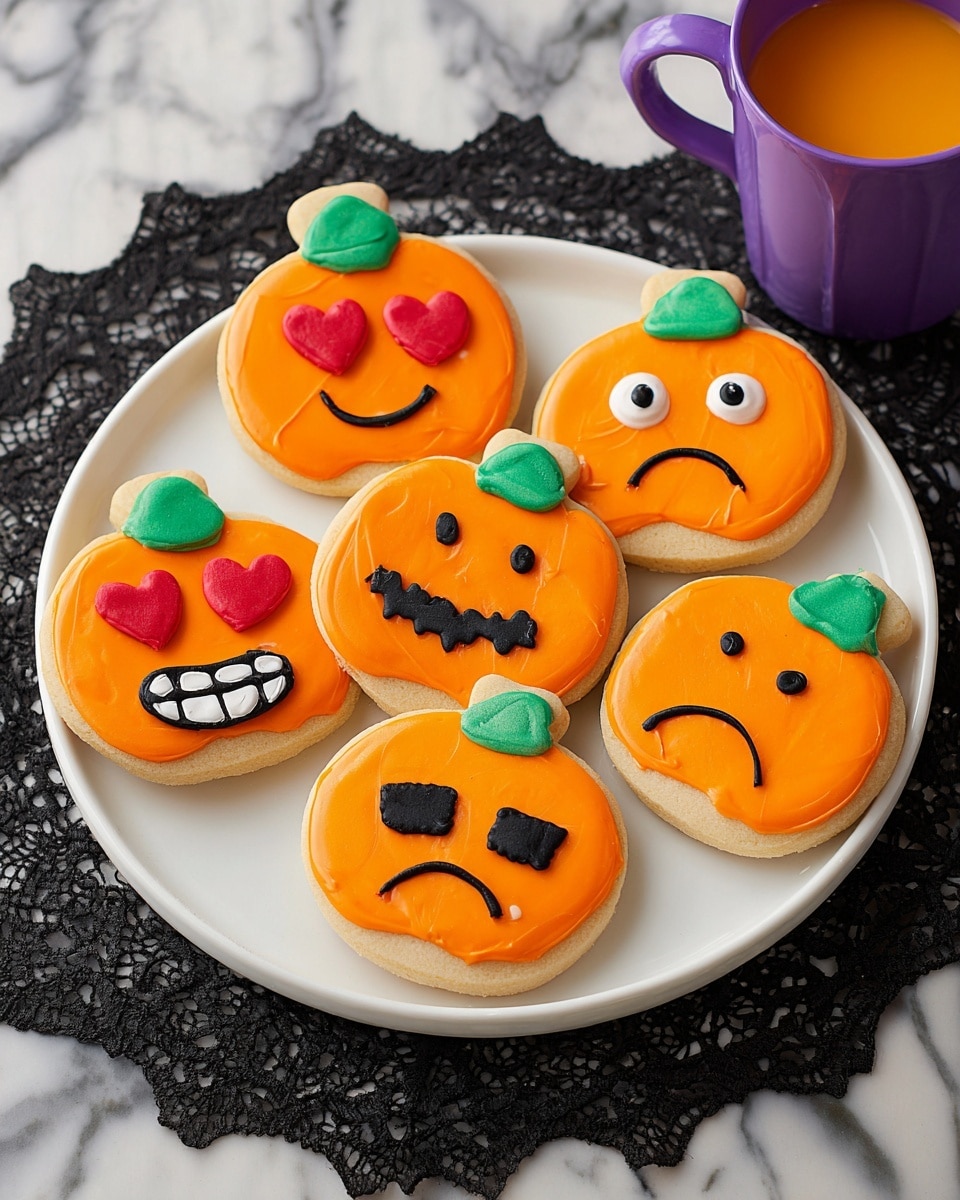
If you’re looking to add some festive cheer to your Halloween celebrations, I’ve got a treat you’re going to adore. This Halloween Pumpkin Cookies Recipe not only looks adorable with its bright orange and spooky black icing but tastes absolutely heavenly with that perfect soft bite. I remember the first time I made these cookies—I was blown away by how the colors popped and how everyone at my party couldn’t stop reaching for “just one more.” Stick with me here because I’m going to share all the tips and tricks so you can nail this fan-freaking-tastic recipe on your first try.
Why You’ll Love This Recipe
- Vibrant Colors: The icing colors are bold and festive, making your cookies pop on any Halloween table.
- Fun and Festive Design: Piping the pumpkin stems and spooky faces turns baking into a creative activity — trust me, it’s a hit with kids and adults alike!
- Perfectly Soft Texture: These cookies stay soft, not dry or crumbly, so every bite melts in your mouth.
- Great for Parties and Gifting: They’re simple to make but feel fancy enough to impress guests or friends.
Ingredients You’ll Need
These ingredients come together beautifully to create the perfect pumpkin-shaped cookies with that classic fall flavor and vibrant icing colors. I like to use gel food coloring because it gives richer hues without thinning the icing. Having a good pumpkin cookie cutter also makes all the fun happen.
- Roll-Out Cookie Dough: A sturdy yet tender dough that holds its shape well for clean pumpkin outlines.
- Orange Icing Color: The quintessential pumpkin shade—make sure to get a gel-based color for brightness.
- Kelly Green Icing Color: Perfect for the pumpkin stems that bring the cookies to life.
- Black Icing Color: For the spooky facial features that really make your pumpkins pop.
- Christmas Red and Red-Red Icing Colors: Used together to create a rich, Halloween-appropriate red for details like eyes or mouth accents.
- White Decorator Icing: The base for all your colors, ensure it’s stiff enough to hold shapes but smooth enough to pipe easily.
Variations
I love changing things up sometimes with this Halloween Pumpkin Cookies Recipe depending on who I’m baking for or what I have on hand. Feel free to get creative here—it’s your kitchen playground!
- Spiced Variation: Adding a touch of cinnamon and nutmeg to the dough gives a cozy, fall-inspired warmth that my family goes crazy for.
- Gluten-Free Dough: I’ve swapped in gluten-free flour blends for friends with sensitivities, and they tasted just as delightful without any compromise.
- Vegan Adaptation: Using vegan butter and a flax egg works great if you want to avoid dairy and eggs but still enjoy festive treats.
- Different Shapes: While pumpkins are the star, I’ve also made spider webs and ghost shapes using the same icing colors for variety during Halloween parties.
How to Make Halloween Pumpkin Cookies Recipe
Step 1: Preparing and Baking the Cookies
Start by following your roll-out cookie dough recipe or package instructions. I like to chill the dough well before rolling it out—that helps the shapes stay crisp and makes cutting easier. Roll the dough to about 1/4-inch thickness, then cut pumpkin shapes using your cookie cutter. Place them on a parchment-lined baking sheet to keep things mess-free. Bake according to your dough recipe’s timing—usually around 10-12 minutes—until edges are lightly golden. Let the cookies cool completely on a wire rack before icing; I can’t stress this enough, or your icing will slide right off!
Step 2: Tinting the Icing
Here’s a little trick I discovered: mix Red-Red and Christmas Red icing colors to create a rich red that’s perfect for spooky accents. Using separate bowls, tint 1 cup of the white decorator icing orange with the orange icing color, 1/4 cup red by combining red shades, 1/4 cup green for the stems, and about 1/2 cup black icing for faces and outlines. Use gel colors sparingly—you can always add more, but too much thins your icing.
Step 3: Decorating Your Pumpkin Cookies
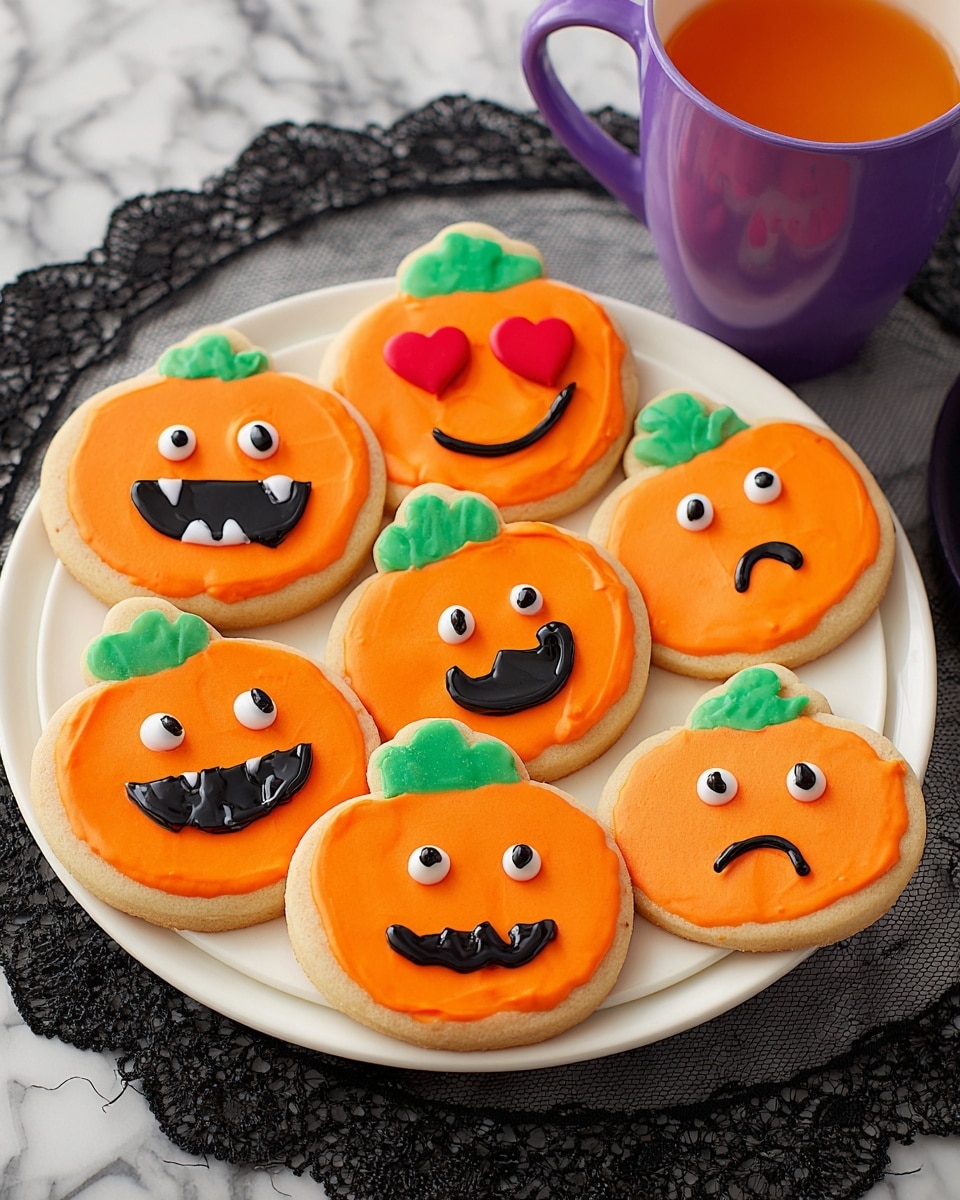
Using an offset spatula, spread a smooth layer of orange icing on each cooled cookie—it sets the pumpkin base perfectly. Then fill piping bags with their assigned colored icings: green for stems, black for faces, and the red and white for eyes and mouth details. I like to use a coupler so I can switch tips easily while piping. Start piping green stems at the top first; it sets the scene. Then use black icing with a fine tip to draw spooky eyes, noses, and mouths. For teeth and eyebrows, switch your black icing bag to a smaller tip (tip 3 works wonders). This step is fun and lets your creativity shine—my family loves helping out here, especially the little ones!
Pro Tips for Making Halloween Pumpkin Cookies Recipe
- Chill Dough Before Rolling: I learned this the hard way—the dough rolls more evenly and cookies hold shapes better.
- Use Gel Food Coloring: Unlike liquid, gel colors give vivid hues without thinning your icing, which is key for clean decorating.
- Let Cookies Cool Completely: Adding icing to warm cookies causes melting and smudging, so be patient for the best results.
- Switch Piping Tips Smoothly: Having a coupler on your icing bag makes changing tips quick—perfect for different facial features on your pumpkins.
How to Serve Halloween Pumpkin Cookies Recipe
Garnishes
I usually keep garnishes simple—sometimes a light dusting of edible glitter adds a fun sparkle that kids love. For a slightly spooky touch, I’ve piped tiny candy eyes with white icing before, which gives the pumpkins a playful, creepy personality. It’s totally optional but such a cute way to amp up the Halloween vibe.
Side Dishes
These cookies pair wonderfully with a warm cup of spiced apple cider or pumpkin spice latte, especially on chilly fall evenings. For parties, I like serving alongside a cheese board featuring mild cheeses and crackers that balance the sweet cookies.
Creative Ways to Present
One of my favorite tricks is creating a Halloween cookie platter with these pumpkins surrounded by mini candy corns and gummy spiders—it’s like a little edible scene. I’ve also wrapped individual cookies in clear cello bags tied with orange and black ribbons to hand out as party favors. Trust me, this adds an extra wow factor for guests and makes the cookies feel super special.
Make Ahead and Storage
Storing Leftovers
I store leftover cookies in an airtight container at room temperature, separating layers with parchment paper to keep the icing intact. They usually stay fresh and delicious for about 4-5 days—plenty of time for that midweek sweet craving.
Freezing
If I’m making a big batch ahead of time, I freeze these cookies after they’ve fully decorated and dried. I place them on a baking sheet first to freeze solid, then stack with parchment layers in a freezer-safe container. When you thaw them at room temperature, the icing stays mostly intact and the cookies taste just as fresh, which is a total win when planning for busy holidays.
Reheating
I usually enjoy these cookies cold or at room temp, but if you want a soft, just-baked feel, pop them in a warm oven (about 300°F) for 3-5 minutes. Just watch closely to avoid melting your pretty icing!
FAQs
-
Can I make these Halloween Pumpkin Cookies Recipe without food coloring?
You could skip the coloring, but the signature bright orange pumpkins and spooky black faces are what make these cookies so fun and festive. Using gel food coloring helps keep the icing thick and vibrant without watering it down, so I highly recommend it for the best look and taste.
-
How long do pumpkin cookies stay fresh?
Stored properly in an airtight container at room temperature, these cookies usually stay fresh for up to 5 days. After that, their texture and icing quality might decline, so it’s best to enjoy them sooner rather than later or freeze some for longer storage.
-
Can I decorate these cookies the day before a party?
Absolutely! Decorating them a day ahead actually helps the icing set nicely, making transport and serving easier. Just keep them in a sealed container for freshness, and they’ll look perfect the next day without losing flavor or texture.
-
What’s the best tip for beginner decorators?
Practice piping on parchment paper before working on the cookies themselves—this gives you a feel for pressure and control. Also, make sure your icing isn’t too runny so the shapes hold. Using a coupler to switch tips easily can make decorating less intimidating and much more fun!
Final Thoughts
This Halloween Pumpkin Cookies Recipe holds a special spot in my heart because it blends creativity and coziness into every bite. Whether you’re baking with kids, hosting a Halloween party, or just craving a festive treat, these cookies deliver both charm and flavor that never disappoints. I can’t wait for you to try them and watch your friends and family’s faces light up with delight—just like mine did the very first time I shared these. Happy baking, and enjoy every spooky sweet moment!
Print
Halloween Pumpkin Cookies Recipe
- Prep Time: 1 hour
- Cook Time: 15 minutes
- Total Time: 2 hours 15 minutes
- Yield: 1 dozen cookies
- Category: Dessert
- Method: Baking
- Cuisine: American
Description
Celebrate Halloween with these festive Pumpkin Cookies that feature colorful icing decorations resembling pumpkin faces. Soft, roll-out sugar cookie dough is baked to perfection and then decorated with vibrant red, orange, green, black, and white icing to create a fun and spooky treat perfect for Halloween parties and family gatherings.
Ingredients
Cookie Dough
- Roll-Out Cookie Dough (enough for 1 dozen pumpkin-shaped cookies)
Icing Colors
- Kelly Green Icing Color, 1 oz.
- Kelly Green Gel Food Coloring, 1 oz.
- Black Icing Color, 1 oz.
- Black Gel Food Coloring, 1 oz.
- Orange Icing Color, 1 oz.
- Orange Gel Food Coloring, 1 oz.
- Christmas Red Icing Color, 1 oz.
- Christmas Red Gel Food Coloring, 1 oz.
- Red-Red Icing Color, 1 oz.
- Red-Red Gel Food Coloring, 1 oz.
- White Decorator Icing, 4.5 lb.
Instructions
- Bake cookies: Prepare the roll-out cookie dough according to the recipe instructions or package directions. Roll the dough to an even thickness and use a pumpkin-shaped cookie cutter to cut out shapes. Place the cutouts onto a baking sheet and bake them until golden and firm. Remove from oven and allow to cool completely on a wire rack before decorating.
- Tint Icing: Separate the white decorator icing into portions. Combine Red-Red and Christmas Red icing colors to create the perfect red shade. Tint 1/4 cup of icing red with this mixture. Tint 1 cup icing orange using the orange icing color. Tint 1/4 cup icing green using Kelly Green icing color. Tint 1/2 cup icing black using black icing color. Mix well to achieve uniform colors.
- Decorate Cookies: Using a spatula, spread the orange icing smoothly over the top surface of each cooled pumpkin cookie to create the pumpkin base layer. Prepare decorating bags with couplers and fitting decorating tips: one bag with black icing, and three bags each filled with green, white, and red icings, all with #5 tips. With the green icing bag, pipe stems at the top of each pumpkin cookie. Using the black, red, and white icings, pipe facial features such as eyes and noses onto the pumpkin. Switch the decorating tip on the black icing bag to a smaller #3 tip and pipe detailed features like teeth and eyebrows to complete the spooky pumpkin faces.
Notes
- Ensure cookies are completely cooled before icing to prevent melting and running colors.
- Mix icing colors well to avoid streaks and ensure vibrant colors.
- Use gel food coloring to intensify colors without altering the consistency of the icing.
- Practice piping on parchment paper before decorating cookies for better precision.
- Store decorated cookies in an airtight container to keep them fresh for up to 3 days.
Nutrition
- Serving Size: 1 cookie
- Calories: 180
- Sugar: 15g
- Sodium: 110mg
- Fat: 8g
- Saturated Fat: 3g
- Unsaturated Fat: 4g
- Trans Fat: 0g
- Carbohydrates: 25g
- Fiber: 0.5g
- Protein: 2g
- Cholesterol: 20mg

