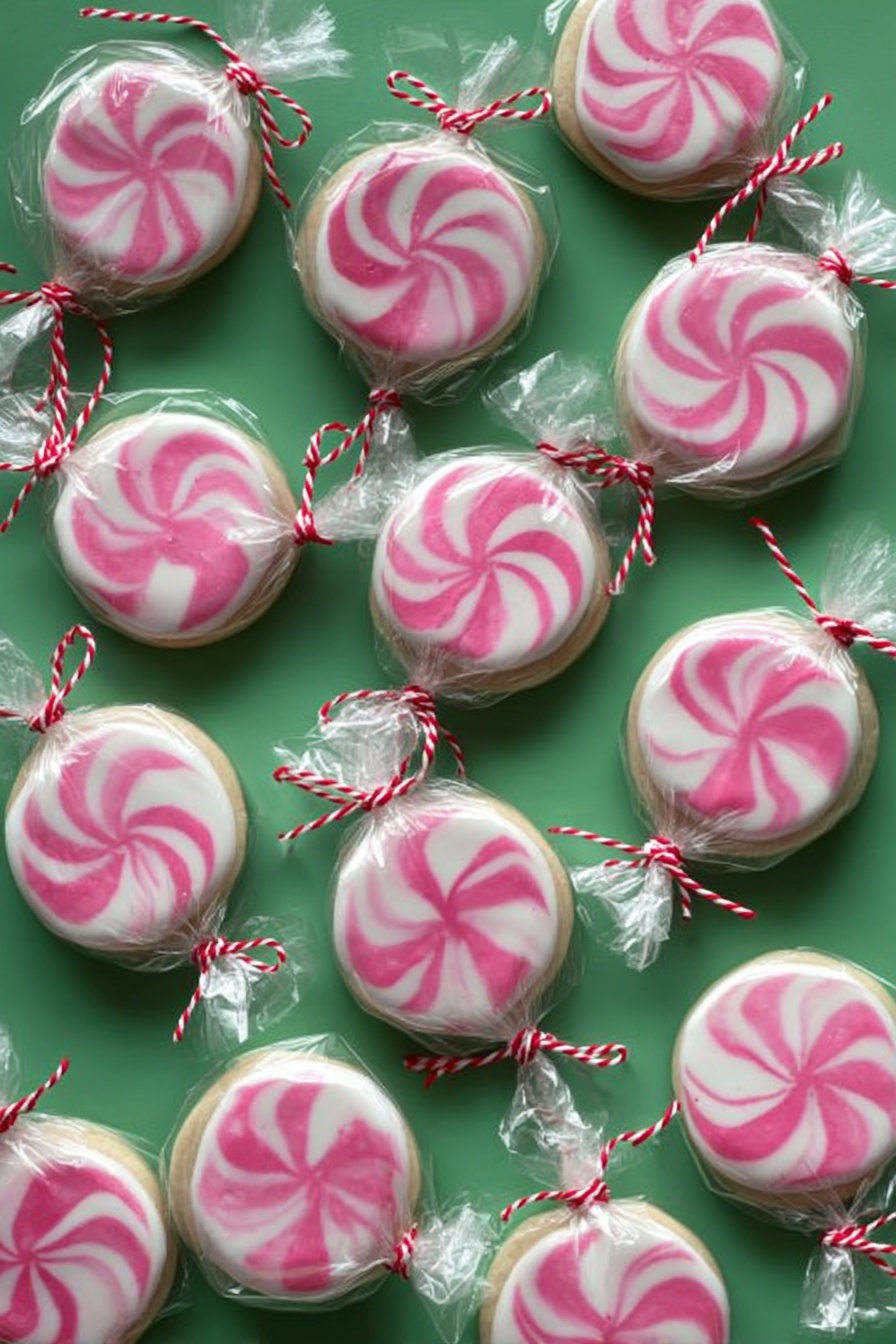
There’s something undeniably magical about a good Peppermint Sugar Cookies Recipe, especially when the peppermint flavor shines through that tender, buttery cookie base. I absolutely love this recipe because it strikes the perfect balance between sweet, festive, and just a little bit minty. Whether you’re baking for the holidays or just want to brighten up a chilly afternoon, you’re going to adore how these cookies come together—and how they disappear fast once your friends and family get a taste!
Why You’ll Love This Recipe
- Perfect Peppermint Flavor: The hint of peppermint extract in the icing adds that classic, refreshing twist that feels just right.
- Soft Yet Sturdy Cookies: These cookies hold their shape beautifully, making decorating a breeze and giving you a consistent bake every time.
- Fun & Creative Decorating: The royal icing lets you get playful with peppermint swirls and designs, making these a hit at any gathering.
- Great Make-Ahead Treats: You can bake and decorate these in advance, which saves time and spreads out the holiday joy.

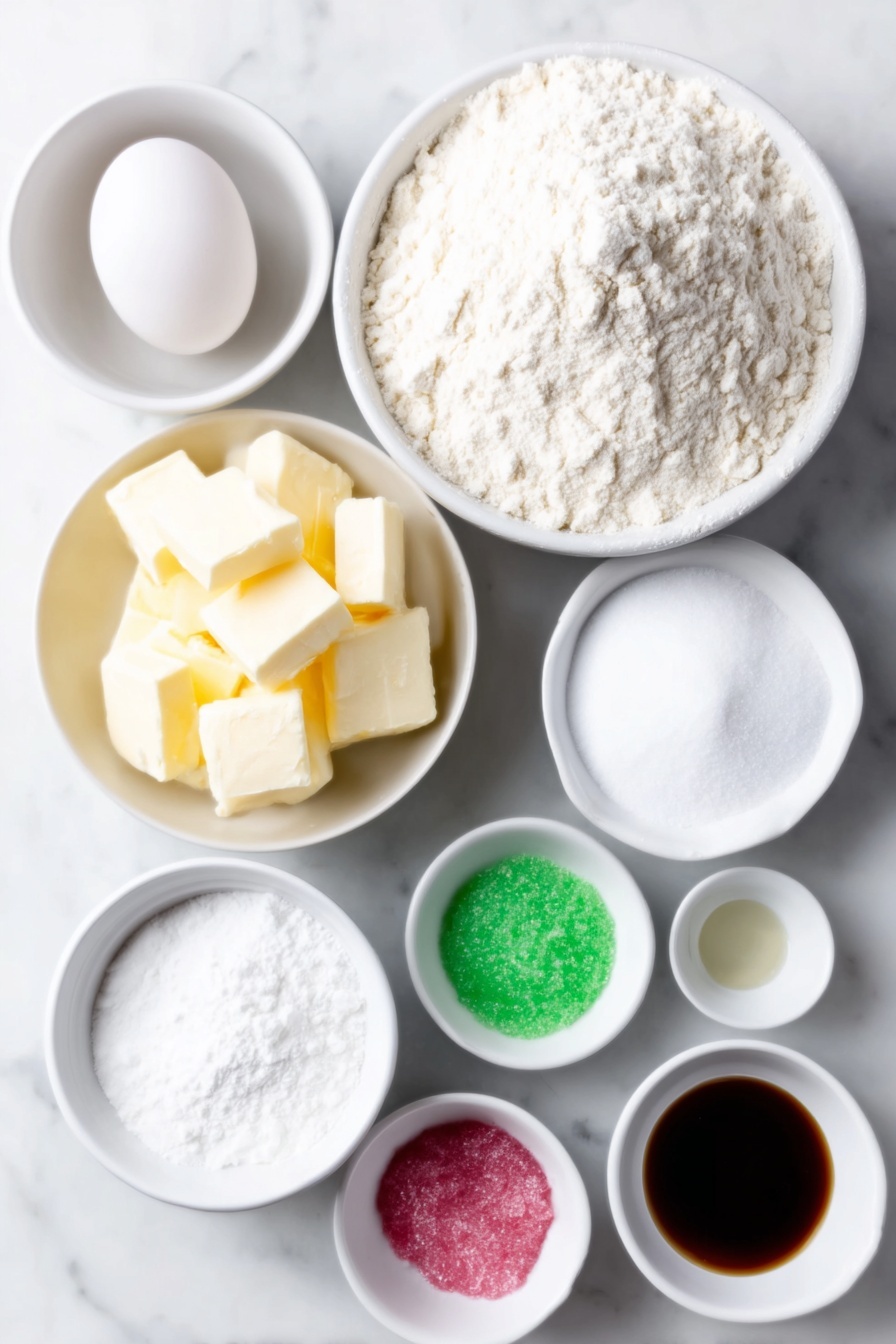
Ingredients You’ll Need
This Peppermint Sugar Cookies Recipe uses simple, classic ingredients that come together to create a cookie dough that’s easy to work with and tastes amazing. Keep your baking staples stocked, and a quick trip to the store will cover any extras like the meringue powder for the royal icing.
- All-purpose flour: The base of your cookie dough, unbleached if possible for a cleaner flavor.
- Baking powder: Helps give these cookies a subtle lift so they’re not too dense.
- Salted butter: Cold and cubed, it makes the dough rich and tender.
- Sugar: Regular granulated sugar for sweetness and a nice texture.
- Egg: Binds everything and adds moisture.
- Pure vanilla extract: Adds warmth and depth to the flavor.
- Almond extract: Just a hint for added complexity—it really makes a difference!
- Meringue powder: Essential for royal icing, it gives structure without the fuss of egg whites.
- Powdered sugar: The smooth base of the royal icing.
- Light corn syrup: Adds shine and helps keep the icing smooth.
- Peppermint extract: For that signature holiday flavor in your icing.
- Gel icing colors (white, pink, red, or green): For decorating and that Christmas flair.
- Tools like round cookie cutters, squeeze bottles, and toothpicks: These really help you get creative with your looks.
Variations
One of my favorite things about this Peppermint Sugar Cookies Recipe is how flexible it is to your flavor preferences and decorating style. I encourage you to make it your own and experiment a bit, especially with the icing colors and flavor accents.
- Chocolate Peppermint Twist: I tried adding a teaspoon of cocoa powder to the dough for a subtle chocolate base—it’s heavenly with the peppermint icing on top!
- Gluten-Free Option: Swap the all-purpose flour for a gluten-free blend that measures like regular flour, but keep a close eye on dough texture—you might need a touch more liquid.
- Extra Minty Kick: Double up on the peppermint extract in the icing, but be cautious—it’s potent and a little goes a long way to avoid overpowering.
- Festive Shapes and Colors: Beyond the classic round cookies, use holiday-themed cutters like snowflakes or trees and choose red and green icing colors for a vibrant holiday spread.
How to Make Peppermint Sugar Cookies Recipe
Step 1: Prepare Your Dough for Success
Start by preheating your oven to 350°F (175°C) and lining your baking sheets with parchment paper—trust me, parchment is a game-changer for easy cookie removal. In a medium bowl, whisk together your flour and baking powder, then set it aside. Next, cream your cold, cubed butter with sugar using the paddle attachment on your stand mixer until it’s light and fluffy—this usually takes about 3 to 5 minutes. You’ll notice the mixture really lightens in color, which means it’s ready. Then beat in your egg plus the vanilla and almond extracts, mixing until everything is well combined. Now, add the flour mixture slowly, one cup at a time, mixing on low speed to prevent overworking the dough. After your last addition, the dough will look crumbly but don’t worry—that’s exactly right.
Step 2: Roll, Cut, and Chill the Dough
I like to line my rolling surface with wax paper and dust it generously with flour along with my rolling pin. This prevents sticking and helps with smooth rolling. Take a portion of dough and knead it gently just until smooth, then roll it out to about a quarter-inch thick. Dip your round cutter in flour before cutting your circles to keep edges clean—don’t forget to flour the surface again as you work! The dough is sturdy, so these cookies lift nicely without breaking. Place the cut cookies on your prepared sheets, then pop them in the freezer for about 10 minutes before baking—this step is crucial for crisp edges and keeping the cookie shape without spreading.
Step 3: Bake and Cool
Bake the chilled cookies for 9 to 12 minutes until the edges just begin to turn golden. Watch them closely—oven times can vary, and you want tender, not overly browned cookies. When you take them out, let them cool for a few minutes right on the baking tray, then trim the edges with your cutter if you want perfectly round shapes. Finally, transfer the cookies to a wire rack to cool completely before icing.
Step 4: Whip Up the Peppermint Royal Icing
Once your cookies are fully cool, it’s time to make the royal icing. In a large bowl with your mixer’s paddle attachment, whisk together the meringue powder, peppermint extract, and water until foamy—that little foamy stage is where magic starts. Sift in the powdered sugar and add the corn syrup for that glossy finish. Mix on low to incorporate, scraping the bowl sides as you go, then beat on medium-high to stiff peaks. The icing should be shiny and hold its shape well. Tint a small portion pink and add a touch of white gel color to the remaining icing to get that crisp white shade.
Step 5: Decorate Like a Pro
Using a squeeze bottle, pipe a crisp white outline around each cookie. Then thin the white icing with drops of water until it flows like thick syrup for flooding the centers. Fill them in with this flood consistency white icing. Next, pipe pink dots along the edges and gently drag a toothpick from the pink dots toward the cookie center to create that classic peppermint swirl effect. This design not only looks beautiful but is surprisingly simple once you get the hang of it. Let the decorated cookies dry uncovered for at least 24 hours so the icing hardens fully—trust me, this patience pays off!
Pro Tips for Making Peppermint Sugar Cookies Recipe
- Chill Dough for Shape Retention: Freezing the cut dough cookies before baking really keeps their shape from spreading in the oven—don’t skip this step!
- Flour Your Tools Well: I learned the hard way that a dry rolling pin and cutter are game changers to avoid sticky dough and ragged edges.
- Be Patient with Icing Drying: Setting the decorated cookies overnight ensures your peppermint designs hold without smudging.
- Thin Your Icing Gradually: Adjust flood icing consistency slowly, adding water drop by drop—you can always add more, but too thin icing will run.
How to Serve Peppermint Sugar Cookies Recipe
Garnishes
I like to keep garnishes minimal for these cookies since the royal icing peppermint swirl does the heavy lifting visually. Occasionally, I’ll sprinkle finely crushed peppermint candies on top before the icing dries for an extra festive crunch and color contrast—it really amps up that holiday vibe.
Side Dishes
These peppermint sugar cookies pair beautifully with a hot cup of cocoa or a peppermint-infused latte. For gatherings, I serve alongside mini jars of eggnog or a warming mulled wine—the minty brightness of the cookies balances creamy or spiced drinks perfectly.
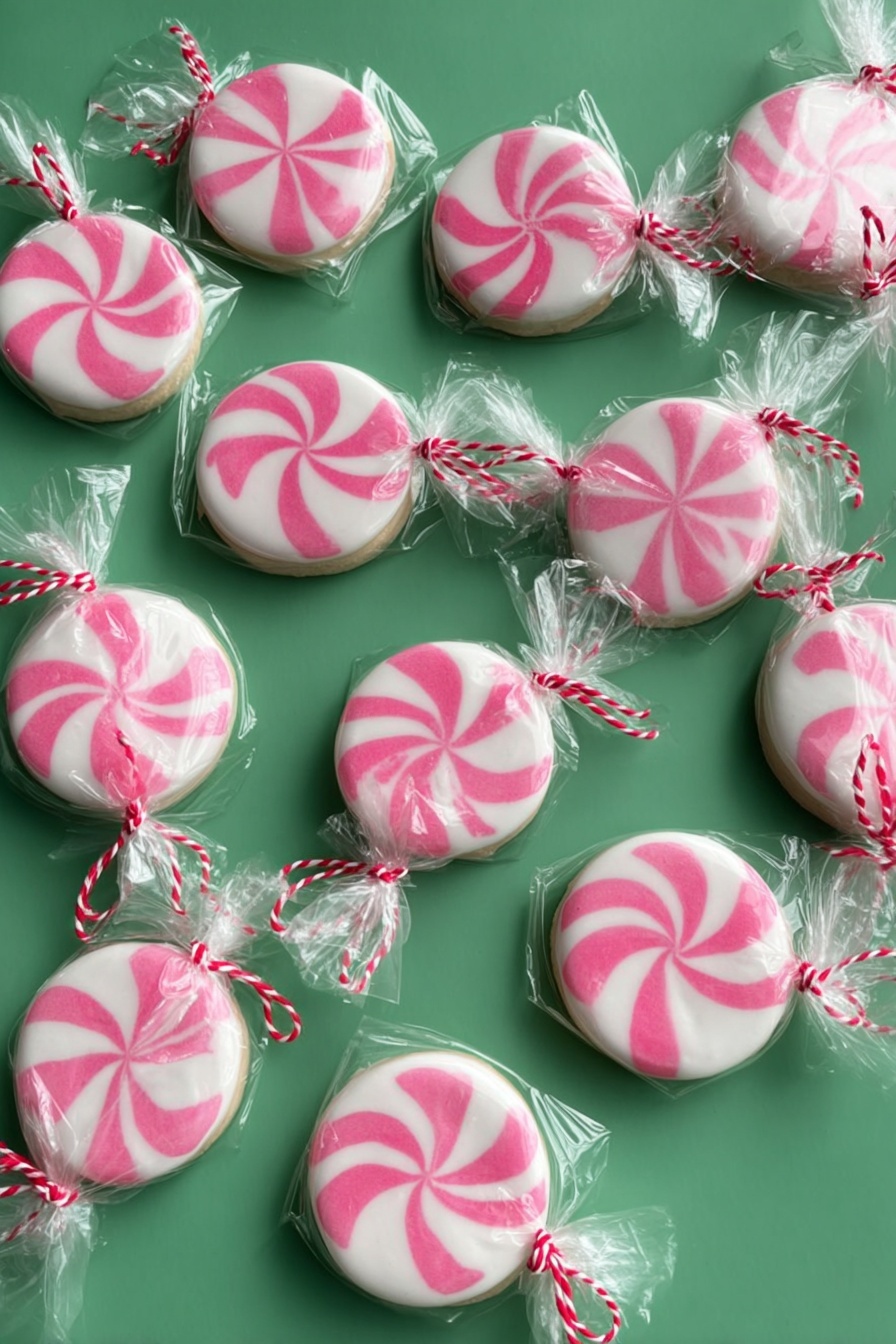
Creative Ways to Present
One year, I packaged these cookies in small treat bags tied with rustic twine, and they made adorable gifts. Another favorite is arranging them on a festive platter with fresh evergreen sprigs and candy canes for a holiday dessert table centerpiece. The pretty colors and peppermint swirls really make the display pop!
Make Ahead and Storage
Storing Leftovers
I store leftover peppermint sugar cookies in an airtight container layered with parchment paper to keep them from sticking together. They last perfectly fresh for up to a week at room temperature, which is plenty long since they tend to disappear quickly around my house!
Freezing
If you want to bake ahead, these cookies freeze nicely—either before decorating or after the royal icing has fully set. Just layer them with parchment and seal tightly in a freezer-safe container or bag. When you’re ready, thaw them overnight on the counter; they come out just as fresh and tasty as the day you baked them.
Reheating
While these cookies are best enjoyed at room temperature, if you prefer them slightly warm, pop them in a preheated 300°F oven for 3-5 minutes. Just be sure not to overheat or the icing may soften too much. This quick warming brings out the buttery notes without any mess.
FAQs
-
Can I make this Peppermint Sugar Cookies Recipe without almond extract?
Absolutely! Almond extract adds a subtle depth, but if you’re allergic or don’t have it on hand, you can leave it out or replace it with an equal amount of vanilla extract. The cookies will still taste delicious and minty thanks to the peppermint icing.
-
How do I prevent my royal icing from cracking?
To avoid cracking, make sure your icing is not too thick when you pipe and flood. Allow the cookies to dry slowly at room temperature, away from direct sunlight or heat. Also, storing the finished cookies in an airtight container with a slice of bread can help maintain moisture in the icing.
-
Can I use fresh egg whites instead of meringue powder?
Yes, fresh egg whites can be used to make royal icing. However, meringue powder is a safer and more convenient option, especially if you’re transporting or gifting the cookies. If you use fresh egg whites, use pasteurized eggs and be aware the icing may have a shorter shelf life.
-
What’s the best way to thin royal icing for flooding?
Add water a few drops at a time, stirring gently after each addition, until the icing flows like thick syrup but doesn’t run off your spoon immediately. The right consistency lets the icing smooth out nicely over the cookie.
-
How long do these peppermint sugar cookies last?
Stored properly in an airtight container at room temperature, these cookies stay fresh for up to one week. They can also be frozen for longer storage, lasting a few months in the freezer.
Final Thoughts
This Peppermint Sugar Cookies Recipe holds a special place in my kitchen because it’s equal parts fun to make and absolutely delightful to eat. I remember the first time I decorated these—I was amazed at how simple techniques turned out stunning peppermint swirl patterns that wowed everyone. You’ll find baking these cookies a joyful way to create memories, whether for family, friends, or yourself. So grab your mixer, your favorite holiday playlist, and get ready—your kitchen is about to smell amazing and your taste buds are in for a treat!
Print
Peppermint Sugar Cookies Recipe
- Prep Time: 30 minutes
- Cook Time: 10 minutes
- Total Time: 40 minutes plus 24 hours drying
- Yield: 5 dozen 1.5 inch cookies
- Category: Dessert
- Method: Baking
- Cuisine: American
Description
Delightfully festive Peppermint Candy Sugar Cookies featuring soft, buttery sugar cookies topped with a glossy royal icing decorated in classic peppermint swirls. Perfect for holiday gatherings, these cookies balance a tender crumb with vibrant peppermint-flavored royal icing that hardens to a beautiful finish.
Ingredients
SUGAR COOKIES
- 3 cups unbleached, all-purpose flour
- 2 teaspoons baking powder
- 1 cup (2 sticks) salted butter, cold and cut into cubes
- 1 cup sugar
- 1 egg
- 3/4 teaspoon pure vanilla extract
- 1/2 teaspoon almond extract
- 1.5 inch round cutter
ROYAL ICING
- 1/2 cup meringue powder
- 1 scant cup (almost full) water
- 2 pounds (32 ounces) powdered sugar
- 2 teaspoons light corn syrup
- 1 teaspoon peppermint extract (if desired)
- Super white gel icing color
- Pink, red or green icing color
- Small squeeze bottles
- Toothpicks
- 3X4 Treat bags
- Twine or Twist ties
Instructions
- Preheat and Prepare Dry Ingredients: Preheat your oven to 350 degrees Fahrenheit and line baking sheets with parchment paper. In a medium bowl, whisk together the all-purpose flour and baking powder; set aside for later use.
- Cream Butter and Sugar: Using a stand mixer fitted with the paddle attachment, cream the cold, cubed salted butter with sugar until the mixture is light and fluffy, which creates a smooth base for the cookies.
- Add Wet Ingredients: Beat in one egg along with the vanilla and almond extracts until fully combined, enhancing the flavor complexity of the dough.
- Incorporate Dry Ingredients: Add the flour mixture gradually, one cup at a time, on low speed to avoid overmixing. Mix until just combined, then scrape down the sides to ensure the thick, crumbly dough has no dry pockets.
- Roll and Cut Dough: Line your rolling surface with wax paper and dust it, along with your rolling pin and cookie cutter, generously with flour. Roll a portion of the dough to 1/4 inch thickness, then cut circles using the 1.5 inch round cutter. Gather scraps, knead briefly, and repeat until all dough is used.
- Freeze Cookies: Place the cut cookies on the prepared baking sheets and freeze for about 10 minutes to help them maintain shape during baking.
- Bake Cookies: Bake in the preheated oven for 9-12 minutes. Once done, allow them to cool on the baking sheet for a couple of minutes before trimming edges if needed and transferring the cookies to a wire rack to cool completely.
- Prepare Royal Icing Base: When cookies are cool, prepare the icing by combining meringue powder, peppermint extract (optional), and water in a stand mixer bowl and mix until foamy and combined.
- Add Powdered Sugar and Corn Syrup: Sift in powdered sugar, add corn syrup, and mix on low just until incorporated. Scrape the bowl’s sides and beat on medium-low for 5 minutes, then increase speed to medium-high and beat until glossy with stiff peaks forming.
- Tint Icing: Tint a small portion of the royal icing pink using gel icing color. Add a few drops of white gel color to the remaining white icing to enhance brightness.
- Outline Cookies: Using squeeze bottles, pipe white icing to outline each cookie precisely, setting the stage for flooding.
- Flood Cookies: Thin the white icing by adding water gradually until it reaches a thick syrup consistency. Flood the centers of each cookie with this thinned white icing.
- Create Peppermint Design: Pipe pink dots around the perimeter of the flooded area, then drag a toothpick through the dots towards the center to form the signature peppermint swirl pattern. Repeat with the remaining cookies.
- Drying Time: Allow decorated cookies to dry completely for 24 hours to set the royal icing hard for a beautiful finish.
Notes
- If the pink icing sits on top of the white without sinking in, add a few more drops of water to thin the icing until it blends properly.
- Rolling the dough between sheets of wax paper can minimize sticking and make clean-up easier.
- Freezing the cut cookies before baking helps maintain their shape and prevents spreading.
- Use a light dusting of flour on the rolling pin and cutter to prevent sticking while shaping cookies.
- Store decorated cookies in an airtight container once completely dry to maintain freshness and icing texture.
Nutrition
- Serving Size: 1 cookie
- Calories: 120
- Sugar: 15g
- Sodium: 65mg
- Fat: 5g
- Saturated Fat: 3g
- Unsaturated Fat: 2g
- Trans Fat: 0g
- Carbohydrates: 18g
- Fiber: 0.2g
- Protein: 1g
- Cholesterol: 15mg


