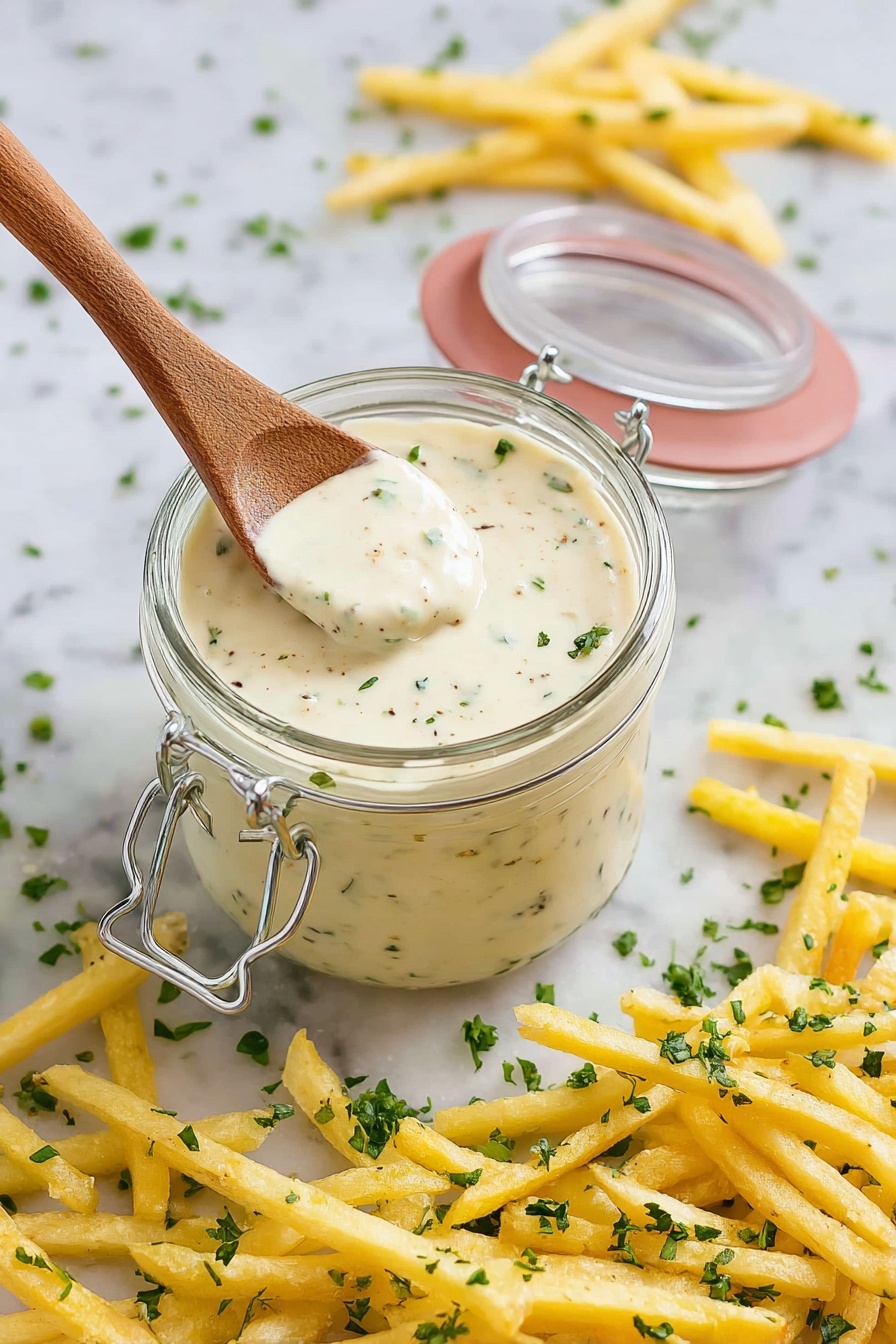
If you’re a garlic lover like me, you’re in for a real treat with this Roasted Garlic Aioli Recipe. It’s creamy, rich, and bursting with that deep, caramelized garlic flavor that only roasting can bring out. I absolutely love how this aioli transforms everyday dishes into something special—and trust me, once you make it, you’ll want to drizzle it on everything!
Why You’ll Love This Recipe
- Deep Roasted Flavor: Roasting the garlic mellows its sharpness and adds a sweet, nutty character you can’t get with raw garlic.
- Simple Ingredients: You probably already have everything in your pantry, making this aioli super accessible and easy.
- Versatile Use: It’s perfect as a dip, sandwich spread, or sauce to elevate fries, veggies, and more.
- Make-Ahead Friendly: This aioli actually tastes better after chilling and keeps well in the fridge for days.

Ingredients You’ll Need
The ingredients for this Roasted Garlic Aioli Recipe are straightforward, but each plays an important role. Using fresh garlic and good-quality mayo makes all the difference, and a splash of lemon juice brightens the whole mixture.
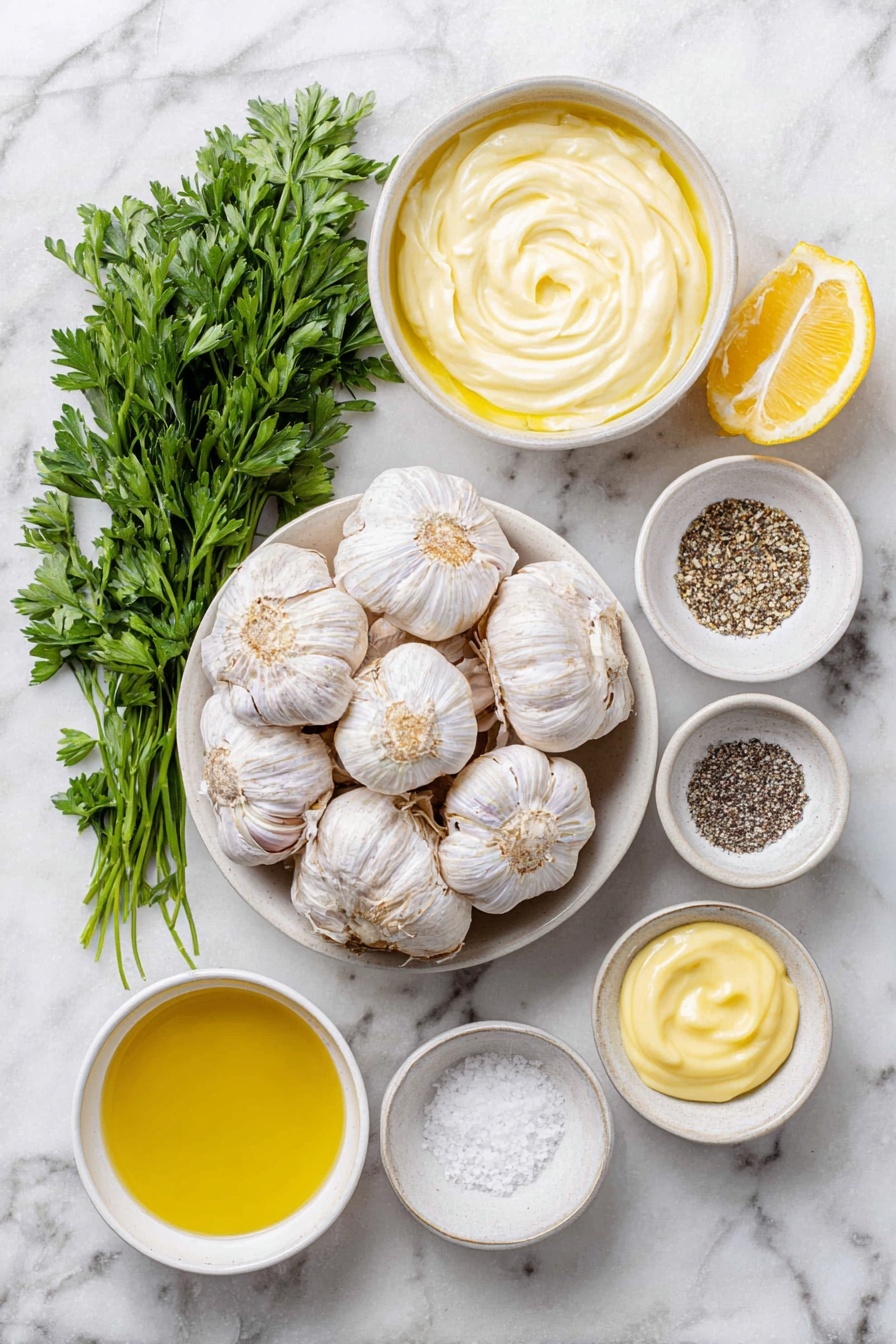
- Garlic: Make sure to choose a fresh, firm head of garlic for the best flavor when roasted.
- Olive oil: Use a good-quality extra virgin olive oil for drizzling over the garlic before roasting—it helps caramelize the cloves beautifully.
- Mayonnaise: Choose your favorite brand or homemade mayo as the creamy base of the aioli.
- Lemon juice: Freshly squeezed is best to add a bright zing and balance the richness.
- Dijon mustard: Adds subtle tang and depth; don’t skip on this one!
- Salt and pepper: To season and elevate all the flavors.
- Parsley or chives: Fresh herbs for garnish to add a pop of color and freshness.
Variations
One of my favorite things about this Roasted Garlic Aioli Recipe is how easy it is to tweak to your liking. I encourage you to personalize it! Sometimes I add a little smoked paprika for warmth or a touch of honey for sweetness when I’m feeling adventurous.
- Smoky Aioli: I once added smoked paprika and a dash of chipotle powder—my family went crazy for the smoky kick it provided.
- Herb-Infused: Adding fresh basil or tarragon alongside the parsley changes the flavor profile completely, perfect for spring dishes.
- Vegan Version: Use vegan mayo and substitute lemon juice with apple cider vinegar for a tangy twist.
- Spicy Twist: Stir in a little sriracha or cayenne pepper if you like your aioli with a bit of heat.
How to Make Roasted Garlic Aioli Recipe
Step 1: Roast the Garlic Till Golden and Soft
Start by preheating your oven to 400°F (200°C). Peel away the outer paper layers from a whole garlic bulb, careful not to separate the cloves inside. Slice off the top to expose the individual cloves. Place the bulb on a foil square, drizzle with olive oil, and wrap it tightly. Roasting for 30-40 minutes will coax out the garlic’s mellow, buttery sweetness. You’ll know it’s perfect when the cloves are soft and golden.
Step 2: Mash and Mix the Aioli Ingredients
After roasting, let the garlic cool just enough to handle. Then squeeze the soft cloves out into a bowl and mash them with a fork until smooth. This is the magic base that makes your aioli sing! Add mayonnaise, lemon juice, Dijon mustard, and stir until well combined. Season with salt and pepper to your taste—don’t be shy here, the seasoning brings the whole thing to life.
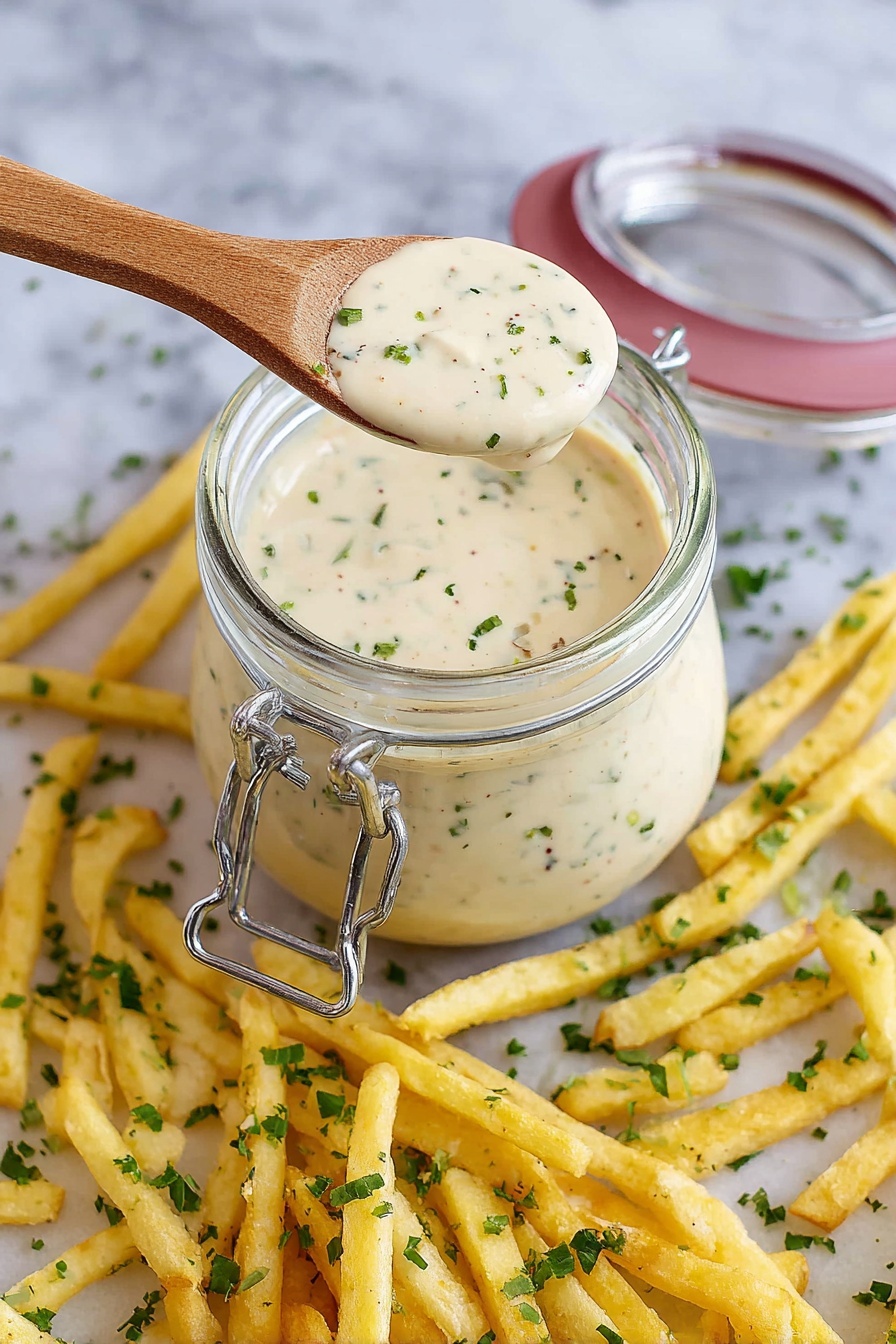
Step 3: Chill and Garnish
For best flavor, cover your aioli and pop it in the fridge for at least 30 minutes. This resting time helps all the flavors meld beautifully. Right before serving, sprinkle with fresh chopped parsley or chives for that gorgeous final touch and a hint of freshness.
Pro Tips for Making Roasted Garlic Aioli Recipe
- Roast Extra Garlic: I always roast a few extra cloves because they’re delicious spread on toasted bread or stirred into soups.
- Smooth or Chunky? For a super smooth aioli, blend everything in a food processor, but if you like a bit of texture, mash by hand.
- Adjusting Consistency: If the aioli feels too thick, thin it with a teaspoon or two of water or extra lemon juice.
- Avoid Over-Roasting: Watch your garlic carefully; too long can make it bitter instead of sweet.
How to Serve Roasted Garlic Aioli Recipe
Garnishes
I love topping my roasted garlic aioli with freshly chopped parsley or chives—these bring a lovely herbal brightness and a great color contrast. Sometimes, I add a sprinkle of smoked paprika for a hint of warmth and smoky aroma.
Side Dishes
This aioli is a game-changer with crispy fries, roasted veggies, grilled chicken, or as a spread on sandwiches and burgers. One of my favorites is drizzling it over roasted potatoes or using it as a dip for crunchy crudités—it’s always a hit with guests!
Creative Ways to Present
For special occasions, I’ve served this aioli in small ramekins garnished with herb sprigs alongside a platter of grilled seafood and charcuterie. Another time, I swirled it beautifully over baked fish fillets for an elegant touch that impressed everyone.
Make Ahead and Storage
Storing Leftovers
I store leftover aioli in a sealed container in the fridge, where it keeps well for up to a week. It thickens a bit while chilled, so just give it a quick stir before serving again.
Freezing
Personally, I don’t freeze this aioli because the texture can change upon thawing—but if you want to, freezing in small portions is best. Just be sure to thaw it slowly in the fridge and whisk gently before using.
Reheating
This aioli is best served cold or at room temperature, so reheating isn’t really necessary. If you do want to warm it slightly, do so gently, stirring often to avoid breaking the emulsion.
FAQs
-
Can I use pre-minced garlic instead of roasting fresh garlic?
While pre-minced garlic is convenient, it won’t deliver the same mellow, sweet depth that roasted garlic does. Roasting softens garlic’s sharpness and adds a wonderful caramelized flavor that’s key to this aioli.
-
How long does roasted garlic aioli last in the refrigerator?
Stored in an airtight container, this aioli lasts about 5 to 7 days in the refrigerator. Always give it a sniff and taste before serving to ensure freshness.
-
Can I make this aioli without mayonnaise?
Yes! You can substitute mayonnaise with Greek yogurt for a lighter version or use a vegan mayo to keep it plant-based. Just note the flavor and texture will vary slightly.
-
What dishes pair best with roasted garlic aioli?
This aioli shines with roasted potatoes, grilled meats, steamed vegetables, burgers, sandwiches, and even as a dip for fresh crudités or crispy fries.
Final Thoughts
Honestly, this Roasted Garlic Aioli Recipe has become a staple in my kitchen because it’s so easy and yet elevates almost any dish. Whether you’re new to making sauces or a seasoned cook looking for that perfect garlicky spread, give this one a try. I’m confident it’ll become one of your go-tos for adding flavor and a bit of gourmet flair without fuss. Enjoy experimenting and sharing it with friends and family—you’ll be hearing everyone say, “What’s in this?!”
Print
Roasted Garlic Aioli Recipe
- Prep Time: 5 minutes
- Cook Time: 40 minutes
- Total Time: 45 minutes
- Yield: 8 servings
- Category: Sauce
- Method: Baking
- Cuisine: French
Description
This Roasted Garlic Aioli is a creamy, flavorful condiment made by roasting garlic to bring out its natural sweetness and combining it with mayonnaise, lemon juice, and Dijon mustard. Perfect for spreading on sandwiches, dipping vegetables, or enhancing your favorite dishes with a garlicky punch.
Ingredients
Roasted Garlic
- 1 head garlic
- 1 tablespoon olive oil
Aioli Base
- ½ cup mayonnaise
- 1 tablespoon lemon juice
- ½ teaspoon Dijon mustard
- Salt and pepper, to taste
Garnish
- Parsley or chives, chopped (optional)
Instructions
- Preheat Oven: Preheat your oven to 400°F (200°C) to prepare for roasting the garlic.
- Prepare Garlic: Peel away the outer layers of the garlic bulb but keep the cloves intact. Slice off the top of the bulb with a sharp knife to expose the cloves. Place the garlic on a piece of aluminum foil, drizzle with olive oil, and tightly wrap with the foil.
- Roast Garlic: Place the wrapped garlic bulb in the oven and roast for 30-40 minutes until the cloves are soft and golden brown.
- Cool and Mash: Remove the roasted garlic from the oven, allow it to cool slightly, then squeeze the cloves out of their skins into a small bowl. Mash the garlic cloves with a fork until smooth and creamy.
- Combine Ingredients: In a separate bowl, mix the mashed roasted garlic with mayonnaise, lemon juice, and Dijon mustard. Stir until well blended.
- Season Aioli: Add salt and pepper to taste, adjusting seasoning as needed for a balanced flavor.
- Garnish and Chill: Optionally garnish with chopped parsley or chives. Transfer the aioli to a serving dish or airtight container and refrigerate for at least 30 minutes to allow flavors to meld.
Notes
- Roast extra garlic cloves to use as a spread or to add to other recipes.
- For a smoother texture, use a food processor or blender to combine the ingredients.
- If the aioli is too thick, thin it out with a splash of water or more lemon juice.
- Remember the aioli will thicken further after chilling; adjust consistency accordingly.
- Customize your aioli by adding ingredients like smoked paprika or honey for a unique twist.
Nutrition
- Serving Size: 2 tablespoons
- Calories: 110
- Sugar: 0.3 g
- Sodium: 140 mg
- Fat: 11 g
- Saturated Fat: 2 g
- Unsaturated Fat: 8 g
- Trans Fat: 0 g
- Carbohydrates: 1 g
- Fiber: 0.2 g
- Protein: 0.3 g
- Cholesterol: 10 mg
