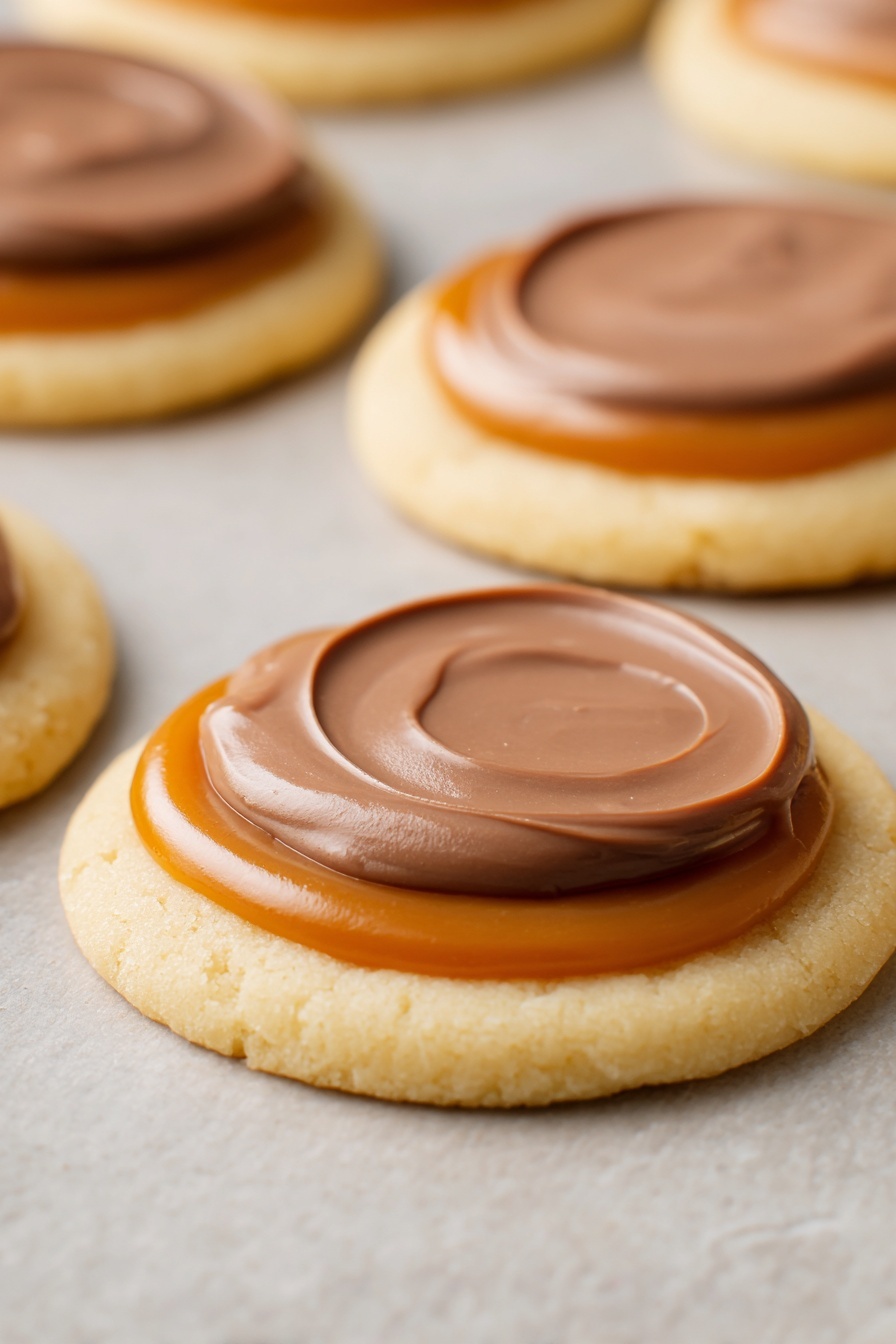
If you’re a fan of cookies and candy bars—and honestly, who isn’t?—then you absolutely must try this Twix Cookie Cups Recipe. Picture this: buttery cookie bases filled with gooey caramel and topped with a smooth layer of melted chocolate. I promise, these little treats are beyond delicious and surprisingly easy to make. When I first tried them, I couldn’t believe how the familiar flavors of a Twix bar transformed into these irresistible, bite-sized cookie cups. Trust me, once you make these, they’ll become a kitchen favorite you’ll want to share (but might end up hoarding!).
Why You’ll Love This Recipe
- Familiar Flavors Made Fun: All your favorite Twix ingredients combined into a fresh, homemade cookie cup that tastes just as amazing as the candy bar.
- Easy to Make: You don’t need fancy tools or a ton of time—perfect for busy days or last-minute dessert cravings.
- Perfect for Sharing or Gifting: These bite-sized treats are great for parties, holidays, or just surprising your loved ones.
- Customizable: You can tweak the recipe to suit your tastes or dietary needs—more on that later!

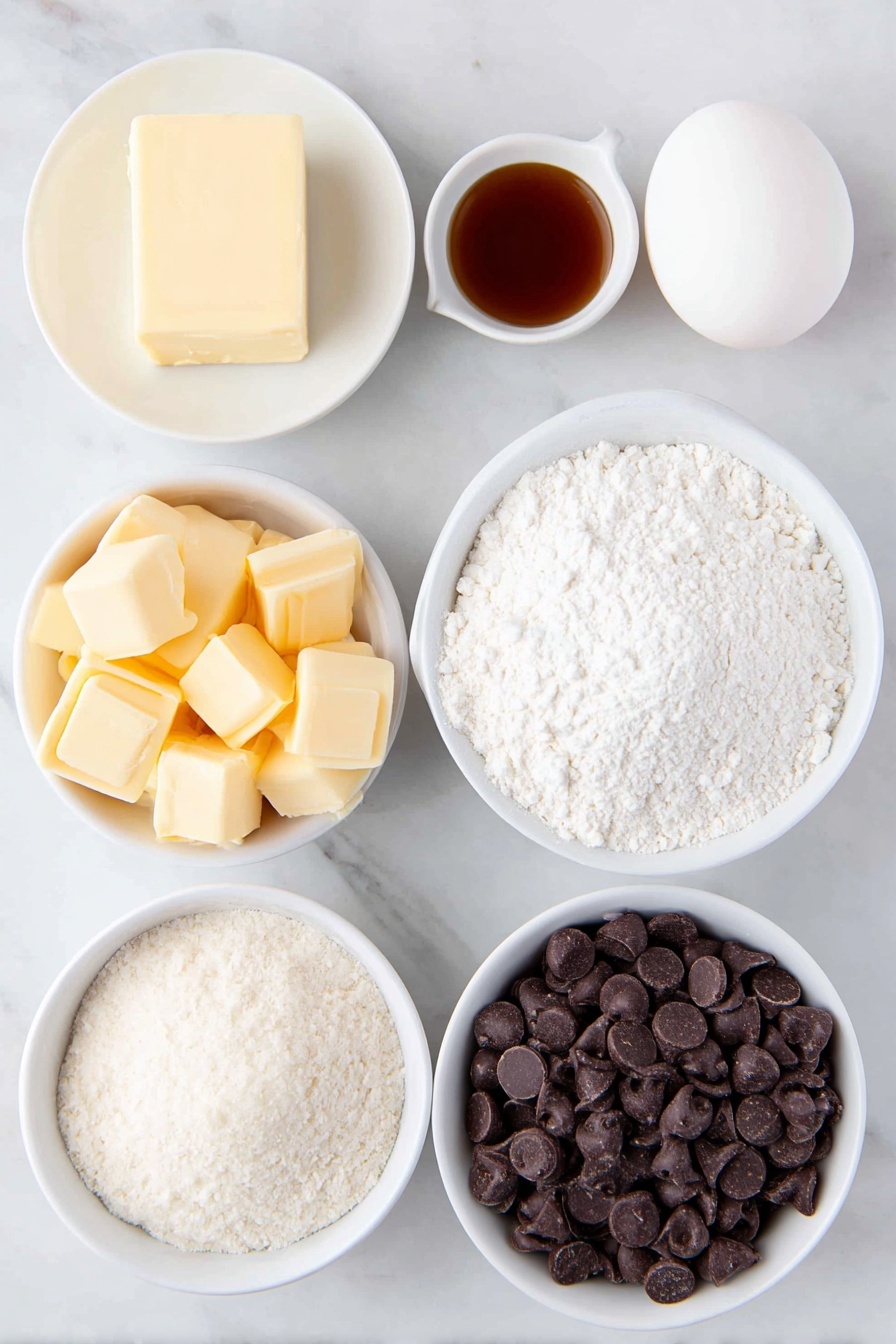
Ingredients You’ll Need
Each ingredient in this Twix Cookie Cups Recipe brings something special to the table. From buttery richness to that perfectly chewy caramel layer and silky chocolate topping, these components just work so well together. Here’s a little heads-up on the key ingredients to watch for when you shop.
- Salted butter: Using salted butter adds a subtle savory note that balances the sweetness—don’t skip this for unsalted, unless you want to add extra salt yourself.
- Granulated sugar: Provides sweetness and helps achieve that tender cookie texture.
- Vanilla extract: This little flavor booster ties the whole dough together beautifully.
- Egg white: Adds structure without weighing the cookies down, keeping them light and puffy.
- All-purpose flour: The foundation for the cookie base—make sure it’s fresh to avoid any off flavors.
- Baking powder: Just enough to give your cookies a little lift and a soft crumb.
- Caramels: Look for individually wrapped caramels for convenience and smooth melting.
- Milk: Used to melt the caramels smoothly and keep the texture just right.
- Milk chocolate chips: For the luscious chocolate topping that seals the deal.
Variations
I love how this Twix Cookie Cups Recipe invites you to get creative. Whether you want to switch up the chocolate, adjust sweetness, or make it a bit healthier, there are plenty of ways to tailor these treats to your taste buds—here’s how I’ve played with it.
- Chocolate Choice: I’ve swapped milk chocolate chips for dark or semi-sweet ones for a richer flavor, and sometimes white chocolate for a little extra sweetness—it all works beautifully.
- Caramel Upgrade: Instead of store-bought caramels, I’ve tried homemade salted caramel sauce for a gooier, more decadent filling.
- Nutty Twist: Adding finely chopped pecans or almonds into the cookie dough gives an extra crunch that my family loves.
- Gluten-Free Version: With a good gluten-free flour blend, these cookie cups come out just as tasty and are perfect if you’re baking for friends with dietary restrictions.
How to Make Twix Cookie Cups Recipe
Step 1: Cream the Butter and Sugar
Start by preheating your oven to 350°F. Then, grab your butter—make sure it’s softened so it creams smoothly with the granulated sugar. I like using a hand mixer or stand mixer because it makes the texture silky and light, which is key for tender cookie cups. It’ll look pale and fluffy once you’re done—that’s your signal to move on.
Step 2: Add Egg White and Vanilla
Next, stir in the egg white and vanilla extract. Combining these ingredients now helps keep the cookies light and ensures that lovely vanilla aroma shines through. Don’t add the whole egg—just the white—to keep the dough firm but not too dense.
Step 3: Mix in Flour and Baking Powder
Whisk your flour and baking powder together, then gradually add to your wet mixture. You want to mix until everything’s just incorporated—over-mixing can make the cookies tough. The dough should hold together nicely and be easy to roll out.
Step 4: Cut Out Your Cookie Circles
Roll the dough out to about 1/4 to 1/2 inch thick on a lightly floured surface. I usually dust my rolling pin lightly, so the dough doesn’t stick. Then, use a round cookie cutter—I like something about 2-3 inches in diameter—to cut circles. Transfer these to an ungreased baking pan. You’ll want to work quickly so the dough doesn’t soften too much.
Step 5: Bake Until Puffy and No Longer Glossy
Bake the cookies between 6 to 8 minutes. What you’re looking for is when they’re still puffy but no longer glossy on top—that subtle hint that they’re done but still soft enough to mold the caramel easily later. Take them out and transfer to a wire rack to cool completely before you add the toppings.
Step 6: Melt the Caramel Filling
While your cookie bases cool, microwave the unwrapped caramels with a tablespoon of milk. Heat in 30-second bursts, stirring in between, until you get a smooth, creamy caramel sauce. Be careful not to burn it—if it’s too thick, add a tiny splash more milk to loosen it.
Step 7: Spoon on the Caramel and Chill
Carefully spoon a few teaspoons of caramel on each cookie, gently spreading it almost to the edges. Place the pan in the fridge for 10 to 15 minutes to let the caramel set and cool completely—this helps maintain the classic layered texture of a Twix bar.
Step 8: Melt Chocolate and Top Your Cookie Cups
Just before serving, melt the milk chocolate chips in 30-second bursts in the microwave, stirring each time until smooth. Spread a thin layer atop each caramel-filled cookie. Let your cookie cups cool and the chocolate set before serving—you don’t want to rush this because that chocolate topping is the cherry on top of these treats!
Pro Tips for Making Twix Cookie Cups Recipe
- Butter Temperature Matters: Make sure your butter is softened but not greasy to get that perfect creaminess in your dough.
- Don’t Overbake the Cookies: Pull them out just as the surface loses its gloss to keep them tender and perfect for layering.
- Even Thickness: Rolling your dough evenly helps all cookie cups bake at the same rate, so none are over or underdone.
- Chill to Set Layers: Refrigerating after spreading caramel helps maintain texture; skipping this step led me to melty, less distinct layers before I learned the trick.
How to Serve Twix Cookie Cups Recipe
Garnishes
I usually keep it simple with these cookie cups because the caramel and chocolate layers steal the spotlight. But if you want to dress them up, a light sprinkle of sea salt or chopped toasted pecans adds a lovely crunch and balances the sweetness. Sometimes, I drizzle a bit of white chocolate on top for extra flair—looks fancy but is so easy!
Side Dishes
These cookie cups pair wonderfully with a cold glass of milk or a cup of coffee if you’re serving them as an afternoon treat. For a party, I like bringing them alongside fresh fruit or a dip platter for a sweet-and-savory contrast.
Creative Ways to Present
For special occasions, I’ve arranged these cookie cups on a tiered dessert stand, which makes them look extra inviting. Another idea is to serve them in cupcake liners or mini paper cups—makes grabbing them a breeze and adds a fun touch. If you want to gift them, wrap a little box with parchment and a ribbon, and your friends will feel super special.
Make Ahead and Storage
Storing Leftovers
I like to store these Twix Cookie Cups in an airtight container in the fridge—this helps keep them fresh for up to a week. Just make sure they’re completely cooled and the chocolate has set before sealing them up to avoid any melty messes.
Freezing
If you want to freeze them, I recommend layering the cookie cups between sheets of parchment paper in a freezer-safe container. They freeze wonderfully and can be kept for up to 2 months. When you’re ready to enjoy, thaw them in the fridge overnight.
Reheating
I usually eat these cookies cold for the best texture and flavor, but if you prefer them a little warm, just pop a couple in the microwave for 10 seconds—enough to soften the caramel a bit but not melt the chocolate completely. It’s a little indulgence that makes them taste freshly made again.
FAQs
-
Can I make the dough ahead of time for this Twix Cookie Cups Recipe?
Absolutely! The dough can be made up to 2 days in advance and stored tightly wrapped in the refrigerator. Just bring it to room temperature before rolling it out to make cutting the circles easier.
-
What if I don’t have individually wrapped caramels?
You can use caramel candies from the bulk section or caramel sauce as a substitute. If using caramel sauce, reduce or skip the milk to keep the filling firm and adjust for sweetness to your liking.
-
How do I avoid the caramel from running when assembling the cookie cups?
Cooling the cookies completely before adding the caramel helps, plus chilling the cookie cups after spreading the caramel ensures it sets firmly and doesn’t run when you add the chocolate topping.
-
Can I use dark chocolate instead of milk chocolate?
Yes! Dark chocolate adds a rich contrast to the sweet caramel and buttery cookie. Choose a good quality dark chocolate with around 60-70% cocoa for the best texture and flavor balance.
-
Are these cookie cups freezer-friendly?
Definitely. Just freeze them in a single layer separated by parchment paper, and thaw overnight in the fridge before serving. They hold up beautifully without losing flavor or texture.
Final Thoughts
I truly enjoy making this Twix Cookie Cups Recipe whenever I want to treat my family or impress friends with something a little special. It’s that perfect combination of crunchy, chewy, and chocolatey that feels nostalgic but homemade. Whether you’re a seasoned baker or someone looking for a joyful dessert to whip up quickly, this recipe won’t disappoint. Give it a try—you might just find yourself making these cookie cups again and again (like me!). Happy baking!
Print
Twix Cookie Cups Recipe
- Prep Time: 10 minutes
- Cook Time: 8 minutes
- Total Time: 40 minutes
- Yield: 24 cookie cups
- Category: Dessert
- Method: Baking
- Cuisine: American
Description
Twix Cookie Cups are a delightful treat combining buttery cookie bases with gooey caramel centers and a smooth milk chocolate topping. These individual-sized desserts are perfect for sharing, featuring a crisp yet tender cookie cup that holds a luscious caramel filling, all encased in a layer of melted milk chocolate. Easy to make and irresistibly delicious, these cookie cups are a fun twist on classic Twix bars.
Ingredients
Cookie Dough
- 1/2 cup (111g) salted butter
- 1/2 cup (115g) granulated sugar
- 1 tsp vanilla extract
- 1 egg white
- 1 1/2 cups (228g) all-purpose flour
- 1 tsp baking powder
Caramel Filling
- 20 caramels, unwrapped
- 1 tbsp milk
Chocolate Topping
- 2 cups (400g) milk chocolate chips
Instructions
- Preheat Oven: Preheat your oven to 350°F (175°C) to prepare for baking the cookie bases.
- Cream Butter and Sugar: In a bowl, cream together the salted butter and granulated sugar until the mixture is light and fluffy, ensuring the sugar dissolves well into the butter to create a smooth texture.
- Add Egg White and Vanilla: Mix in the egg white and vanilla extract thoroughly until all ingredients are well incorporated, forming a smooth dough base.
- Combine Dry Ingredients: Add the all-purpose flour and baking powder to the creamed mixture. Mix thoroughly until a soft, cohesive dough forms without overworking it.
- Shape Cookies: Roll out the dough on a flat surface to a thickness between 1/4 inch and 1/2 inch. Use a round cookie cutter to cut out circles and transfer them onto an ungreased baking pan, spacing them evenly.
- Bake Cookies: Bake in the preheated oven for 6 to 8 minutes, or until the cookies puff up and the surface loses its glossy sheen. This ensures a tender yet sturdy base for the caramel filling.
- Cool Cookies: Remove the cookies from the oven and transfer them to a wire rack to cool completely, so they firm up and maintain their shape for adding the filling.
- Prepare Caramel Filling: While cookies cool, microwave the unwrapped caramels with milk for 1 minute, stirring halfway through at 30 seconds. Stir until the caramel is smooth and creamy for easy spreading.
- Add Caramel to Cookies: Spoon a few teaspoons of the warm caramel onto each cooled cookie, spreading it nearly to the edges. Place the caramel-topped cookies into the refrigerator for 10 to 15 minutes to chill and set the caramel.
- Melt Chocolate Chips: Melt the milk chocolate chips in 30-second intervals in the microwave, stirring between each interval, until the chocolate is fully melted and smooth.
- Top with Chocolate: Spread a small layer of the melted chocolate over the caramel on each cookie cup. Allow the chocolate to cool and harden completely before serving.
Notes
- Ensure the cookies are completely cooled before adding caramel to prevent melting and spreading.
- For a firmer caramel, chill the cookie cups longer in the refrigerator.
- Use high-quality milk chocolate chips for the best flavor and smooth melting texture.
- Store finished cookie cups in an airtight container in the refrigerator to keep the chocolate and caramel firm.
- Allow the cookie cups to come to room temperature briefly before serving for the best texture and flavor.
Nutrition
- Serving Size: 1 cookie cup
- Calories: 190
- Sugar: 14g
- Sodium: 75mg
- Fat: 10g
- Saturated Fat: 6g
- Unsaturated Fat: 3g
- Trans Fat: 0g
- Carbohydrates: 22g
- Fiber: 1g
- Protein: 2g
- Cholesterol: 20mg


