
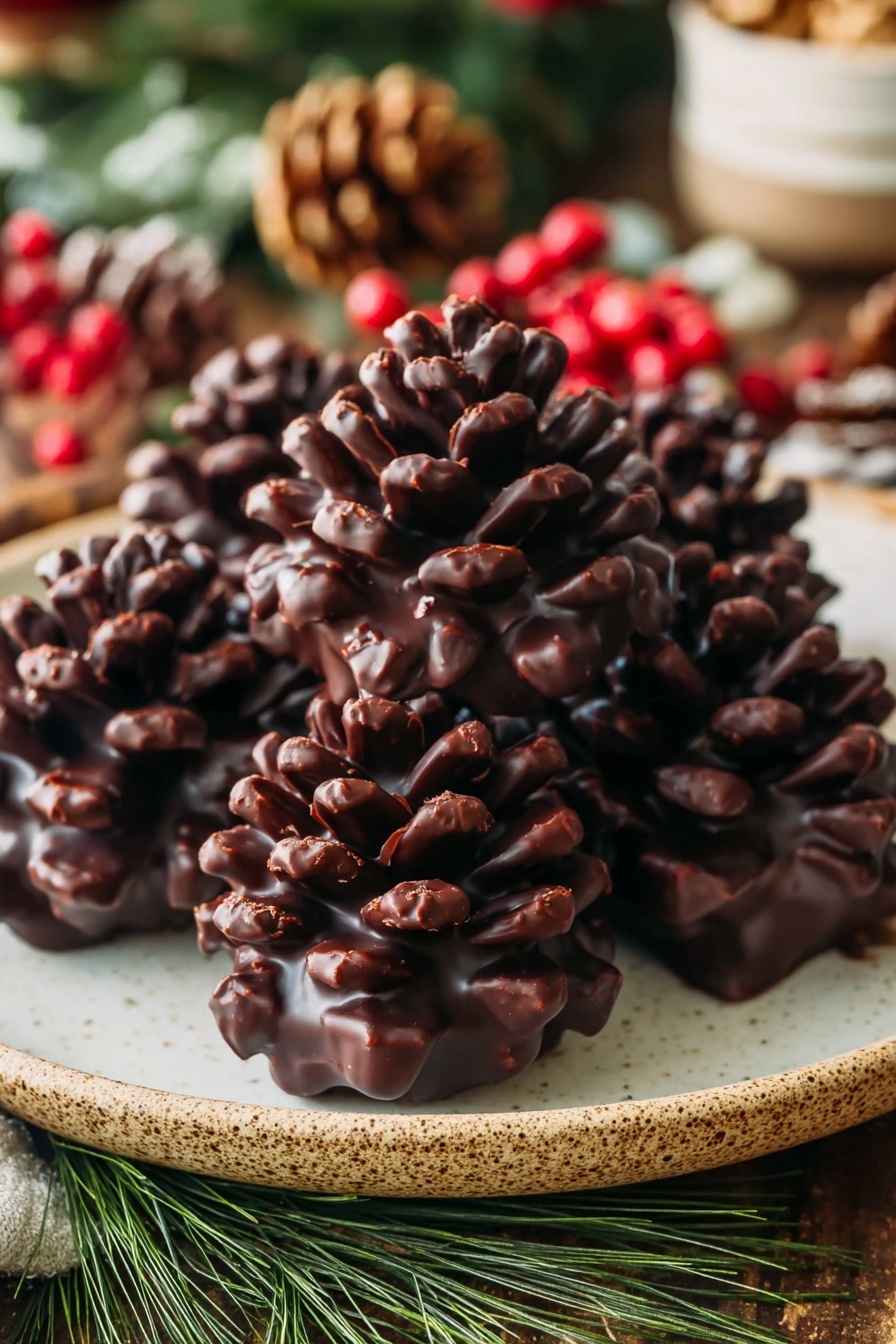
If you’re looking for a unique, show-stopping dessert that’s as fun to make as it is to eat, then I can’t wait for you to try this Viral Pine Cone Brownie Cones Recipe. I absolutely love how these little beauties come together—gooey brownie ‘cones’ decorated with almond slices to mimic pine cone scales, all dipped in glossy chocolate. They’re perfect for holiday parties, cozy evenings, or any time you want to impress with something creative but surprisingly simple.
Why You’ll Love This Recipe
- Eye-Catching and Unique: These pine cone brownies instantly WOW your guests with their charming appearance.
- Simple Ingredients: You can whip these up with a box of your favorite brownie mix and a few pantry staples.
- Delicious Flavor & Texture: A gooey, fudgy center paired with crunchy almond scales is irresistible.
- Fun to Make: I promise you’ll enjoy shaping and decorating these—it’s almost like edible craft!

Ingredients You’ll Need
These ingredients come together to create not just a dessert but a delightful experience. I like using a gluten-free or grain-free brownie mix like Simple Mills because it makes shaping the cones so much easier, but you can pick your favorite. The sliced almonds add that essential pine cone look and crunch, and the melted chocolate acts as a beautiful coating that seals everything for the perfect finish.

- Gluten-Free/Grain-Free Brownie Mix: I use Simple Mills for its great texture and flavor, but any good-quality mix works.
- Sliced Almonds: These mimic pine cone scales perfectly; if you don’t have almonds, cereal flakes work well, too.
- Chocolate Chips: Semi-sweet or dark chocolate gives the best flavor and smooth coating.
- Coconut Oil: Helps melt the chocolate perfectly and keeps it shiny and smooth.
- Powdered Sugar or Powdered Monk Fruit: For that frosted, snowy pine cone look at the end.
Variations
I love that the Viral Pine Cone Brownie Cones Recipe is super flexible—you can tweak it to fit your tastes or dietary needs. I often swap out the almonds for cereal flakes when I’m in a pinch or want a different texture. You can even stir in some chocolate chips into the brownie batter or drizzle extra chocolate on top for that indulgent touch. Feel free to get creative!
- Nut-Free Version: I swap sliced almonds for crunchy cereal flakes, and honestly, no one notices the difference but the nut-sensitive friends are happy.
- Extra Chewy Brownies: If you want a really fudgy center, try adding a bit of cream cheese frosting to the brownie mix—it helps keep things moist and easier to shape.
- Flavor Add-Ins: A pinch of cinnamon or a splash of vanilla in the brownie batter gives it a cozy twist I enjoy during fall.
- Chocolate Variants: Use white chocolate chips instead of dark chocolate for a sweeter look that really “pops” against the pine cone scales.
How to Make Viral Pine Cone Brownie Cones Recipe
Step 1: Bake the Brownies Just Right
Follow the directions on your brownie mix, but here’s a trick I discovered to make shaping easier: don’t overbake. The brownies should still be a little gooey in the middle so they hold together nicely without crumbling. When they come out, let them cool for about 10 minutes—the warmth helps with molding but don’t wait too long or they’ll harden and get tricky to shape.
Step 2: Shape Your Pine Cone Brownie Cones
Using your hands (clean and slightly greased if needed), form the brownie mix into 12 small cone shapes, similar to cake pops. Don’t worry if they’re a little imperfect—that just shows they’re homemade! Work gently because the brownie cones will be delicate. The gooey texture makes shaping fun but be patient.
Step 3: Decorate with Almond Scales
Carefully press sliced almonds one by one all around your brownie cones. This part can feel a bit delicate, so take your time layering the almonds to mimic pine cone scales. You’ll notice how the almonds add great crunch and that signature look. If you’re using cereal flakes instead, gently tuck them in evenly for the same effect.
Step 4: Freeze to Set
Place your decorated cones on a parchment-lined baking sheet and pop them into the freezer for 30 minutes. This step firms everything up so when you dip them in chocolate, the cones won’t fall apart and the chocolate will coat beautifully.
Step 5: Melt & Coat with Chocolate
Microwave the chocolate chips with the coconut oil in 30-second bursts, stirring between each, until smooth. If it’s too thick to coat your cones easily, add a little more coconut oil to thin it out. Dip each pine cone brownie into the melted chocolate and set it back on the parchment paper. The chocolate hardens into a shiny shell that holds the whole thing together.
Step 6: Finish with a Dusting of Powdered Sugar
Sprinkle powdered sugar or powdered monk fruit over the cones for that magical frosted look like they’ve been kissed by winter. This final touch is totally optional but I think it makes these little desserts even more festive and appealing.
Pro Tips for Making Viral Pine Cone Brownie Cones Recipe
- Don’t Overbake: I used to get dry cones until I made sure to pull brownies out while still gooey inside—that makes all the difference for shaping and taste.
- Chill Before Dipping: Freezing the cones really helps them hold their shape and avoids crumbly messes when coating with chocolate.
- Thin Chocolate with Coconut Oil: If the melted chocolate is too thick, adding a bit more coconut oil smooths it out, making coating easier and prettier.
- Use Parchment Paper: Always set your cones on parchment to prevent sticking and to ease cleanup—it saved me multiple times!
How to Serve Viral Pine Cone Brownie Cones Recipe
Garnishes
I love dusting these with powdered sugar because it mimics a light snowfall, perfect for seasonal treats. Sometimes, I add a tiny sprinkle of edible gold dust for an elegant holiday party vibe. Fresh mint leaves on the side add a lovely contrast and a pop of color if you want to dress things up.
Side Dishes
Since these pine cone brownies are pretty rich, I like pairing them with a simple side like fresh berries or a scoop of vanilla ice cream. A hot cup of coffee or cinnamon-spiced tea is a match made in heaven that balances the chocolatey decadence.
Creative Ways to Present
I once arranged these Viral Pine Cone Brownie Cones Recipe on a wooden slab surrounded by pine needles and festive ornaments for a winter party centerpiece—it was a huge hit and looked like a little forest of treats! You could also present them in a rustic basket lined with a linen napkin for casual family gatherings or on a tiered cake stand for elegant get-togethers.
Make Ahead and Storage
Storing Leftovers
I store any leftover pine cone brownies in an airtight container at room temperature for up to two days. Just make sure the chocolate coating has set fully before sealing them up so they don’t stick together. If your kitchen is warm, popping them in the fridge helps keep them firm longer.
Freezing
I’ve frozen these pine cone brownies successfully by placing them in a single layer on parchment paper inside a freezer-safe container. When you’re ready for a treat, thaw them in the fridge for a few hours to keep their shape and texture perfect. Freezing helps when you want to prep in advance for holiday hosting.
Reheating
No real reheating needed here—these are best enjoyed at room temperature when the chocolate is firm but the brownie inside stays soft and fudgy. If you want to soften them slightly, a 10-second zap in the microwave does the trick, but watch carefully so they don’t melt and lose their shape.
FAQs
-
Can I use any brownie mix for the Viral Pine Cone Brownie Cones Recipe?
You can, but results may vary. I recommend using a gluten-free or grain-free mix like Simple Mills because it holds together well for shaping. If your mix is crumbly, try adding a bit of frosting to bind the mixture before shaping.
-
Why do I need to freeze the brownie cones before dipping in chocolate?
Freezing helps the cones firm up, so they don’t fall apart or crumble when coated with melted chocolate. It also allows the chocolate to set faster and form a nice, even coating.
-
Can I substitute almond slices with something else?
Yes! If you have nut allergies or prefer different textures, cereal flakes make a great substitute. Just gently press them onto the cones for the pine cone scale effect.
-
How do I get the chocolate coating to be shiny and smooth?
Melting your chocolate chips with coconut oil helps create a smooth, glossy finish. Be sure to stir frequently, and if the chocolate is too thick, add a little more coconut oil in small increments.
Final Thoughts
I used to struggle to find a fun but simple dessert that could wow my family and friends until I stumbled on this Viral Pine Cone Brownie Cones Recipe. It’s such a joy to make together, and every time I serve these, the compliments roll in. You’ll enjoy watching the process as much as the finished product—with the gooey brownie, crunchy almond ‘scales,’ and silky chocolate coating, it’s a treat everyone raves about. Trust me, once you try these, they’ll become a favorite go-to dessert you’ll want to make again and again. So grab that brownie mix and let’s get baking!
Print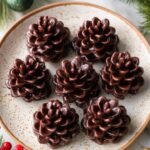
Viral Pine Cone Brownie Cones Recipe
- Prep Time: 1 hour 15 minutes
- Cook Time: 20 minutes
- Total Time: 3 hours
- Yield: 12 pine cone brownies
- Category: Dessert
- Method: Baking
- Cuisine: American
- Diet: Gluten Free
Description
Delight your guests with these Viral Pine Cone Brownies, a creative and festive dessert featuring gooey grain-free brownies shaped like pine cones, adorned with almond slices for a realistic ‘scale’ effect, and coated in rich melted chocolate for a glossy finish. Perfect for holiday celebrations or any special occasion, these brownies combine grain-free goodness with a fun, eye-catching presentation.
Ingredients
Brownie Mix
- 1 box GF/Grain-free brownie mix (e.g., Simple Mills) plus required ingredients per mix instructions
Additional Ingredients
- 1 cup sliced almonds (or cereal flakes as a substitute)
- 9 oz chocolate chips
- 1 tsp coconut oil
- Powdered sugar or powdered monk fruit (for dusting)
Instructions
- Prepare Brownie Batter: Follow the instructions on your grain-free brownie mix box carefully to prepare the batter, ensuring you measure and mix all ingredients as directed.
- Bake Brownies: Bake the brownie mix, watching closely to prevent overbaking. Aim for a somewhat gooey center so the brownies will be easy to shape later. Typically, bake for about 20 minutes or as directed, then remove from oven.
- Cool Brownies: Let the brownies cool on a wire rack for about 10 minutes. Do not allow them to cool completely or harden, as they need to be pliable for shaping.
- Shape Pine Cones: Using your hands, form the slightly warm brownies into roughly 12 cone shapes, similar to shaping cake pops. Be gentle to avoid breaking the soft brownies.
- Add Almond Scales: Carefully press sliced almonds (or cereal flakes) into and around each brownie cone to mimic pine cone scales. Handle the cones delicately to prevent crumbling.
- Freeze Pine Cones: Place the shaped cones on a parchment paper-lined sheet pan and freeze for 30 minutes to firm up before coating.
- Melt Chocolate Coating: Combine the chocolate chips and coconut oil in a microwave-safe bowl. Heat in 30-second intervals, stirring between each until smooth and fully melted. Alternatively, melt over a double boiler.
- Coat Pine Cones: Remove pine cones from freezer and carefully dip or spoon melted chocolate over each one to coat thoroughly. Return them to the parchment-lined sheet pan for setting.
- Finish and Serve: Once chocolate has set but still slightly tacky, lightly dust the pine cones with powdered sugar or powdered monk fruit for a frosted, snowy effect. Serve and enjoy your festive treats!
Notes
- Every brownie mix behaves differently; this recipe works best with the recommended Simple Mills mix, but results may vary with other brands.
- If the melted chocolate is too thick, add additional coconut oil a little at a time to thin it for easier coating.
- Using semi-sweet or dark chocolate chips is preferable for better flavor and texture compared to milk chocolate.
- If the brownie mixture feels crumbly and won’t hold shape, try mixing in a bit of chocolate or cream cheese frosting to help bind it together.
Nutrition
- Serving Size: 1 pine cone brownie
- Calories: 220 kcal
- Sugar: 15 g
- Sodium: 90 mg
- Fat: 13 g
- Saturated Fat: 7 g
- Unsaturated Fat: 5 g
- Trans Fat: 0 g
- Carbohydrates: 22 g
- Fiber: 3 g
- Protein: 3 g
- Cholesterol: 0 mg


